
Using the Developer Console
With the Developer Console, you can manage your teams and their members, register new capsules, administer your capsules and collaborators, and view analytics for published capsules. This guide walks through how to use the Console to manage your teams and capsules.
Open the Console
Click the Developer Console link in the Bixby Developer Center's sidebar to open the Console in a new tab or window. If you belong to at least one team, the Console's front page opens with your team (or first team) selected and a list of the team's capsule(s) for which you have read access.
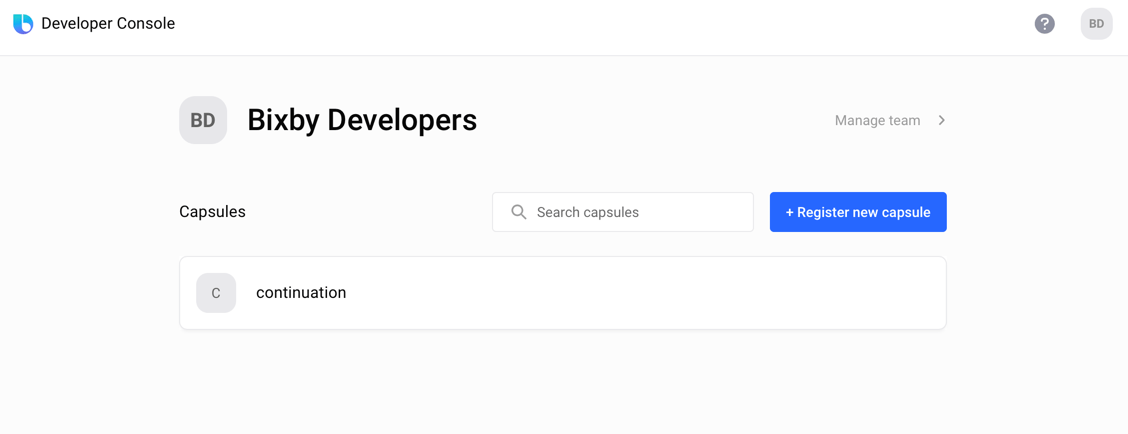
From the front page, you can do the following:
- Click on your account icon in the upper right corner of the Console to open a management menu:
- Manage your account
- Manage the current team
- Switch Teams, if you belong to more than one, by clicking your current team name in the menu
- Create a new Team by clicking your current team name in the menu and selecting Create new team
- Register a new Capsule
- Manage an existing Capsule, including:
If you do not belong to a team yet, you must create one to continue.
You can always return to the Console's front page by clicking Developer Console or the Bixby logo in the upper left corner of the Console window.
Create a Team
If you're not a member of a team yet (and you aren't following an invitation email to join an existing one), you will be prompted to register one. If you already belong to at least one team, you can create a new team by clicking on your account icon in the upper right corner of the Developer Console, clicking on the current team name to switch teams, and selecting Create new team.
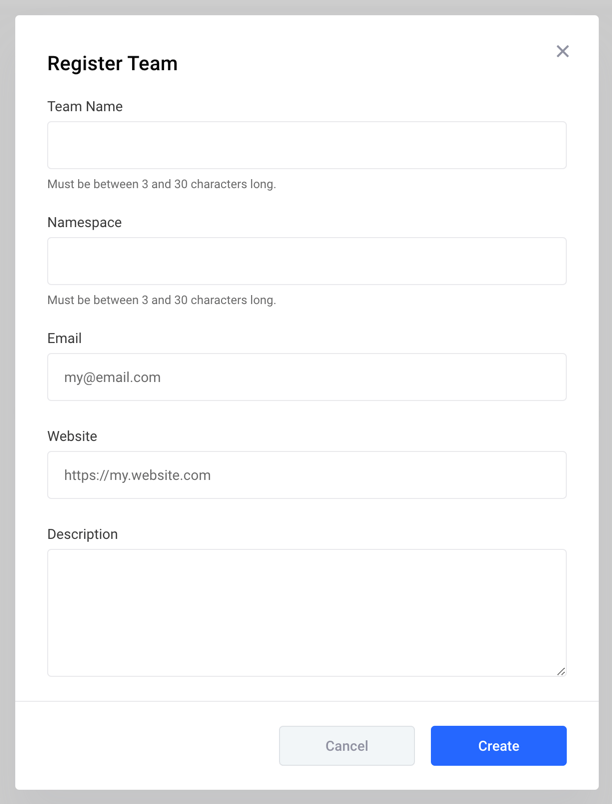
You're currently limited to creating three teams. If you need more than three teams, please contact Bixby support.
To register a team, provide the following information:
- A Team Name. This should be a human-readable name, such as the name of your organization or company division, like "Bixby Developers".
- A namespace. Capsules in Bixby are uniquely identified by an ID composed of an organizational namespace and the capsule name separated by a dot (
.) character. If you specify a namespace ofrutabaga, then a capsule namedshirtwill have a capsule ID ofrutabaga.shirt. This ID will be used in yourcapsule.bxbfile. - In addition, you can specify an email address, a website, and a description for your team.
A unique namespace is required to submit capsules to the Bixby Marketplace. Namespaces can only include lowercase letters, numbers, and underscore characters. Additionally, the namespace must comply with our Terms and Conditions, including section 2.4(h), which prohibits choosing a name for any Licensee Services that is substantially similar to the name of a Samsung or third-party application in a way that creates consumer confusion, or "squatting" on application names to prevent legitimate Samsung or third-party use of the name.
If you aren't a team admin, you might be invited through email to join an existing team. In this case, you won't need to register the team through the Developer Console.
If you are just starting and you want to execute and debug your capsule using the Simulator or with stories, you can use the playground namespace. Another special namespace is example, which is used for sample capsules. However, you cannot submit capsules that use these special namespaces. Once you have tested your capsule using these special namespaces, and you are ready to submit your capsule, you should follow the normal process here to create a team, register a capsule, and update your capsule ID in your capsule.bxb file.
Your team's ability to execute capsules in Bixby Developer Studio, view submissions and submission details, or submit capsules depends on whether you have the correct permissions. Therefore, ensure that you register a namespace, register your capsules under that namespace, and add appropriate team members as collaborators for those capsules.
Keep in mind that once a namespace has been created, it cannot be changed for that team! You can update other team information, but namespaces are permanent.
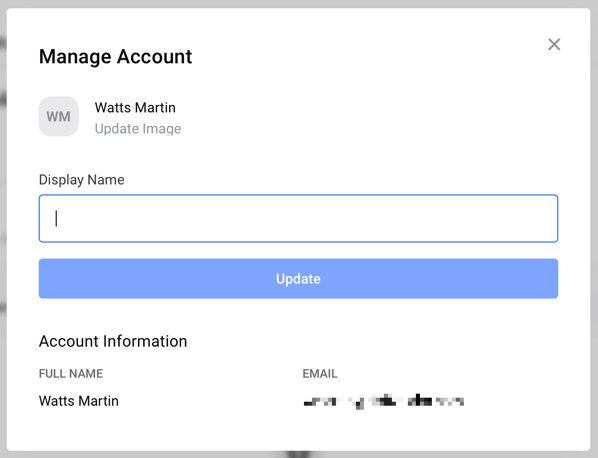
Manage Your Account
Regardless of your permissions, you can edit your profile to add a display name and profile picture. This allows fellow team members to better identify you.
- Select Manage Account from the menu in the upper-right corner of the screen.
- Edit your display name and profile image.
- Click Update.
To edit Samsung Account information, visit the Samsung Account page.
Manage Team
To edit team information and add or remove team members, click Manage team > on the Console's front page. Or click on your account icon in the upper-right corner of the Developer Console and select Manage Team in the menu.
Invite Members
If you are an admin of an existing team, you can invite others, as members or admins, using their email addresses. From the Manage Team page, click + Invite Members.

- Click + Invite Members on the Manage Teams page.
- Type one or more email addresses of members to invite. If you're inviting more than one person, type the addresses on separate lines, or separate them with commas.
- Choose Member or Admin as the role for the invited members. If you need to invite members of both role types, invite the members and the admins separately.
- Click Submit.
Manage Members
The Manage Team page will list both members and pending invitations.
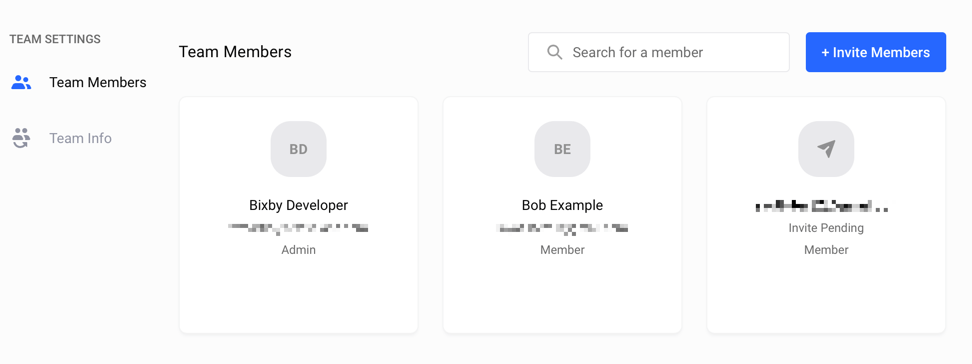
You can make any team member an admin by hovering the mouse pointer over their info card and clicking the Make Admin button that appears.
Invitations that have not been accepted will show as "Invite Pending." You can cancel an invitation by hovering the mouse pointer over the invitee's info card and clicking the Cancel Invite button that appears.
Edit Team Info
If you are a team admin, you can update team information, such as the team name, website, or team logo.
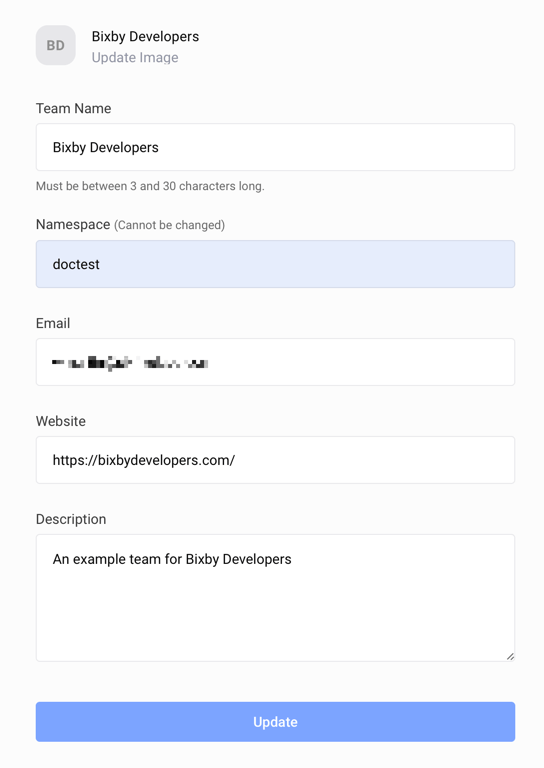
- Click the Team Info tab in the sidebar on the Manage Teams page.
- Edit the information you wish to change. (Note that you cannot change the team's namespace.)
- Click Update.
Manage Capsules
Your team's front page is where you register new capsules, manage collaborators who work on your capsule, and manage the release cycle of existing capsules.
For more information about releasing capsules to end-users, see Working with the Marketplace Developers' Guide.
Register a Capsule
As a team admin, you can register a capsule, which allows any collaborator to submit it.
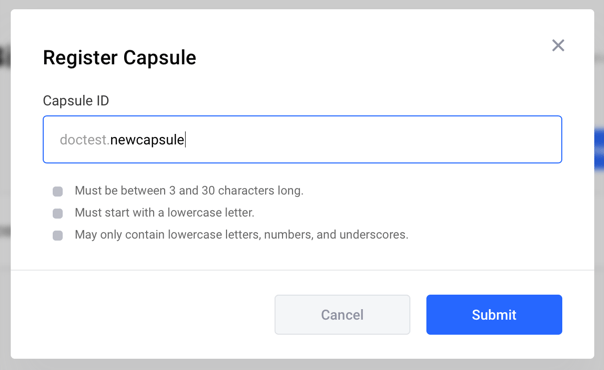
- Click + Register new Capsule on the Console's front page.
- Type the capsule ID in the box that pops up.
- Click Submit.
You can only use letters, numbers, and underscores for a capsule ID. The capsule name must start with a lowercase letter and be at least three letters long.
You must use the fully-qualified name of the capsule within your capsule.bxb file. This consists of your team organization name, a dot, and the capsule's name, such as doctest.newcapsule.
Manage Collaborators
Once you've added team members and capsules, you can manage collaborators on each capsule. Being a collaborator allows a member to edit capsule code, submit capsules, and view capsule submissions.

- Click the capsule for which you wish to manage collaborators on the front page.
- Click the Settings tab for that capsule in the top menu bar. A list of all your team members will appear. Team members who are collaborators on the current capsule will be badged with MEMBER or ADMIN. (Note that "ADMIN" here refers to being an admin for this capsule, not the team as a whole. See Permissions.)
- Hover the mouse pointer over the member whose status you wish to change.
- Click Add Member, Remove Member, Make Admin, or Demote Admin as appropriate.
In addition to adding collaborators, you can also remove them from a capsule.
Manage Configuration Properties
The Settings tab for each capsule also lets you set property keys and values stored on Bixby's servers rather than in your capsule code. This makes it easier to change configuration values dynamically and keep secret values like API keys and passwords secure. Read about setting Configuration & Secrets values in the Capsule Configuration reference guide.
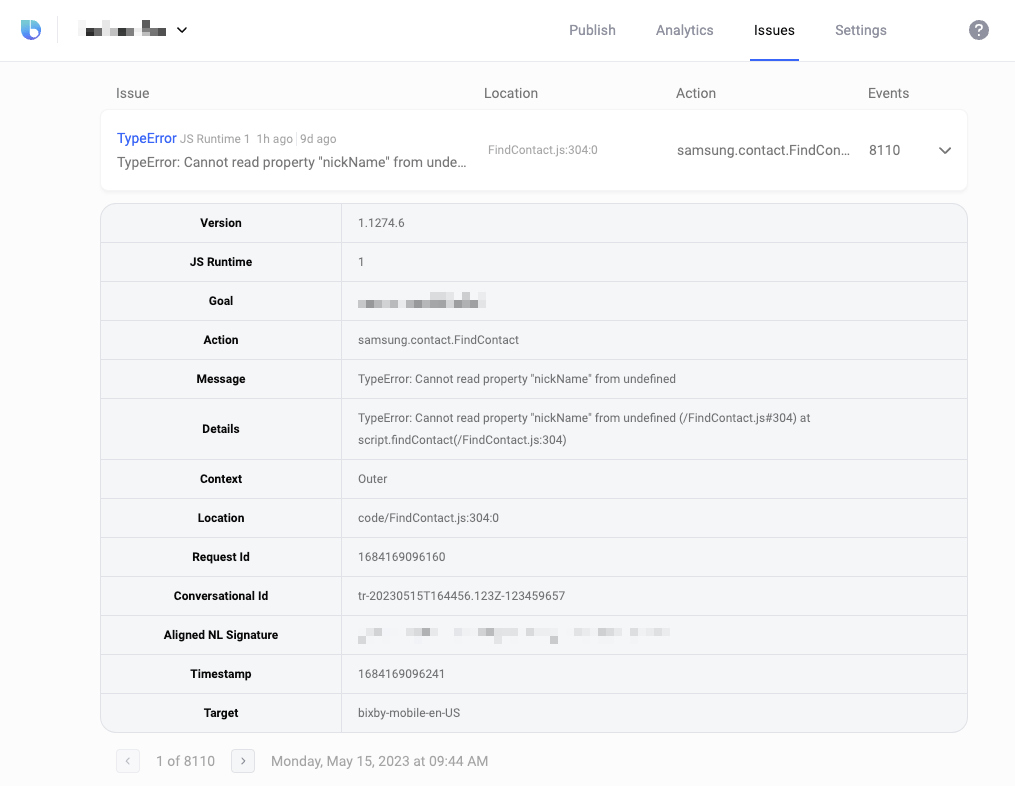
Review Runtime Issues
When capsules encounter JavaScript issues in runtime, the issues will be logged, and can be viewed on the Issues tab for the capsule. In addition, team admins will get "Capsule Issue Summary" email notifications listing any such issues and a link to the Issues tab in the Developer Console.
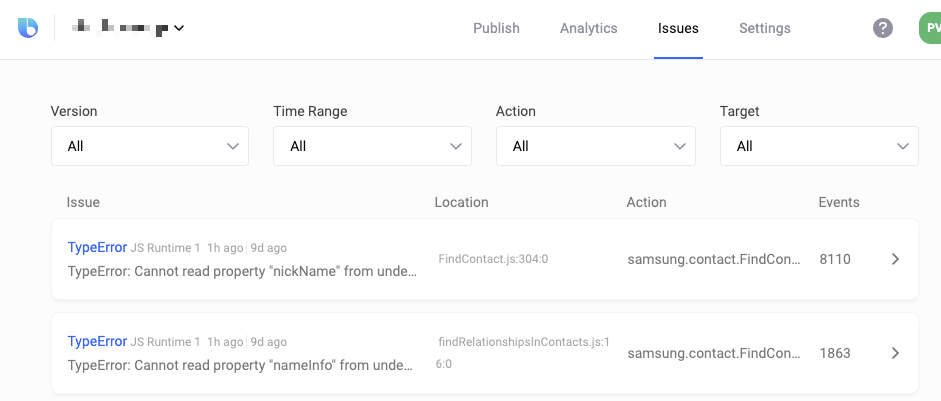
Issues are listed by file, with the file path, line, and column number of the error. They can be filtered by recency, the type of issue (such as TypeError), the action that generated the error, the capsule version, and target. If there are error reports available, click on any row in the list of reports to view the report in full detail, including the times when the issue first occurred and most recently occurred.
Permissions
The following table is a summary of the permissions you have, depending on whether you are a team member, capsule collaborator, or team admin.
| Ability | Collaborator | Capsule Admin | Team Member | Team Admin |
|---|---|---|---|---|
| View capsules and related submissions | Yes | Yes | Yes | Yes |
| Add/remove capsule members | No | Yes | No | Yes |
| Add/remove team members | - | - | No | Yes |
| Make capsule submissions | Yes | Yes | No | No |
| Register capsules | - | - | No | Yes |
| Edit team information | - | - | No | Yes |
| Edit Configuration & Secrets | No | Yes | No | No† |
| Execute a capsule | Yes | Yes | No | Yes |
| Nominate capsule for release | No | Yes | No | Yes |
† Even for Team Admins, this permission requires you to assign yourself the additional Capsule Admin permission.
You must first be added to a team as a member or admin before you can become a capsule collaborator or capsule admin. Permissions are not mutually exclusive. This means, for example, you could be both a team member and a capsule collaborator.
If your team has any issues while working on a capsule, you can check the Troubleshooting Common Issues with Permissions and Submissions guide.
Capsule Analytics
To help you better understand how users interact with your capsule, the Developer Console provides charts showing capsule usage. You can filter these charts to see data specific to targets and time ranges.
Capsule analytics do not provide personally identifiable information about users.
To access capsule analytics, do the following:
- Open the Developer Console.
- Select the team your capsule belongs to, if it is not already selected.
- Click on the capsule in the list of capsules.
- Click on the Analytics tab.
Capsule analytics include these three charts:
- Unique Active Users: This chart includes the number of unique users who have used the capsule within a specified amount of time. You can use the two drop-down menus to determine what information to show. The first determines the time increments shown, ranging from Daily to Monthly. The second determines how many days to look back upon, ranging from 7 days to 90 days.
- Total Utterances: This chart includes the number of utterances that your capsule received. It includes the same menus as Unique Active Users.
- Top Goals: This chart shows the top 10 training goals that users have reached for this capsule within the last 30 days.
To get information on specific capsule metrics, you can filter both of the charts by choosing specific regions (locales) and devices.