
Initializing Your Capsule
Before you can work on your capsule, you need to prepare your capsule.bxb file, as well as organize the capsule files appropriately.
In order to create a capsule for the Bixby Marketplace, you need to be registered with a team and have your capsule registered under that team. For more information, read the Using the Developer Console guide.
You can, however, start developing and playing with your capsule while using the playground namespace. However, if you intend to submit your capsule to the Marketplace, you must manage your capsules appropriately, as described in the previously linked developers' guide.
Create the capsule.bxb File
When you create a new capsule from scratch, one of the files that is automatically created is the capsule.bxb file in your capsule's root directory, which handles the metadata required by Bixby to ensure the capsule contents are rendered correctly.
This is what it looks like:
capsule {
  // your ID will match your org and capsule name that you choose
  id (playground.tester)
  version (0.1.0)
  format (3)
  targets {
    target (bixby-mobile-en-US)
  }
}
In the above example, the id is set to playground.tester, but your id should match the org namespace and capsule name that you chose, something like id(my-org.myCapsule).
This section discusses the different settings you need in your capsule.bxb file in order to start working on your capsule.
You can always update your capsule.bxb file if you decide to change the designs and plans for your capsule.
There are additional requirements for your capsule.bxb file in order for you to make a submission to the Marketplace. This includes changing the id in your capsule.bxb file to match your org and capsule name registered in the Developer Console.
Set Device and Locale Targets
You must indicate the device types and languages your capsule supports within your capsule's capsule.bxb file. Use targets to specify each pair of device type and locale, such as bixby-mobile-en-US. This is important when you want your capsule to support multiple device types in multiple regions of the world.
Here's a sample capsule.bxb for reference:
capsule {
  id (example.test)
  // ensure that the version is unique with each submission
  version(4.0.0)
  format(3)
  targets {
    target (bixby-mobile-en-US) //supports US-English mobile devices
  }
  capsule-imports {
    import (viv.measurement) {
      as (measurement)
        // indicate version for imported capsule
      version (2.1.3)
    }
  }
}Each target must have at least a device and two-letter language code.
You can find the list of supported targets on the target reference page.
For more information on implementing translated versions of your capsule and organizing your localized text, see How to Localize Your Capsule.
Video Tutorial: Develop a Bixby Capsule for the Phone, Watch, TV and Appliances
The following video shows how to create a capsule on several devices.
Import Library Capsules
We've provided several capsules that contain commonly used models. For example, viv.time has Date and Time concepts, with several actions to process those concepts. Instead of trying to model your own, you can import the viv.time capsule.
If you try to use one of these models without importing it, you won't be able to run your capsule.
For more information, you can read the Library Capsules Developers' Guide and the individual library capsule references.
If you are declaring library permissions in an autocomplete component, you need to declare them both in the capsule.bxb file and in the permissions block in auto-complete.
Grant Capsule Permissions
Your capsule needs to be granted special permissions for certain situations. For a full list of what permissions you can request from users and additional information on implementation, see the permissions key and its child keys in the reference guide, as well as the Permissions sample capsule. If necessary, you can restrict the permissions needed using the restrictions key. This is similar to the visibility-constraints you can specify in store sections and hints. Library capsules and capsules that import these libraries must declare additional keys so that users can grant permissions. See Grant Permissions for Exported Capsules.
Depending on which permissions you request, you might have to do additional configuring in order to have access to the requested information. You can request from the user to provide your capsule this access with the permissions key in your capsule.bxb, like in this example from the Permissions sample capsule:
capsule {
  id (example.permissions)
  version (0.1.0)
  format (3)
  targets {
    target (bixby-mobile-en-US)
    target (bixby-watch-en-US)
  }
  runtime-version (9) {
    js-runtime-version (2)
  }
  default-action (GetLocationAndProfile)
  store-sections {
    section (TravelAndTransportation)
  }
  capsule-imports {
    import (viv.geo) {
      as (geo)
      version (10.9.6)
    }
    import (viv.self) {
      as (self)
      version (4.0.25)
    }
  }
  permissions { // This capsule uses device-location-access to get the user's location // and self:profile to get the users name
    device-location-access
    library-permission (self:profile)
  }
  store-countries {
    all
  }
  device-models {
    all
  }
}Here is what the permissions prompt might look like for the Space Resorts example on mobile:
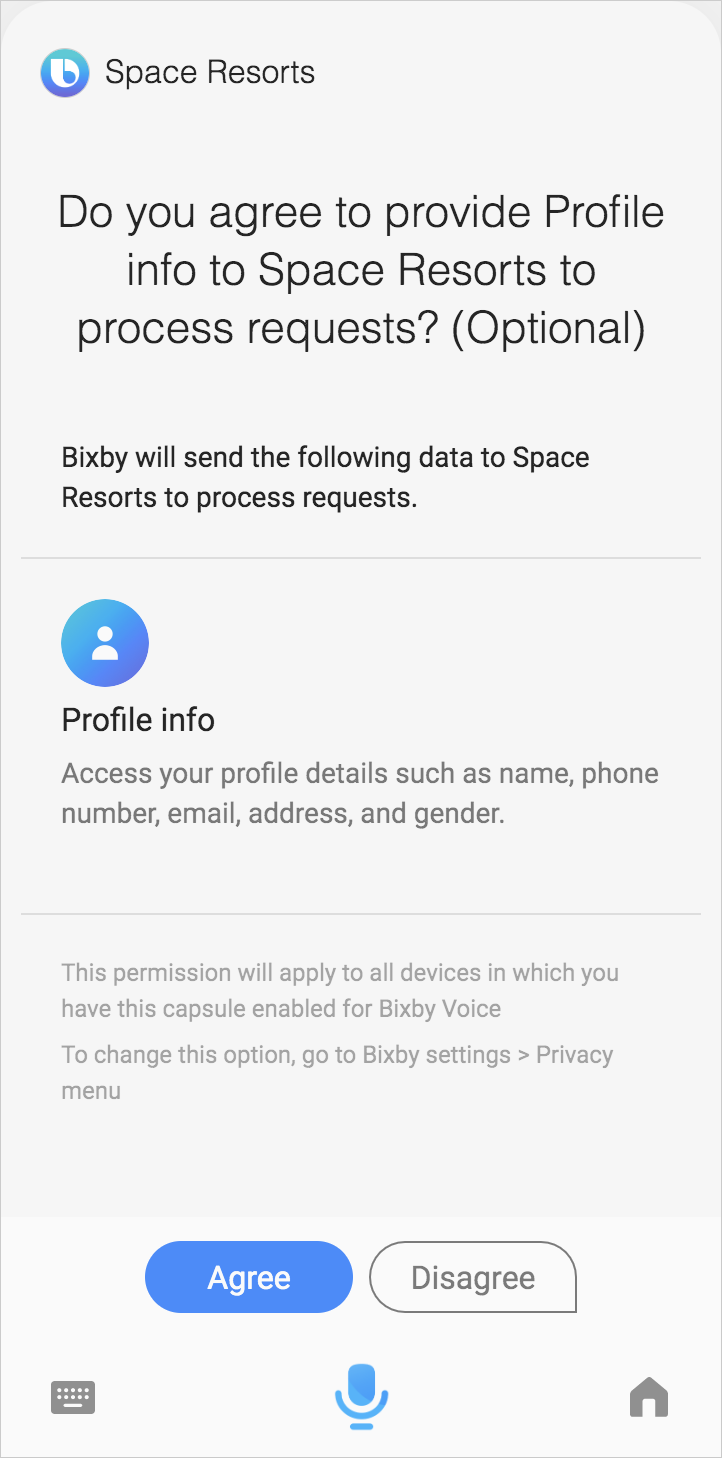
If a user is adding the capsule for the first time, the prompt will look similar to the one below:
Additionally, you need to provide a localized justification for why you are requesting any permissions in your capsule-info.bxb file using the requested-permissions key. This information is visible to the user, so you should add a reasonable business explanation of why you are requesting this permission in this justification:
capsule-info {
  display-name (Permissions Example)
  developer-name (Example Developer)
  description ("Example capsule to show how to use the Bixby permissions model")
  dispatch-name (Permissions Example)
  icon-asset (images/icons/permissions-icon.png)
  requested-permissions {
    permission (device-location-access) {
      justification ("This capsule needs your permission to get your device location")
    }
    permission (self:profile){
      justification ("This capsule needs permission to get your name")
    }
  }
  search-keywords {
    keyword (sample capsule)
    keyword (permissions)
  }

}
The following sections contain additional information about permissions:
Where Users See Permissions Information
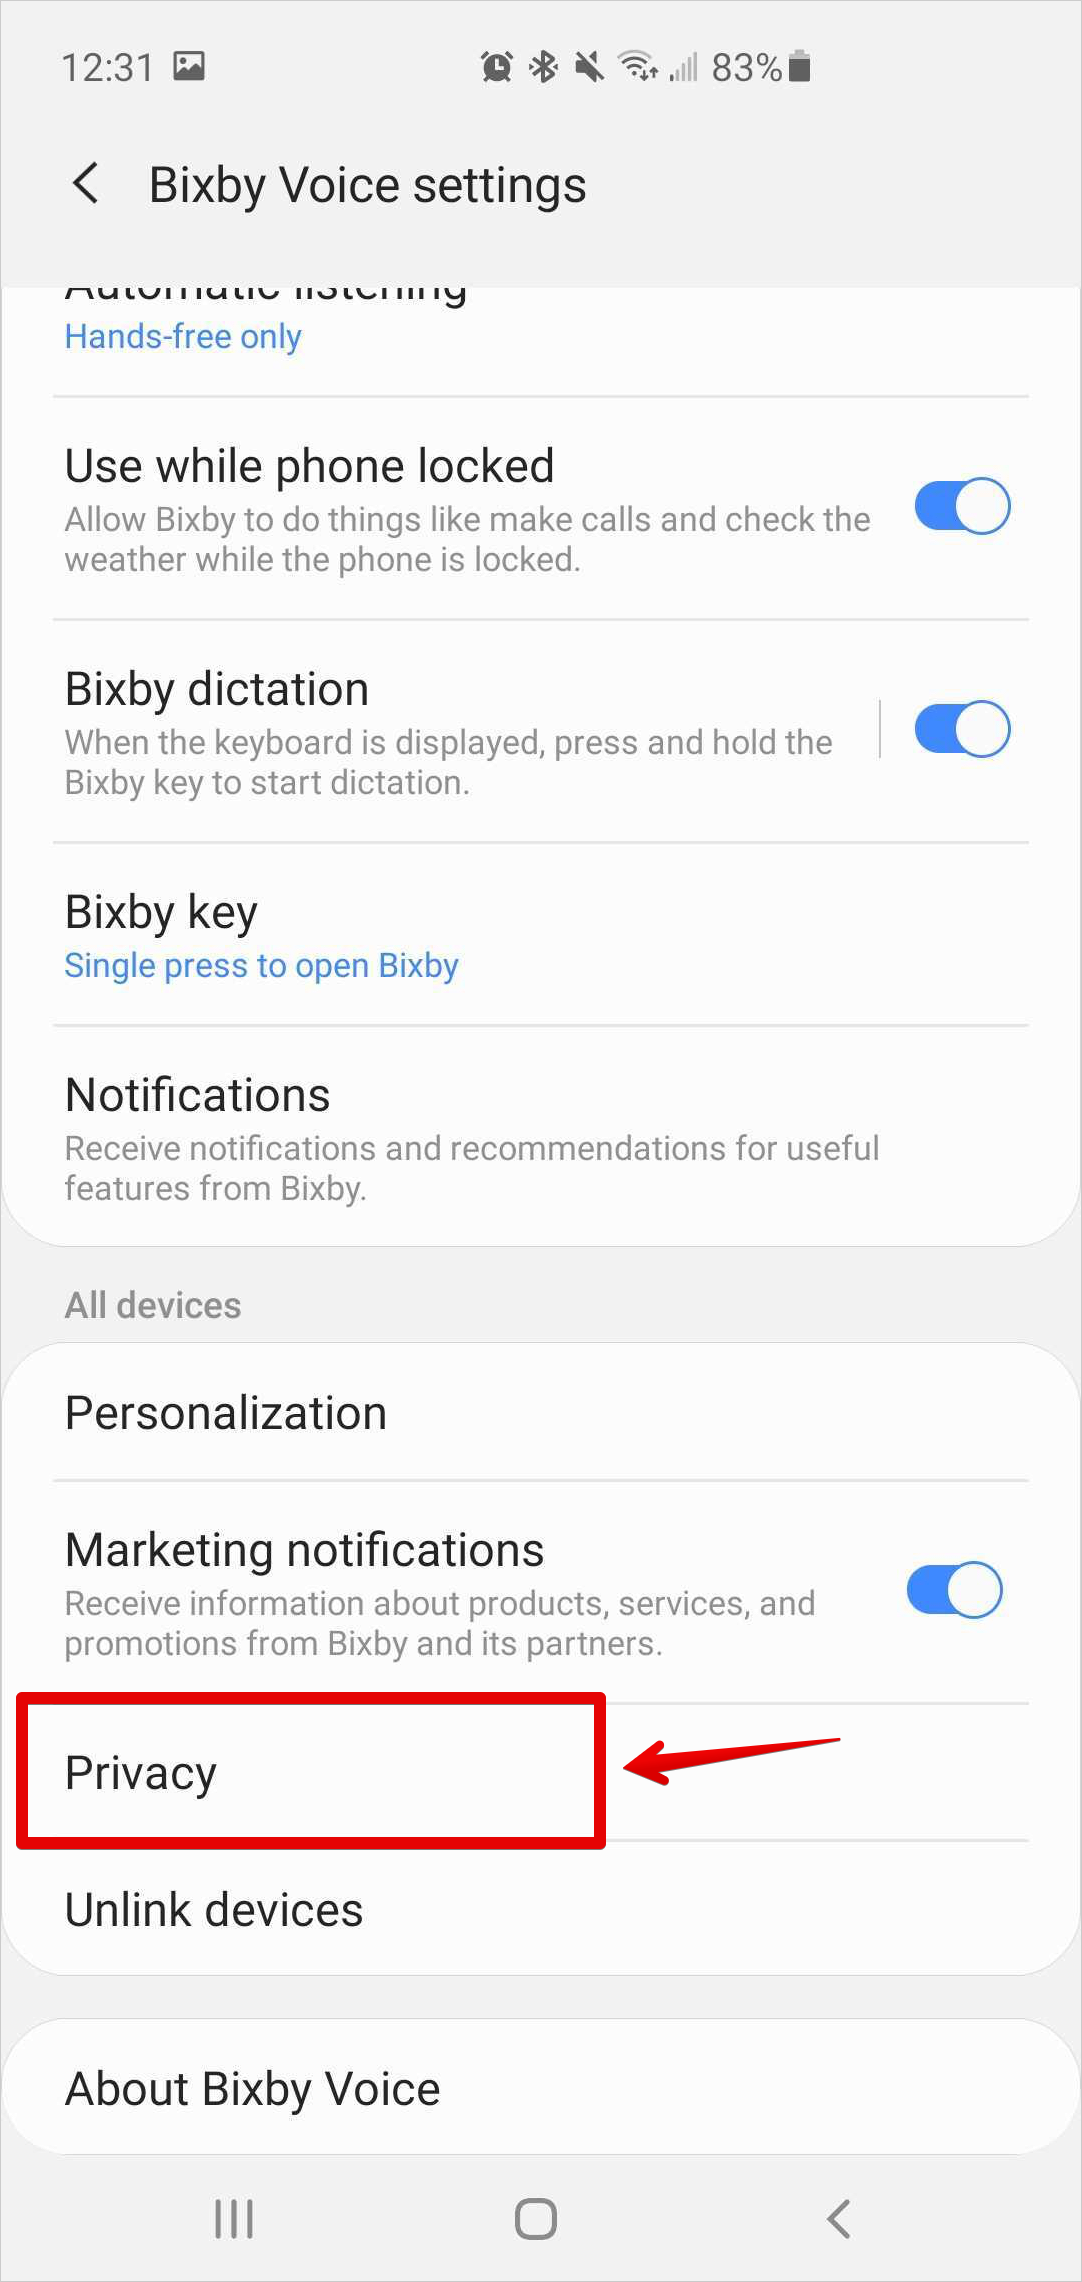
Users can find which permissions they granted in several locations:
- Under the Manage > Privacy section on the capsule's home page within Bixby.
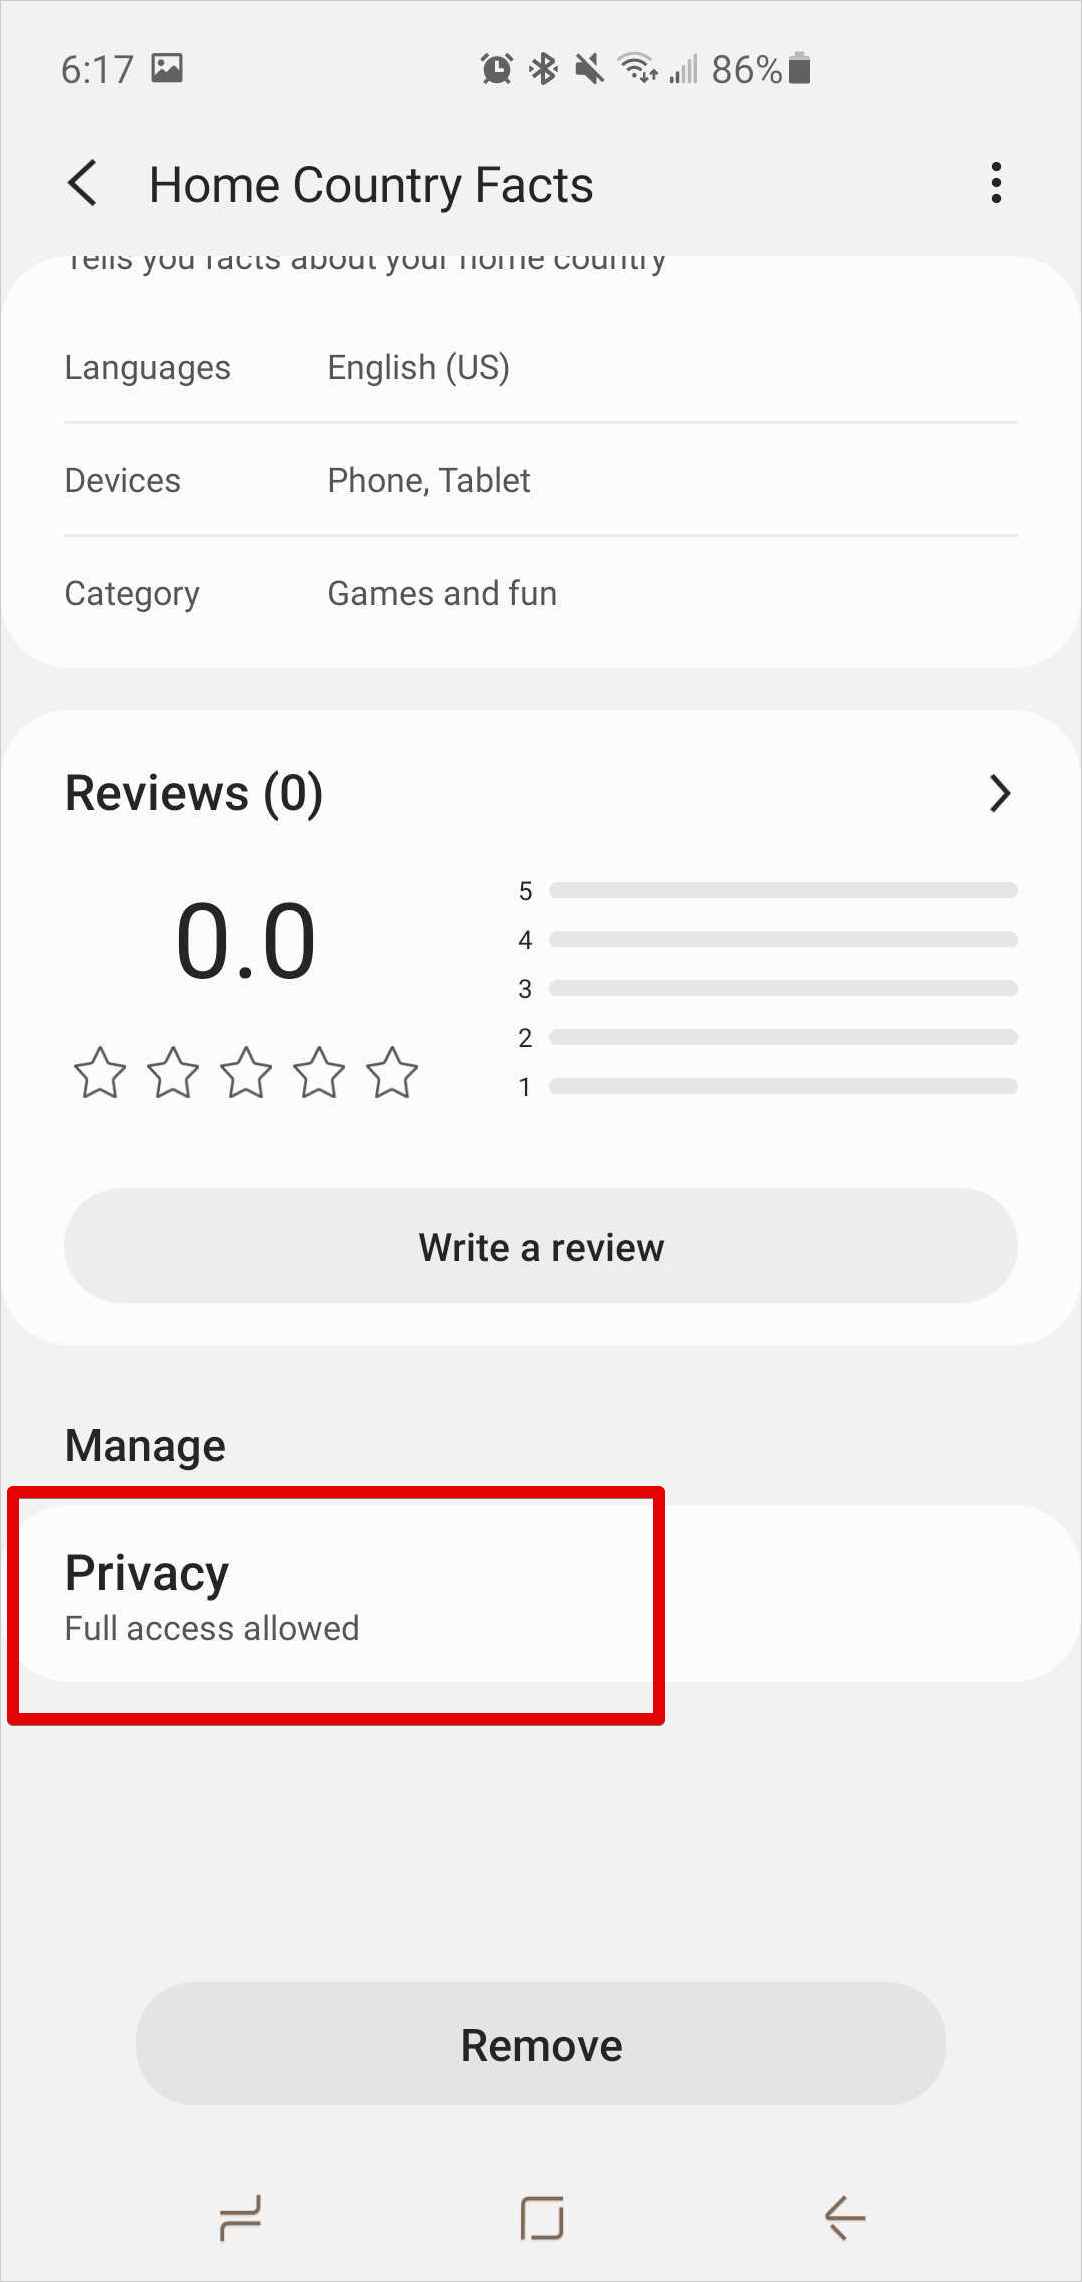
- Under Bixby Voice Settings > All Devices > Privacy, after tapping on the chosen capsule.
Each capsule that requests permissions is listed under this privacy page:
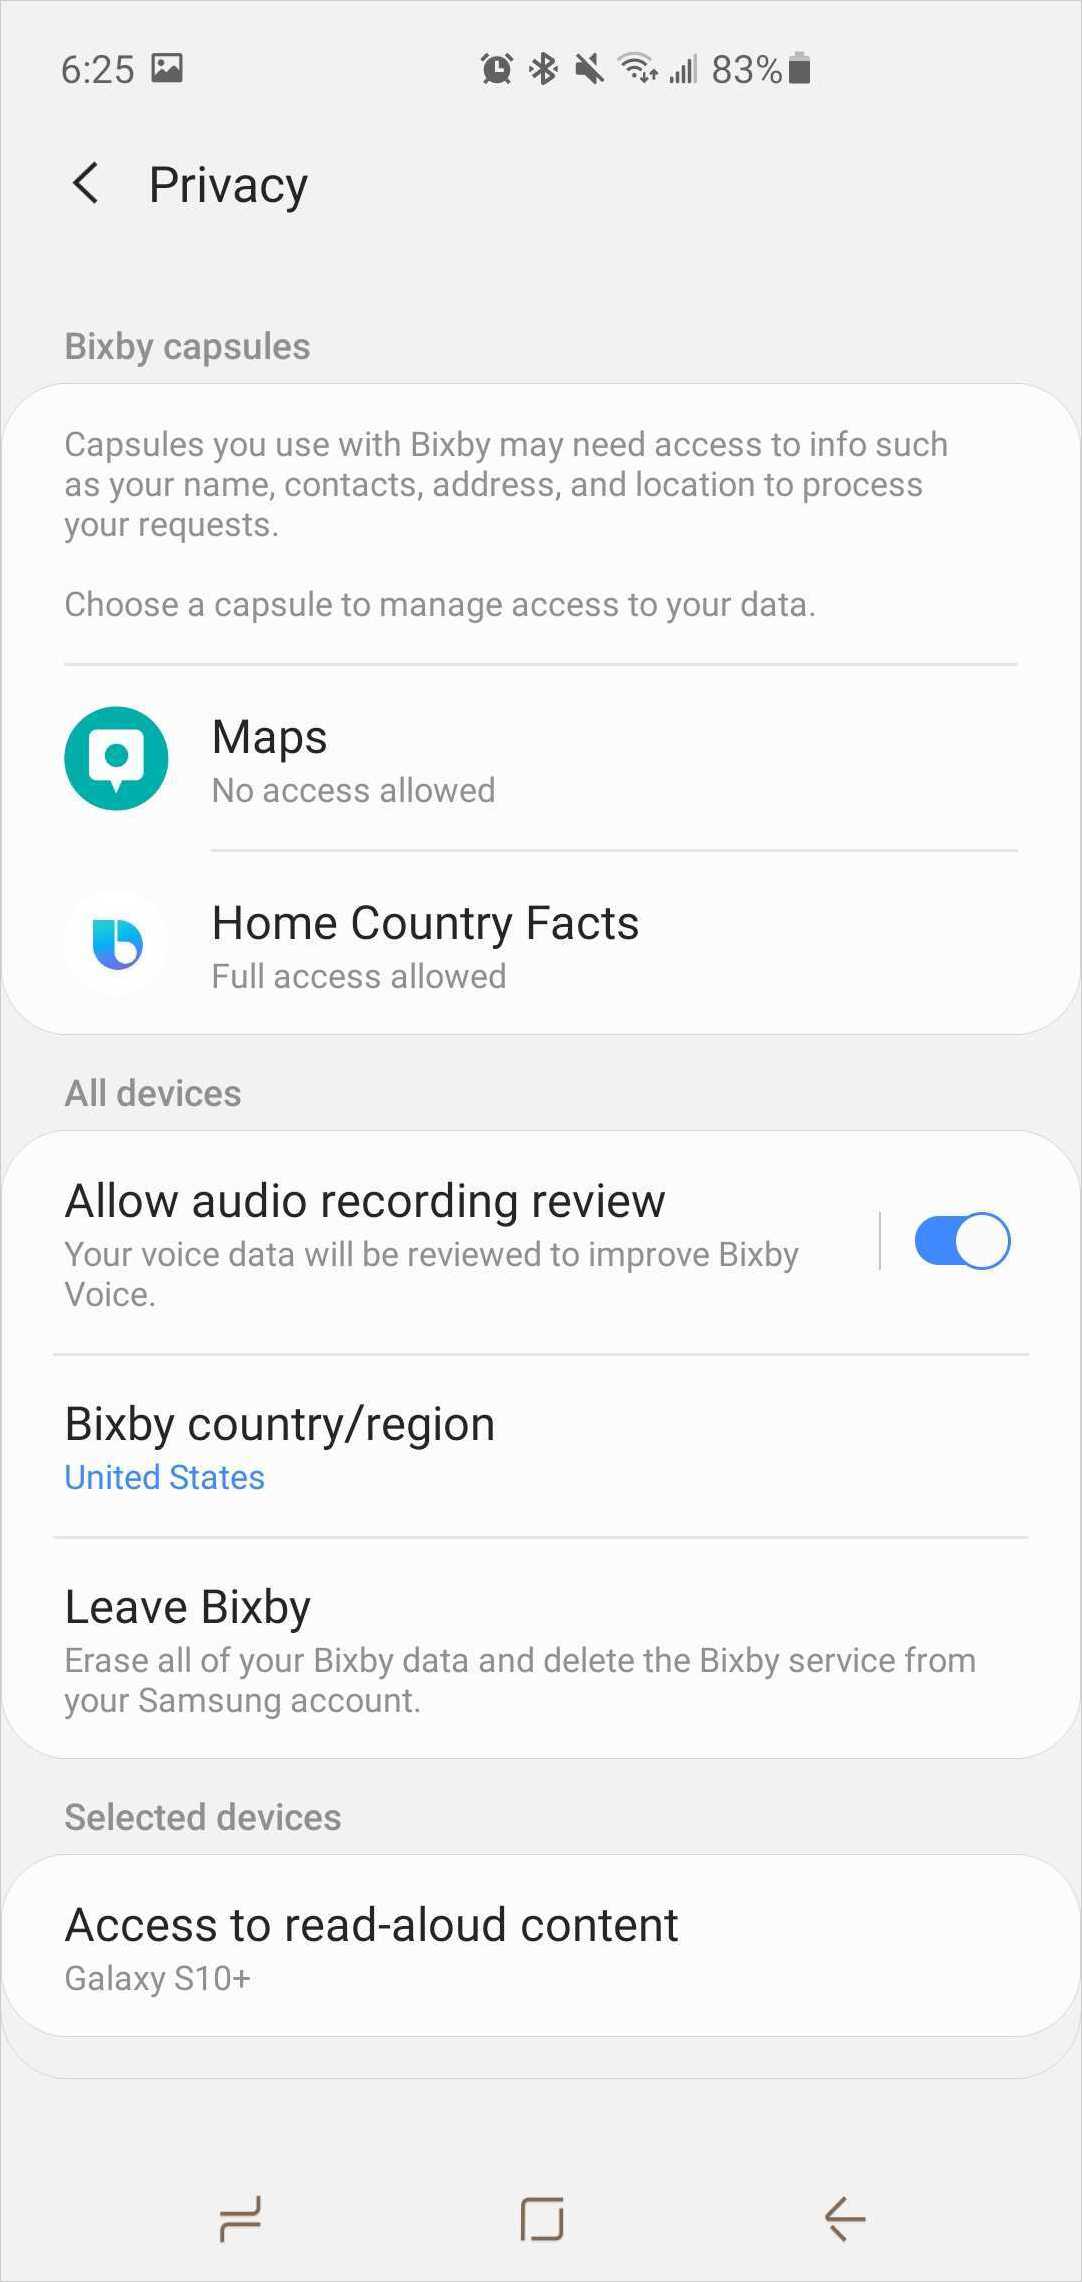
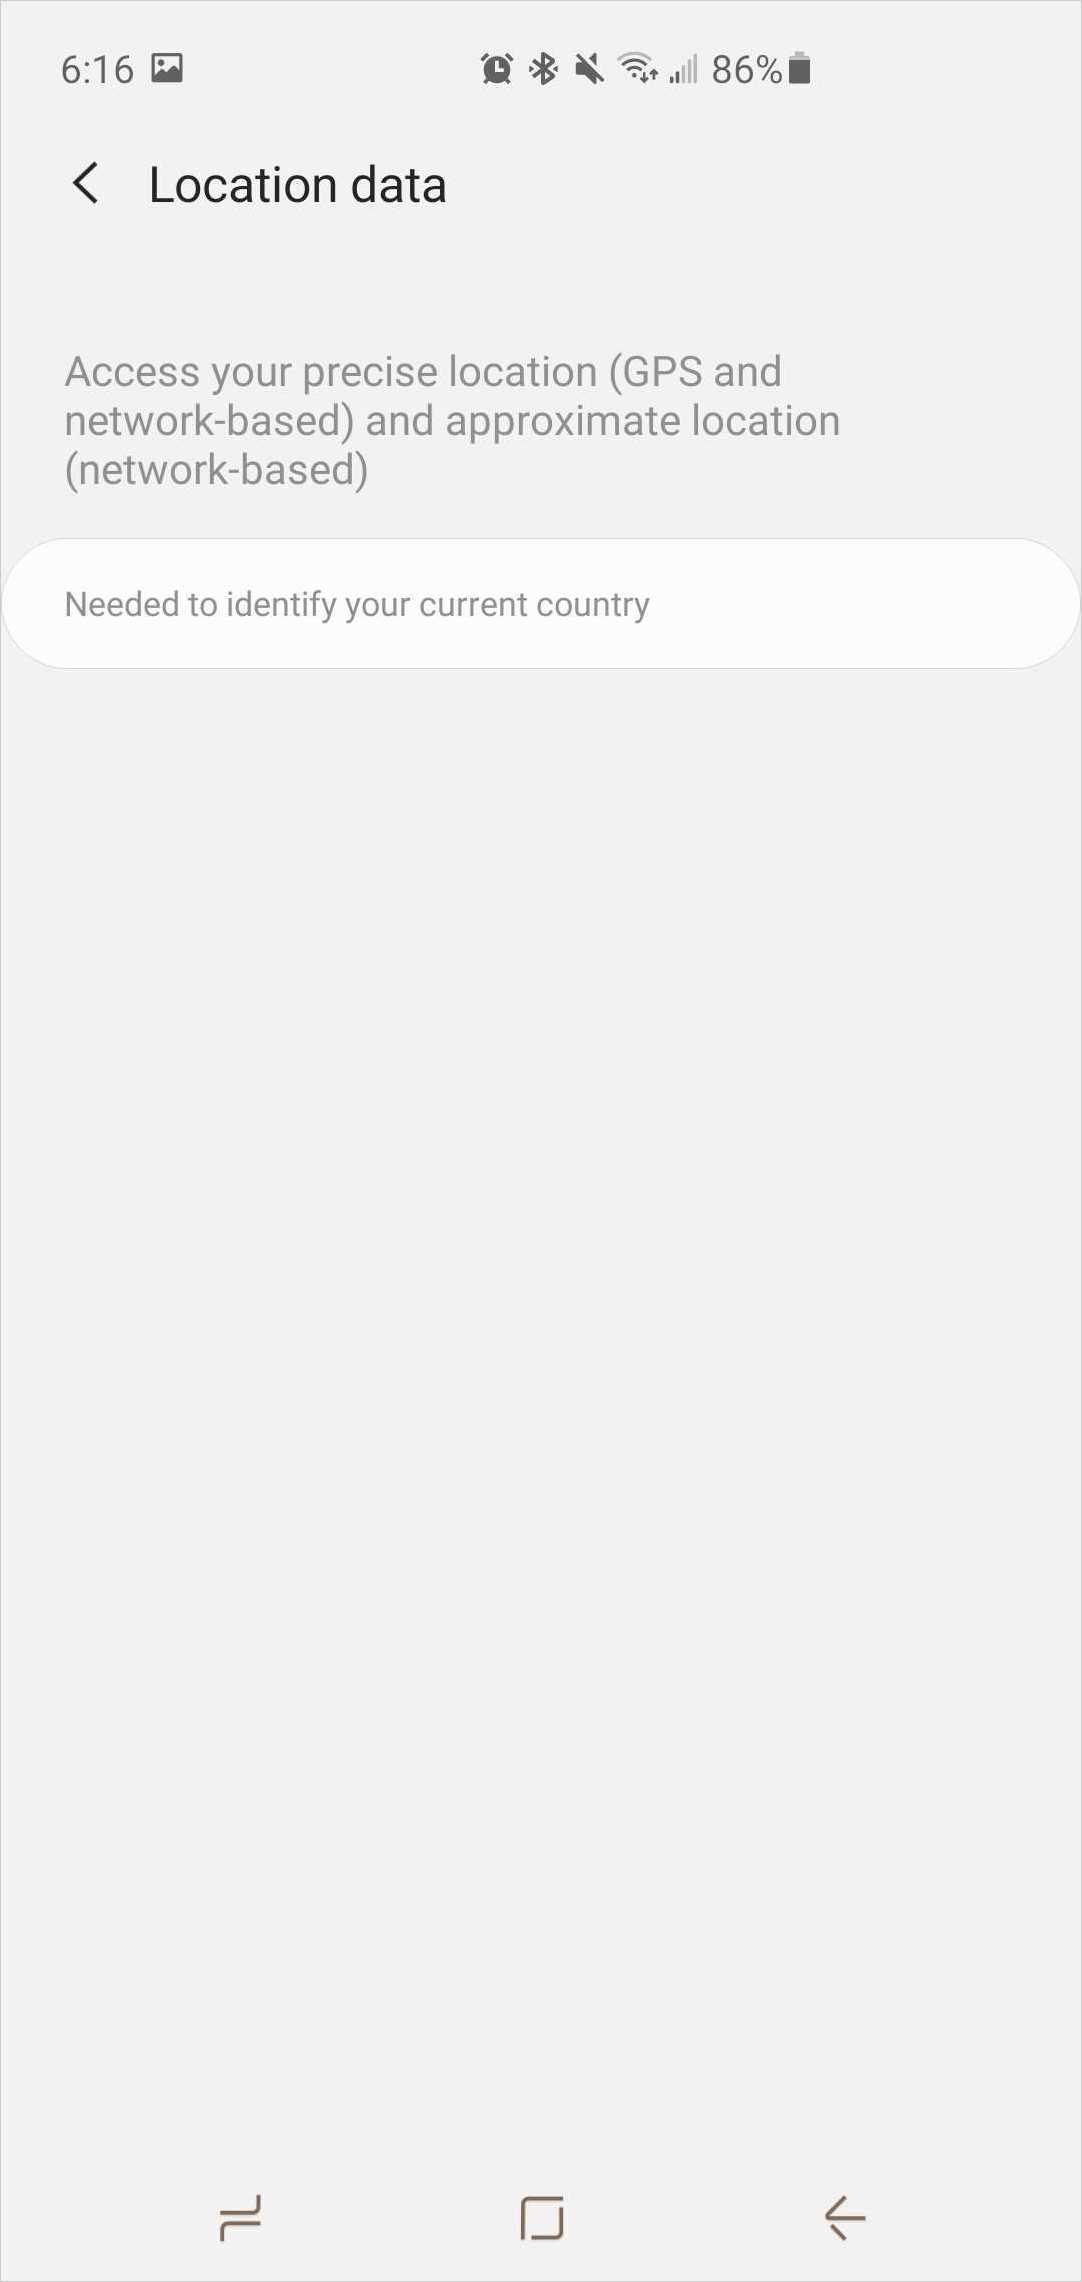
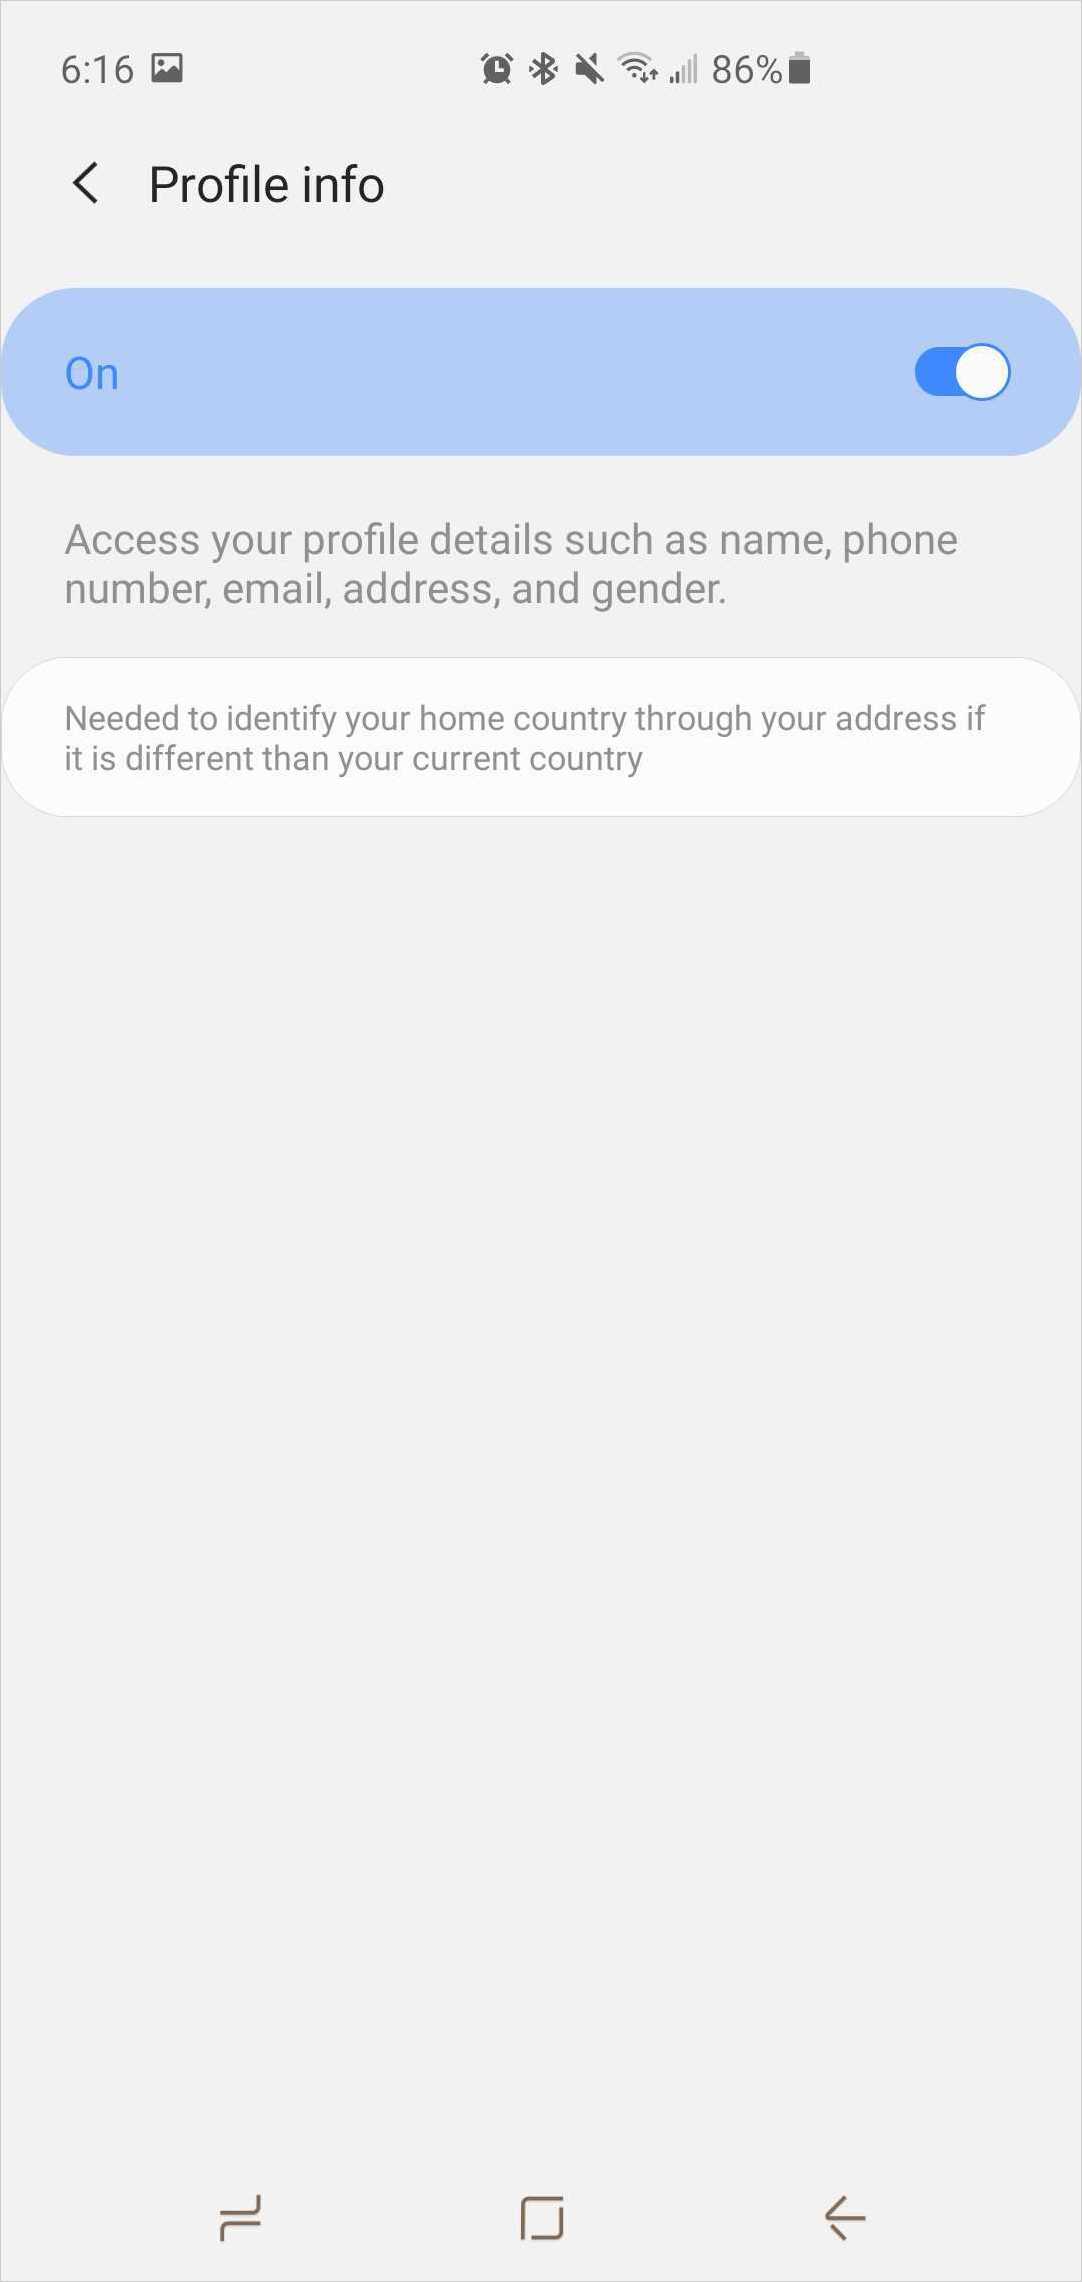
When users navigate to a specific capsule's privacy page, they can turn permissions on or off, as well as determine which devices have those specific permissions.
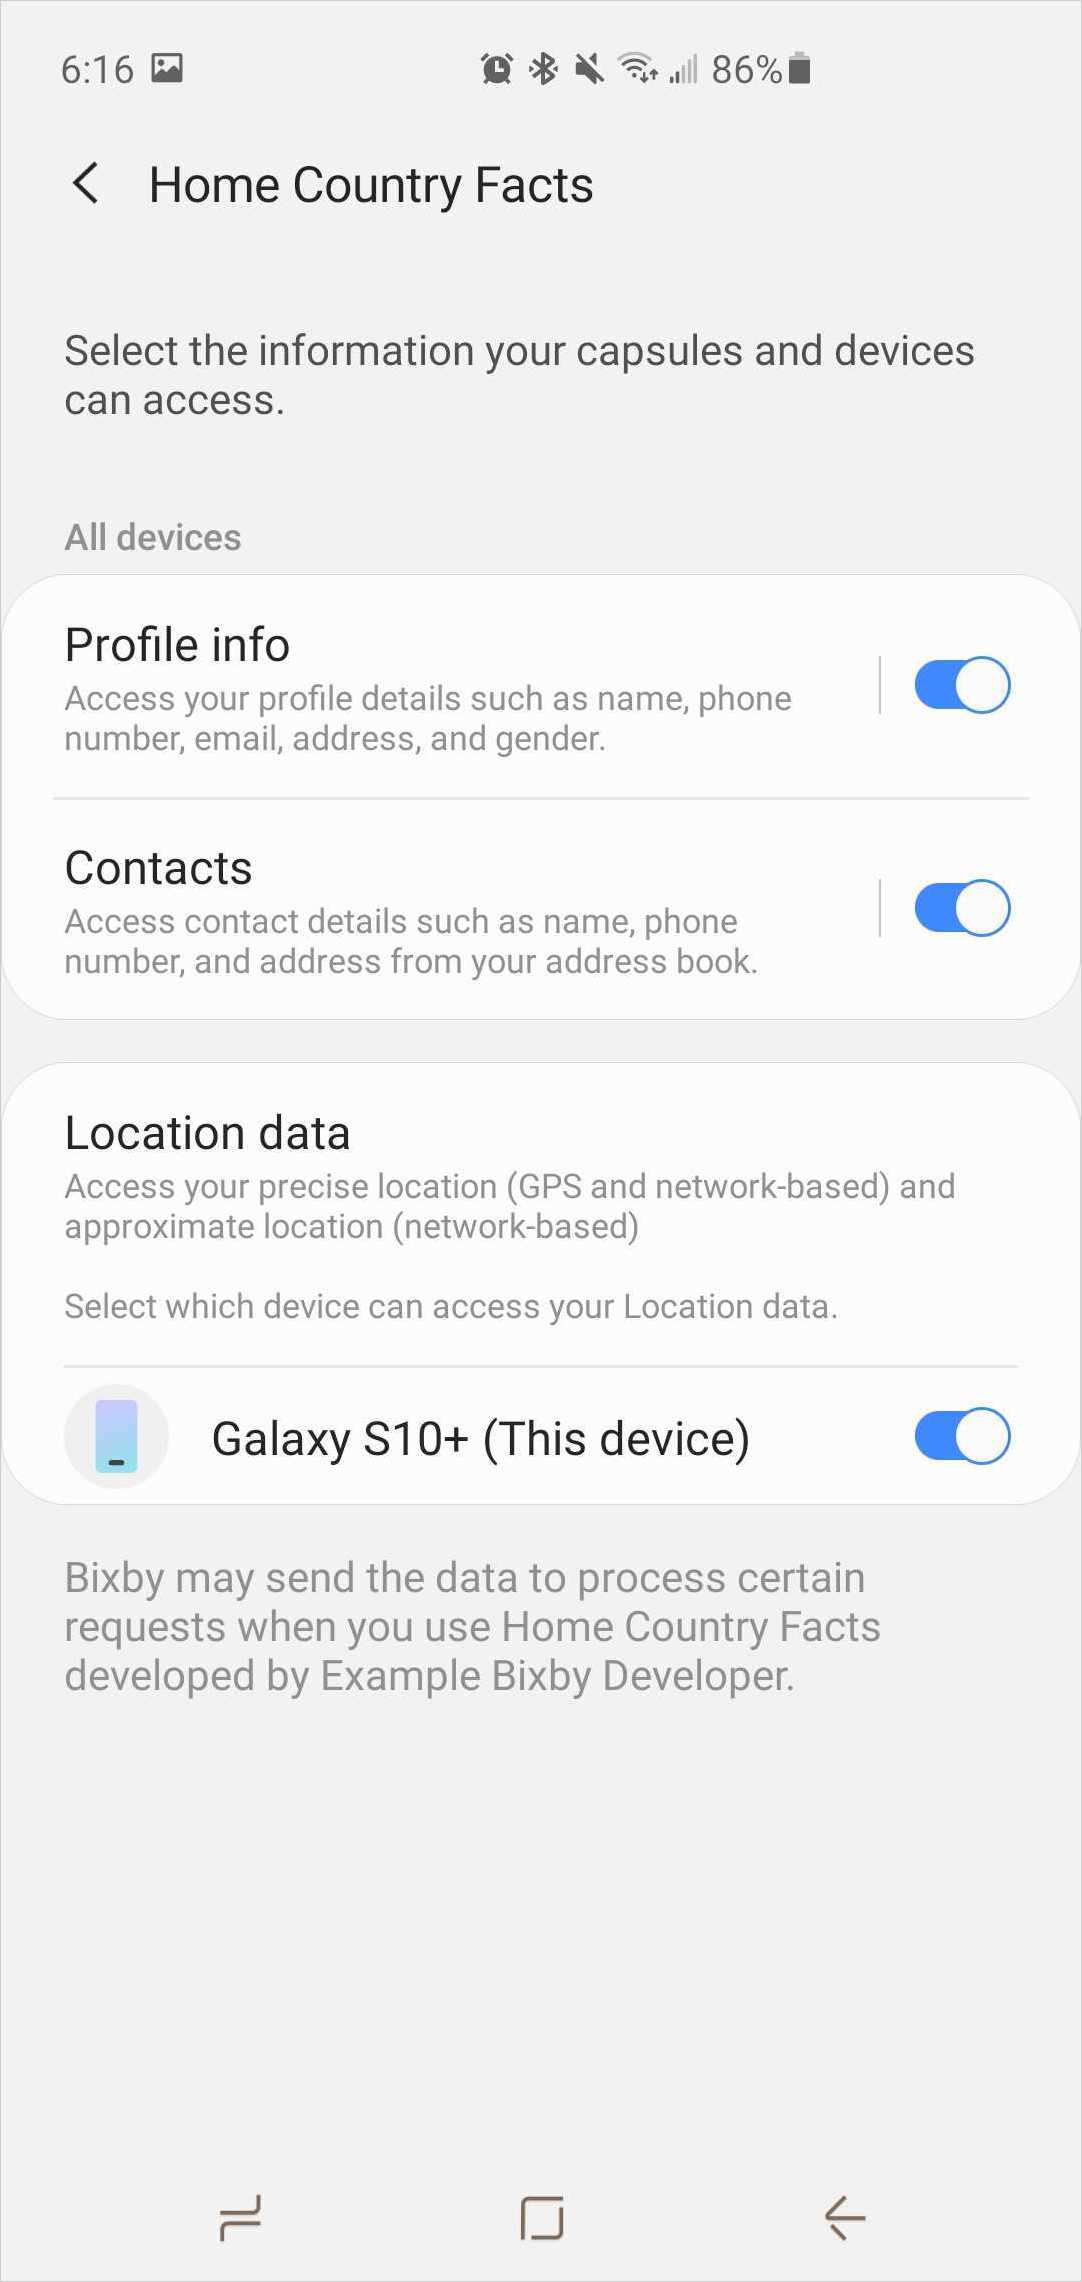
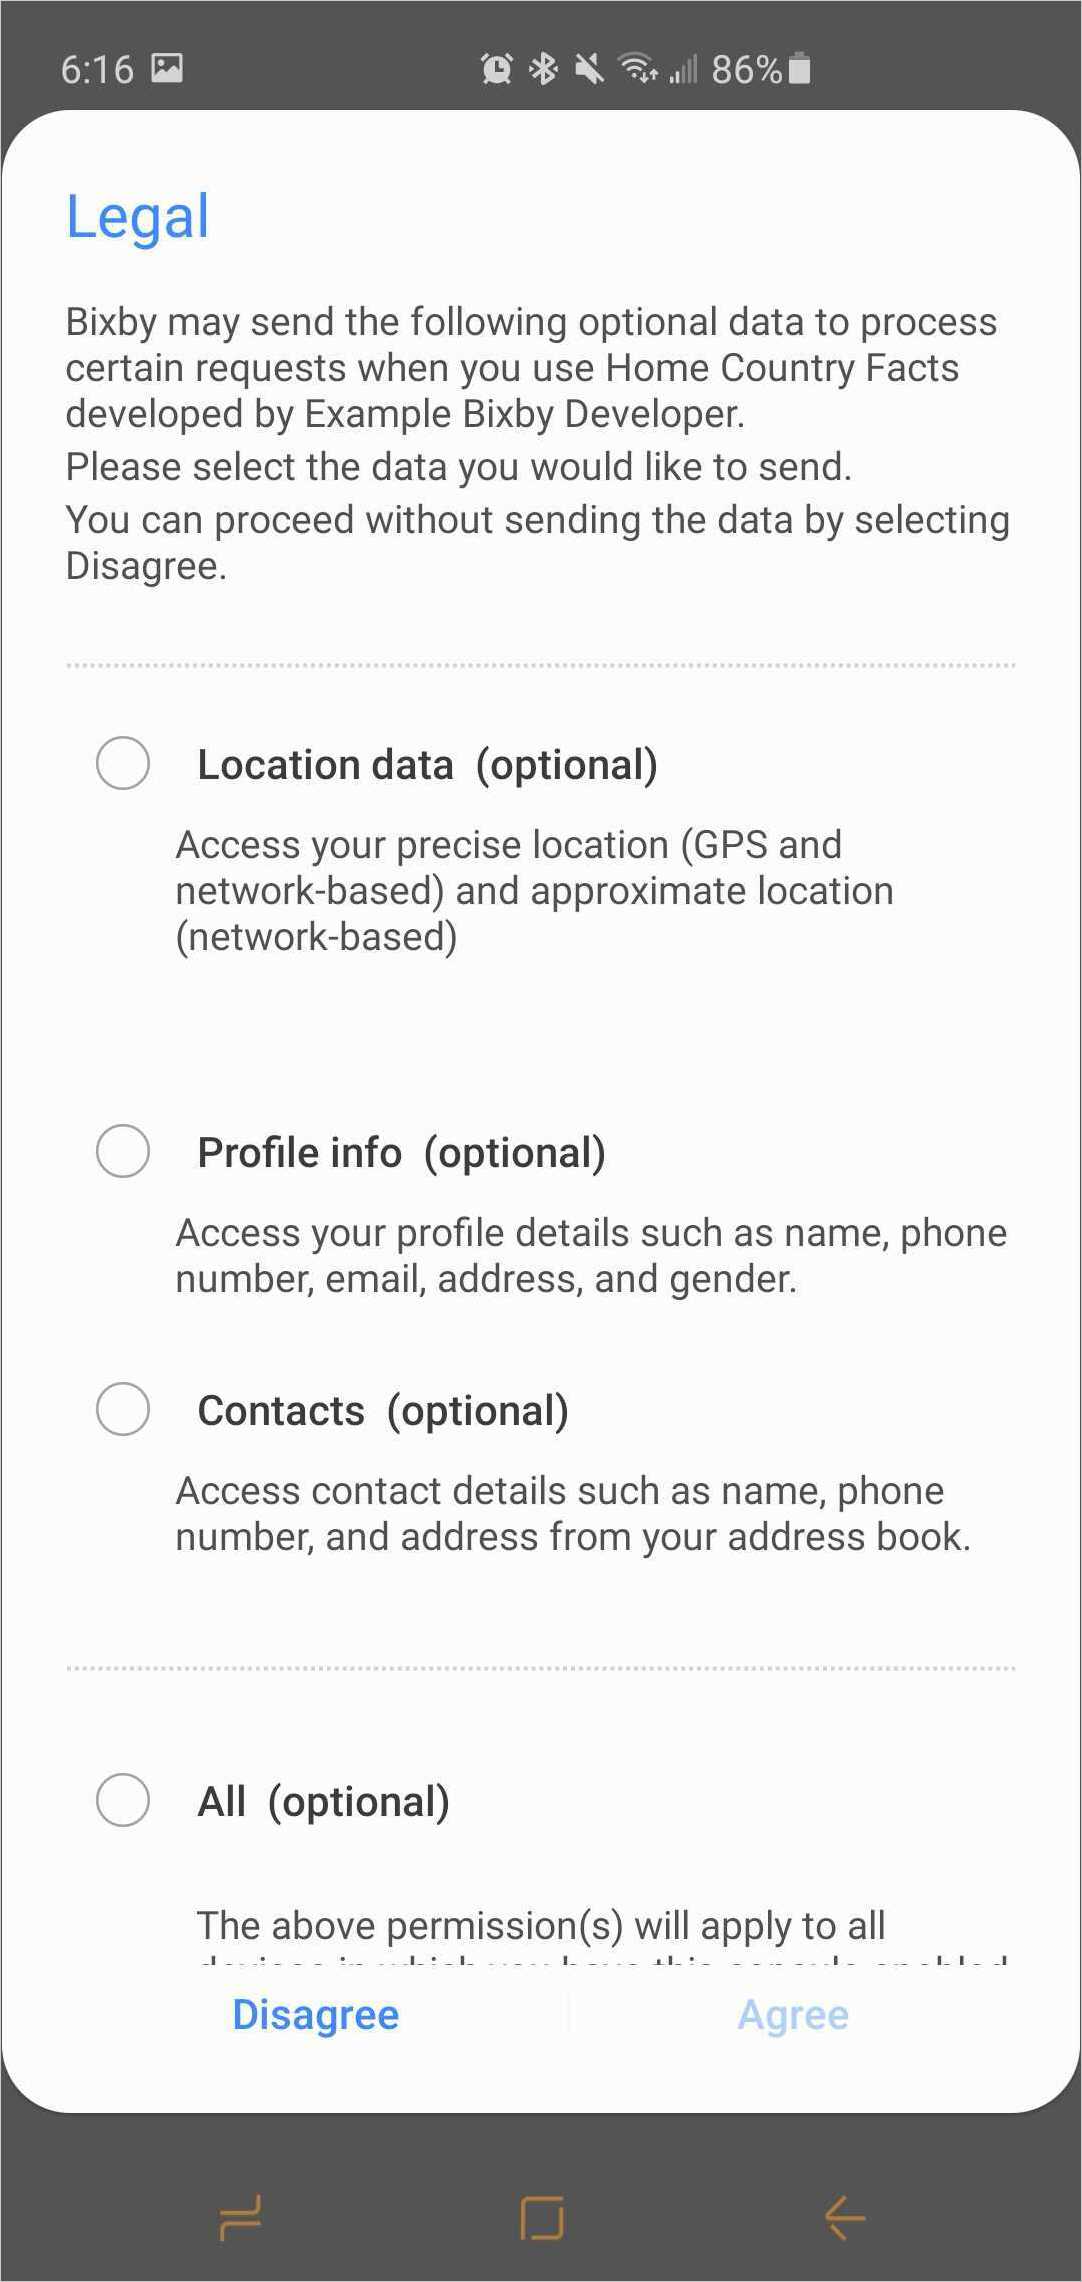
If users tap on a specific permission, the permission page displays with a switch to turn that permission on or off, what the permission does, and the justification text. Here are some examples in the following table:
device-location-access | viv.self:profile | bixby.contact:contacts |
|---|---|---|
 |  | 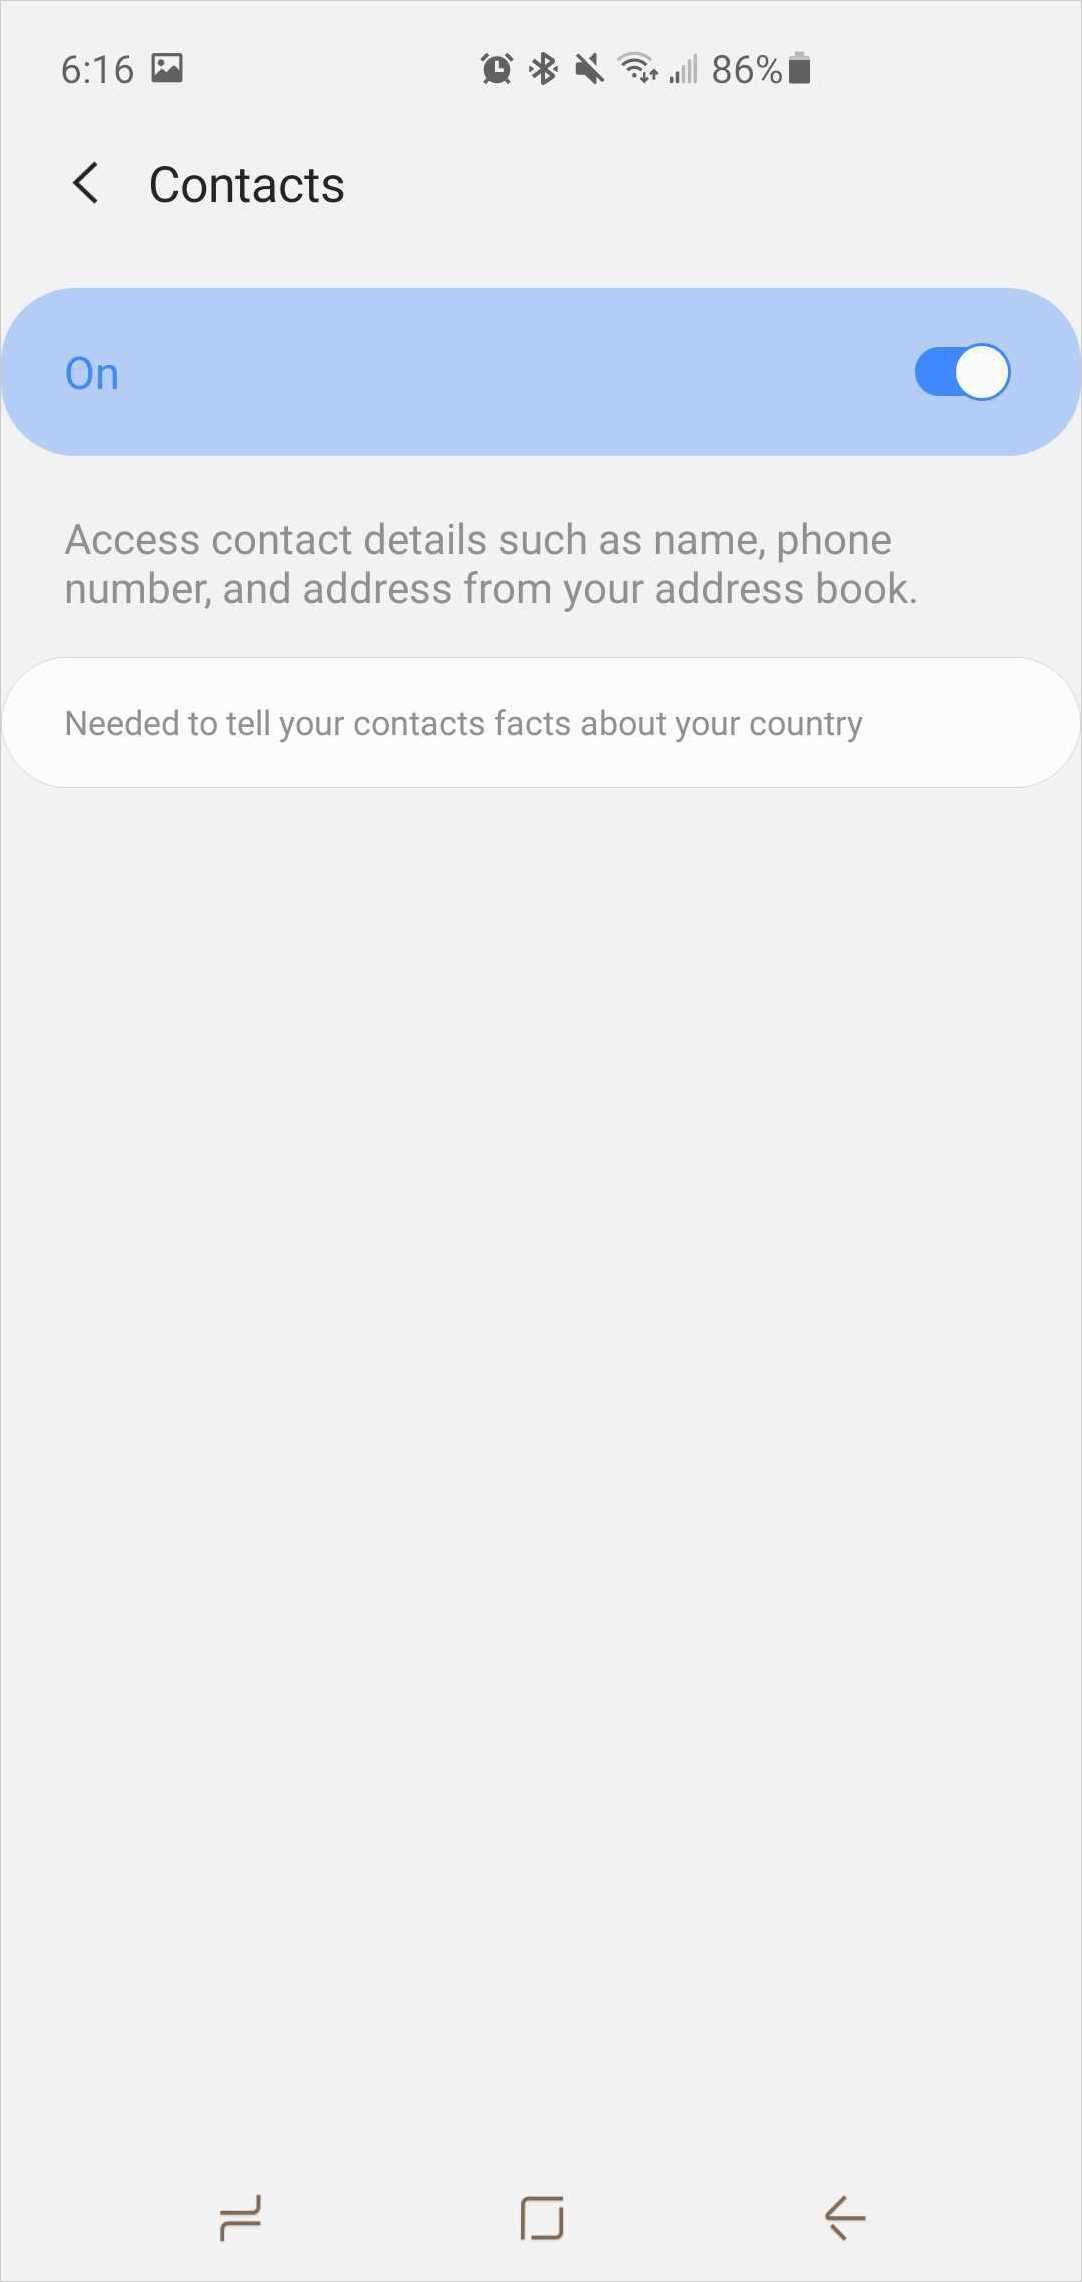 |
Denied Permissions
If the user decides not to grant permissions to that capsule, it will continue to execute.
When this happens, you should create a prompt so that the user can input the relevant information, such as location or profile information. This provides a better user experience and allows Bixby to continue executing gracefully.
Alternatively, you can add a permission-link component in your view if you want users to be able to grant the permission later.
For example, consider a capsule called RestaurantFinder that declares permissions { device-location-access } in order to access a user's location. When a user asks Bixby "Find Italian restaurants nearby", Bixby checks for the device-location-access permission and prompts the user if no persisted value exists. If the user grants the permission, RestaurantFinder can access the user's location. However, if the RestaurantFinder never declares the device-location-access permission, Bixby does not check or prompt the user for the user's location, and the RestaurantFinder capsule won't get that information either. In this scenario, you should add a prompt that allows users to input their location when it is not granted.
If you want to check if the permission has been granted first, you can use the permissionGranted() EL function or the $vivContext.grantedPermissions variable in JavaScript.
If checking with EL, do the following:
output (Something) {
  evaluate {
    if("#{permissionGranted('device-location-access')}") {
      ...
    } else {
      ...
    }
  }
}
If checking in JavaScript, do the following:
var permissions = $vivContext.grantedPermissions
if ('device-location-access' in permissions) {
  console.log('PERMISSION GRANTED')
} else {
  console.log('PERMISSION DENIED')
}If you have the Deterministic Mode option enabled while testing permissions in the Simulator, you will be prompted for permissions every time in a conversation, even if you've previously granted permissions. Additional permissions settings are available in the Permissions tab of the User Pane in the Simulator.
Scope of Permission States
Permissions always depend on the currently executed end-user capsule, since users do not know about library capsules.
Some permissions are capsule-based permissions, such as device-location-access. This means that you would only need to declare them at the end-user capsule that needs the permission. These permissions are checked at execution, prompted for a value from the user, and the value the user gives (either granted or denied) persists for the entire execution of the request.
For example, consider an example end-user capsule RestaurantFinder that imports location, and location imports geo. During a user's request to RestaurantFinder, when location performs an action, it requests the user’s current location from geo. The current location will only be accessible if RestaurantFinder (the currently executed end-user capsule) requests the device-location-access permission and the user granted it.
Some permissions are system-level and are only available to internal-only developers.
How Library Capsules Define Permissions
A library capsule exports permissions by defining a permission and only allowing that action endpoint to execute if the permissions is granted by the user. For example, the bixby.contacts library capsule could declare a contacts permission that guards access to the user's address book. Another end-user capsule can import bixby.contacts and if it needs to use an action that requires the contacts permission, Bixby prompts the user, asking if the user grants the requested permission to the executed end-user capsule. If the user grants it, then the action will continue as usual. If the permissions are not properly requested in the end-user capsule, they are automatically denied and the function is not executed.
You might want to test that the permissions are being properly prompted-for and granted using on-device testing.
How Library Permissions Work End-to-End
There are several steps required to properly ensure that the library permission request is presented to users and they can grant Bixby access to the information they need. As described in How Library Capsules Define Permissions, if you are developing an end-user capsule that imports this library and requires those same permissions, you need to request those library permissions.
You might not require both parts of this library permissions section. For example, if you are developing an end-user capsule and not developing a library capsule, then there is nothing for you to export on the library level.
Request Library Permissions
Follow these steps to request the library permissions of an imported library capsule. This is necessary when your capsule imports a library that requires specific permissions to be granted.
- Import the library you need. Check you're using the latest version.
    capsule-imports {
        import (viv.core) {
            as (core)
        }
        import (viv.self) {
            as (self)
            version (4.0.25)
        }
        import (viv.time) {
            as (time)
            version-from (self)
        }
        import (viv.money) {
            as (money)
            version (2.22.56)
        }
    }
- Declare the various
library-permissionkeys within thepermissionsblock of your end-user capsule'scapsule.bxbfile.
    permissions {
        library-permission (self:profile)
- Add localized justifications of why you are requesting these permissions within the
capsule-info.bxbfile in therequested-permissionsblock.
  requested-permissions {
    permission (self:profile){
      justification (Your profile information is needed to book a space resort.)
    }
  }
Organize Your Capsule Resources
Your capsule organization should also reflect the device types and languages (Targets) you want to support. For a full list of supported devices and languages, see the target reference doc.
Bixby sorts resources in the following order, from most to least specific:
- spec-lang-country (ex:
bixby-mobile-it-IT) - spec-lang (ex:
bixby-mobile-it) - spec (ex:
bixby-mobile) - lang-country (ex:
it-IT) - lang (ex:
it) base
Note that your resources (such as your dialog, layout, training, and hint files) follow the hierarchy listed above within your resource folders. For example, bixby-mobile-it-IT is a more specific bucket than bixby-mobile. Bixby defaults to the base directory to look for your dialog, layout, and other similar files, unless you provide a more specific resource bucket with a file defined for that instance.
For example, if you want to support all devices in the US but only mobile devices in Korea, organize your capsule resources in two folders, as shown here:
/resources/en-us/
/resources/bixby-mobile-ko-KR/
Anything language-specific should be put in the corresponding language's resource folder. For example, each language should have their own training and vocab files.
The organization of your capsule resources offers fallback support, which lets you reuse parts of your capsule as needed. For example, you can organize your capsule to use the same English dialog (en-US), but different layouts depending on the device type.
Consider the following example with bixby-mobile-en-US and bixby-tv-en-US:
resources/en-US/Recipe_Results.dialog.bxb
resources/bixby-mobile-en-US/Recipe_Summary.macro.bxb
resources/bixby-tv-en-US/Recipe_Summary.macro.bxbYou cannot have a macro with the same ID if the macro is defined in the same resource folder. For example, if you have a macro with the ID "this-test-macro" in the bixby-mobile-en-US target, you cannot have another different macro with the same name in that target.
However, if the macro's target is in a higher level resource folder, the more specific target will override the more general target. For example, say you have a macro in bixby-mobile-en and another macro in bixby-mobile-en-US, both with the ID "this-test-macro". The macro in the bixby-mobile-en-US target will render for the bixby-mobile-en-US target, but the bixby-mobile-en macro will render for the bixby-mobile-en-GB target.
Macros with the same ID but in different targets (for example, bixby-mobile-ko-KR and bixby-mobile-en-US) are allowed and are encouraged, especially when localizing or handling development for multiple devices.