
On-Device Testing
While Bixby Home Studio (BHS) includes a Try it out feature that lets you test your action flow on a device, it also enables you to do on-device testing of metadata on compatible mobile devices.
On-device testing lets you say user utterances to a Bixby-enabled device to test the metadata of your devices. For example, you can load the metadata to your mobile phone for your lightbulb, and then say "Hi Bixby, turn on my light" to check if your lightbulb turns on. Currently, you can only test utterances through mobile devices. The device used in this guide is a simulated light bulb.
To perform on-device testing, you'll need to set up the following:
- Prepare for On-Device Testing, which includes the following tasks:
- Register your device with SmartThings. For more information, see the Start Developing guide on the SmartThings Developers website.
- Register the metadata through BHS. For more information, see the Publishing the Bixby Device Graph (BHS Metadata Submission) guide.
- Enable on-device testing on a compatible mobile device.
Prepare for On-Device Testing
To enable on-device testing, you must first register your device with SmartThings. If you haven't completed this step, create a Samsung Account first. This is the same account you'll use to log into BHS. For more information about registering your device with SmartThings, see the Start Developing guide on the SmartThings Developers website.
Then you need to register the metadata through BHS. You can create new metadata or update existing metadata. Once you upload the new or updated metadata, the first metadata state should be Private.

For more information about registering metadata through BHS, see the Publishing the Bixby Device Graph (BHS Metadata Submission) guide.
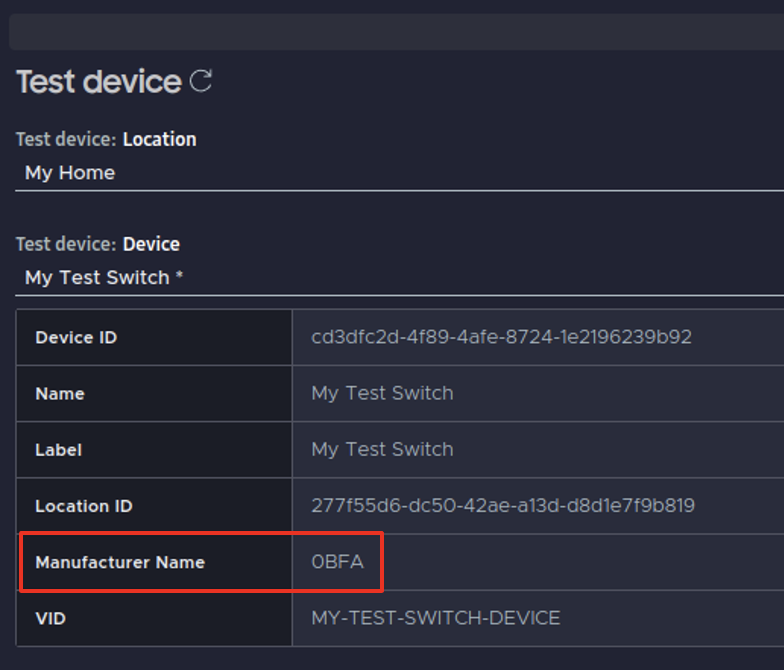
You also need to confirm that the Manufacturer ID (MNID) and Vendor Identifier Number (VID) of the test device, the MNID and VID of the metadata, the MNID and VID of the Bixby app developer settings, and the MNID of your SmartThings Developers user account all match, as listed in the following table. In addition, the metadata version and metadata state of the Bixby app developer settings and of the metadata must match.
| Property | SmartThings User Account | Test Device | Metadata | Bixby App Developer Settings |
|---|---|---|---|---|
| MNID | must match the others | must match the others | must match the others | must match the others |
| VID | N/A | must match the others | must match the others | must match the others |
| Metadata Version | N/A | N/A | must match the others | must match the others |
| Metadata State | N/A | N/A | must match the others | must match the others |
If the MNID of the test device is not visible in the BHS Device tab, as shown in the following image, your account does not have permission to use the device's MNID. You need to request permission from the SmartThings device developer to use the MNID.
Enable On-Device Testing
In order to perform on-device testing, you need to enable the Developer Options button in the Bixby app's settings. This is a hidden feature. To enable this button, do the following:
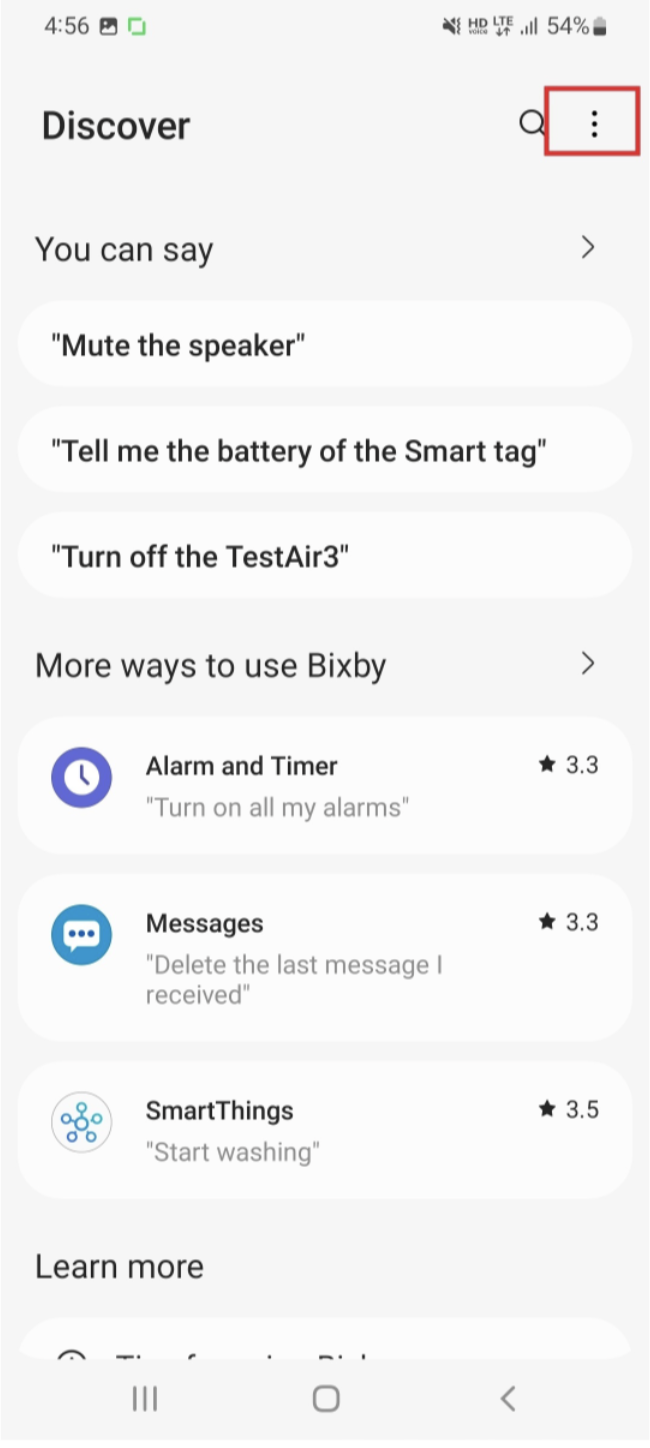
- Open the Bixby app.
- Tap the More menu at the top right.
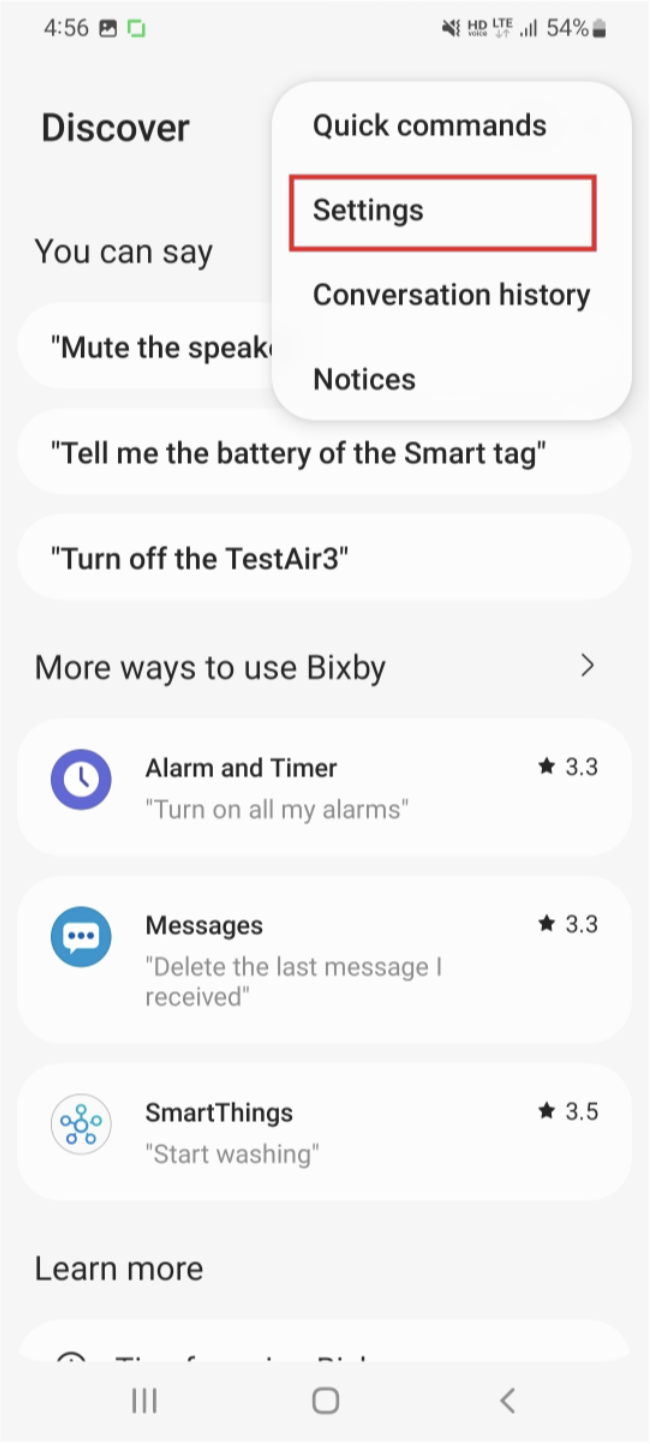
- Tap the Settings option.
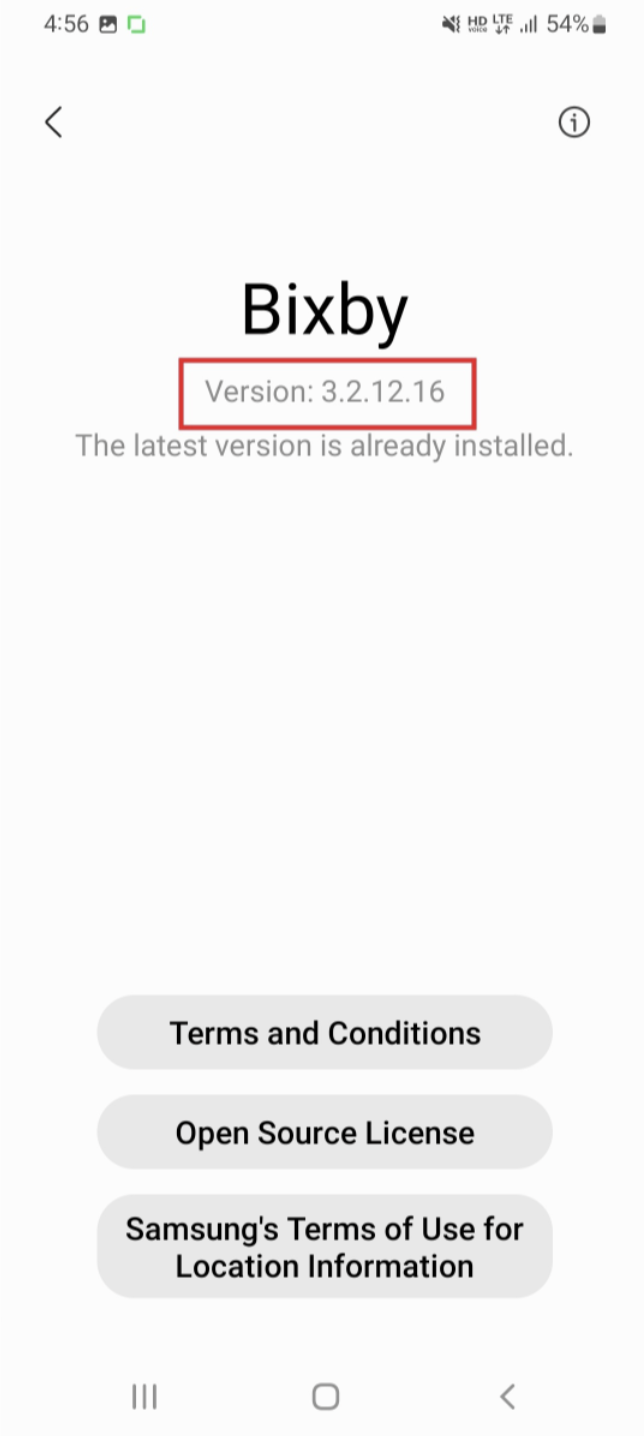
- At the bottom of the Bixby Settings menu, tap About Bixby.
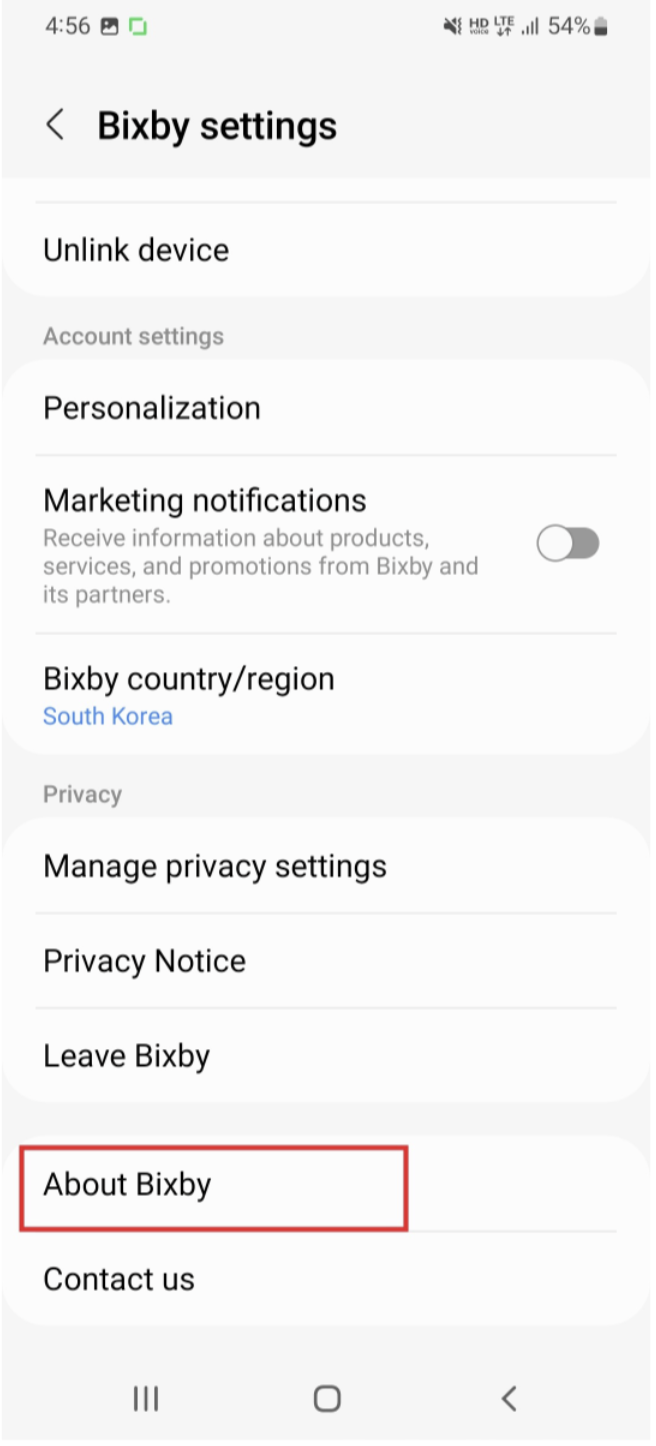
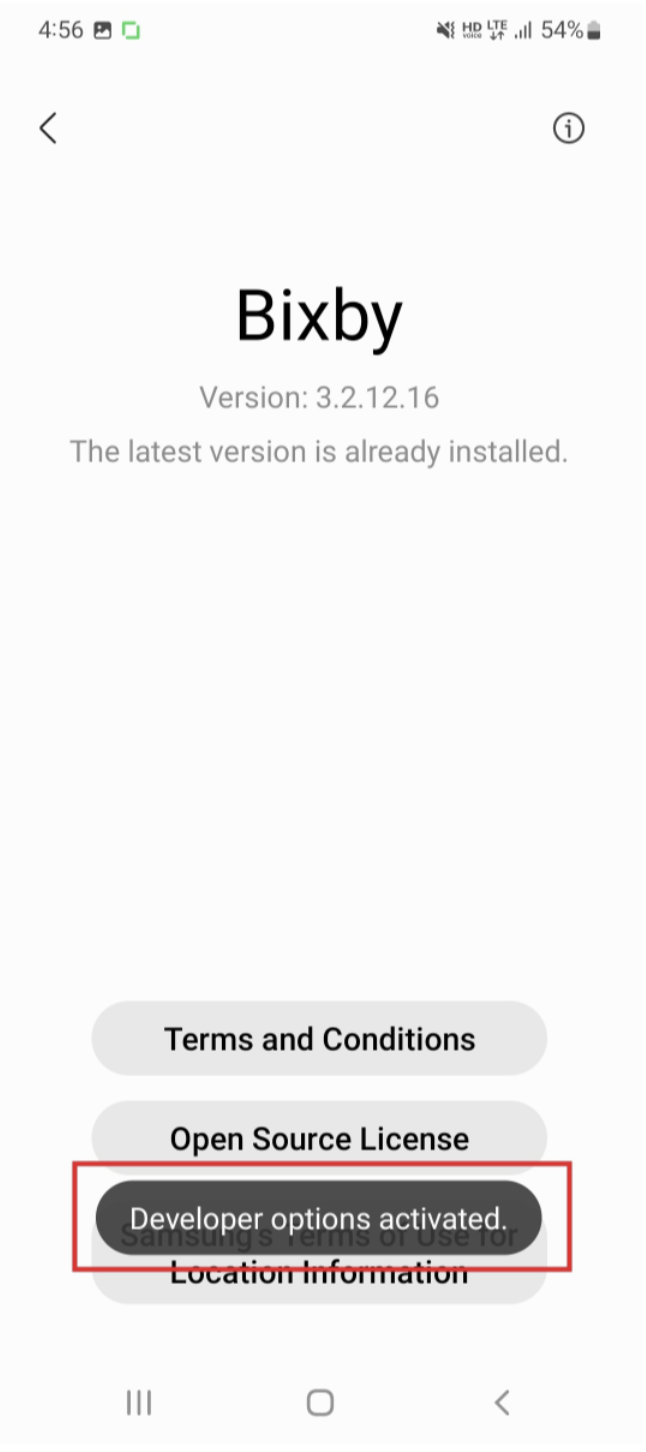
- Tap the version number, under "Bixby", 5-7 times.
If successfully activated, you will see a notification saying "Developer options activated."
Currently, on-device testing is limited to the mobile device you are using.
You can also import push notifications to BHS for on-device testing.
Get Execution Results from Push Notifications
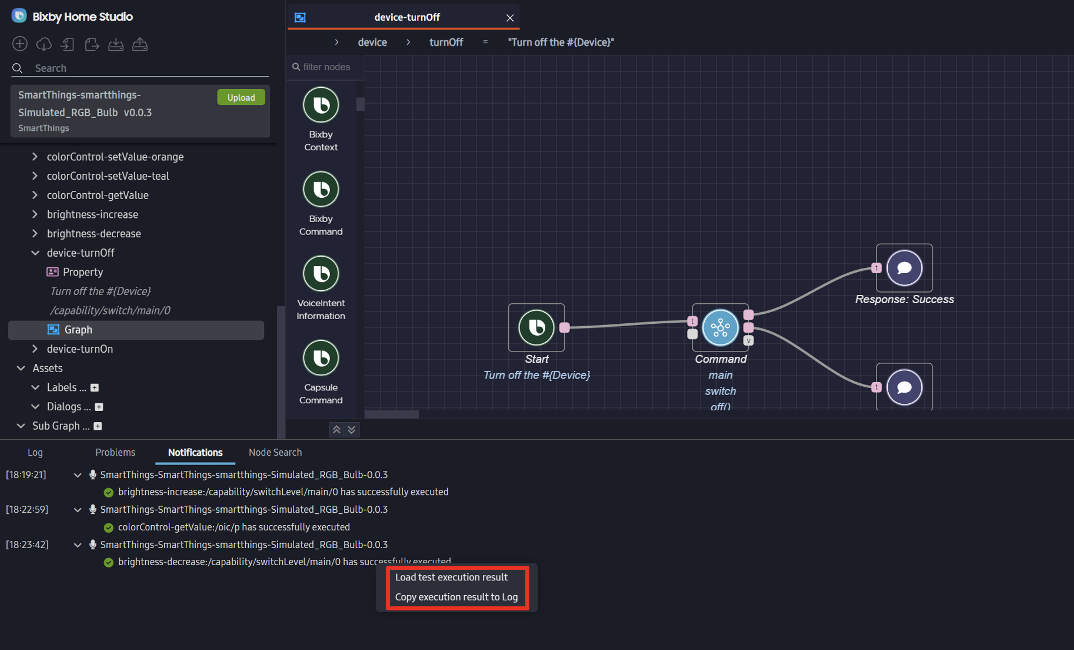
You can import push notifications to Bixby Home Studio (BHS) for on-device testing. This enables you to view and load execution results in BHS for debugging, regardless of whether the device is real or virtual. Execution results include information to help you narrow down any issues, such as execution paths, relevent voice intents, payloads, errors, and so forth.
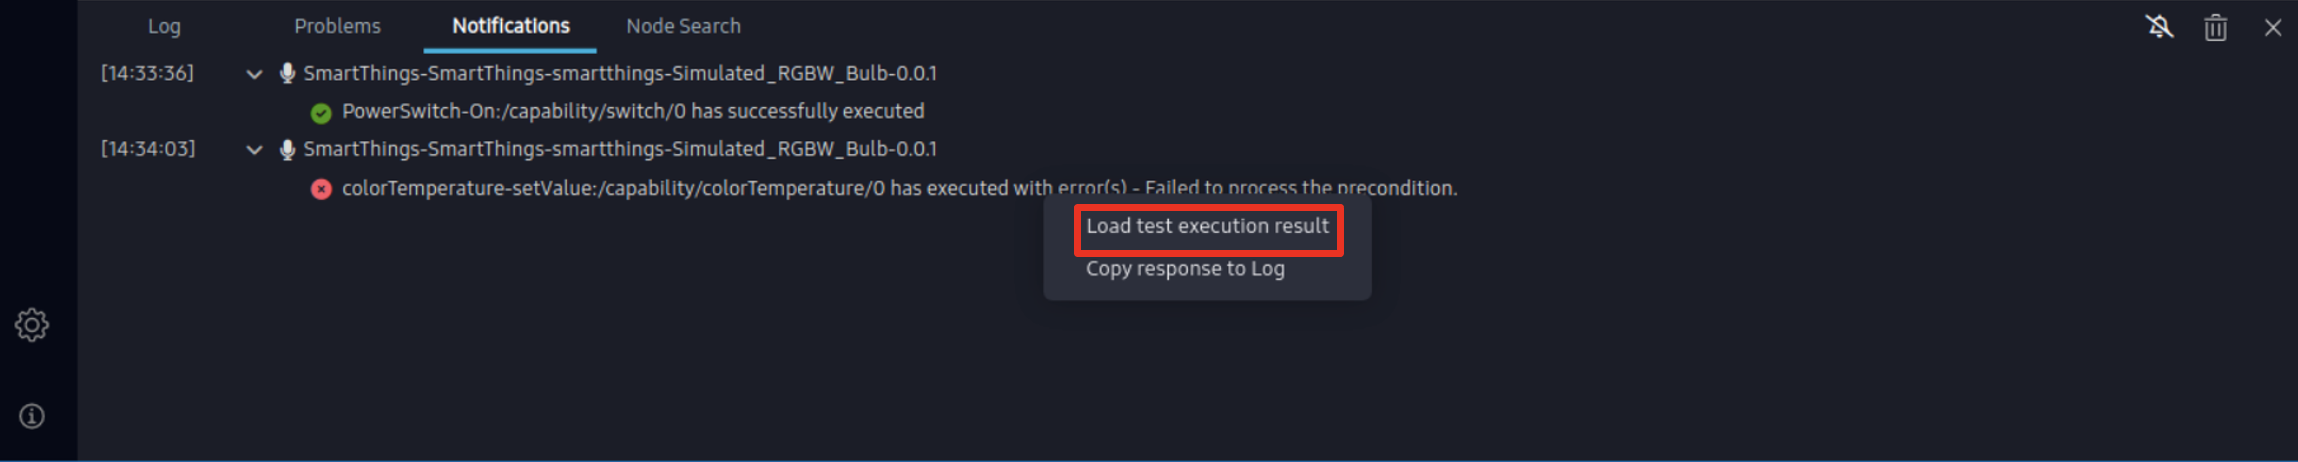
To debug execution errors, you can click Load test execution result to show the graph execution result in BHS, which includes information such as parameters, node values, and execution paths from the on-device test.
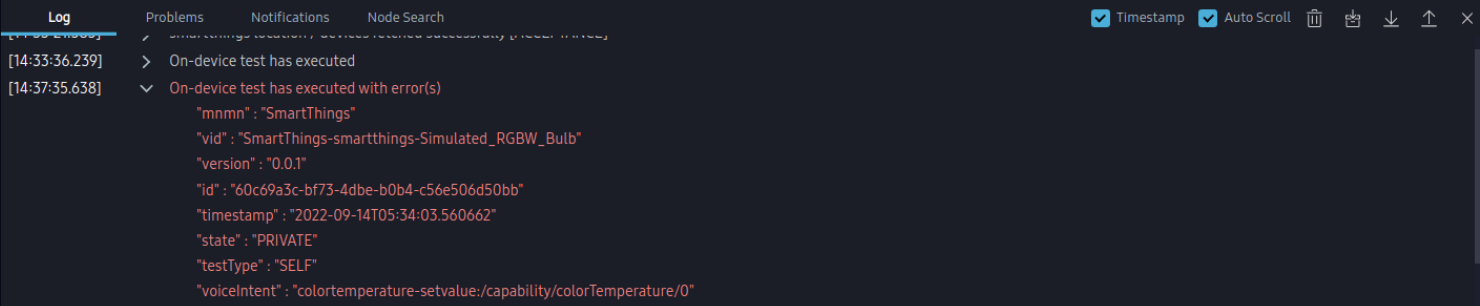
Click "Copy execution result to Log" to see more information about the error in the Log tab.
Enable And Set Up Push Notifications
To view push notifications in BHS, you should first enable push notifications to be delivered in BHS. To enable these notifications, do the following:
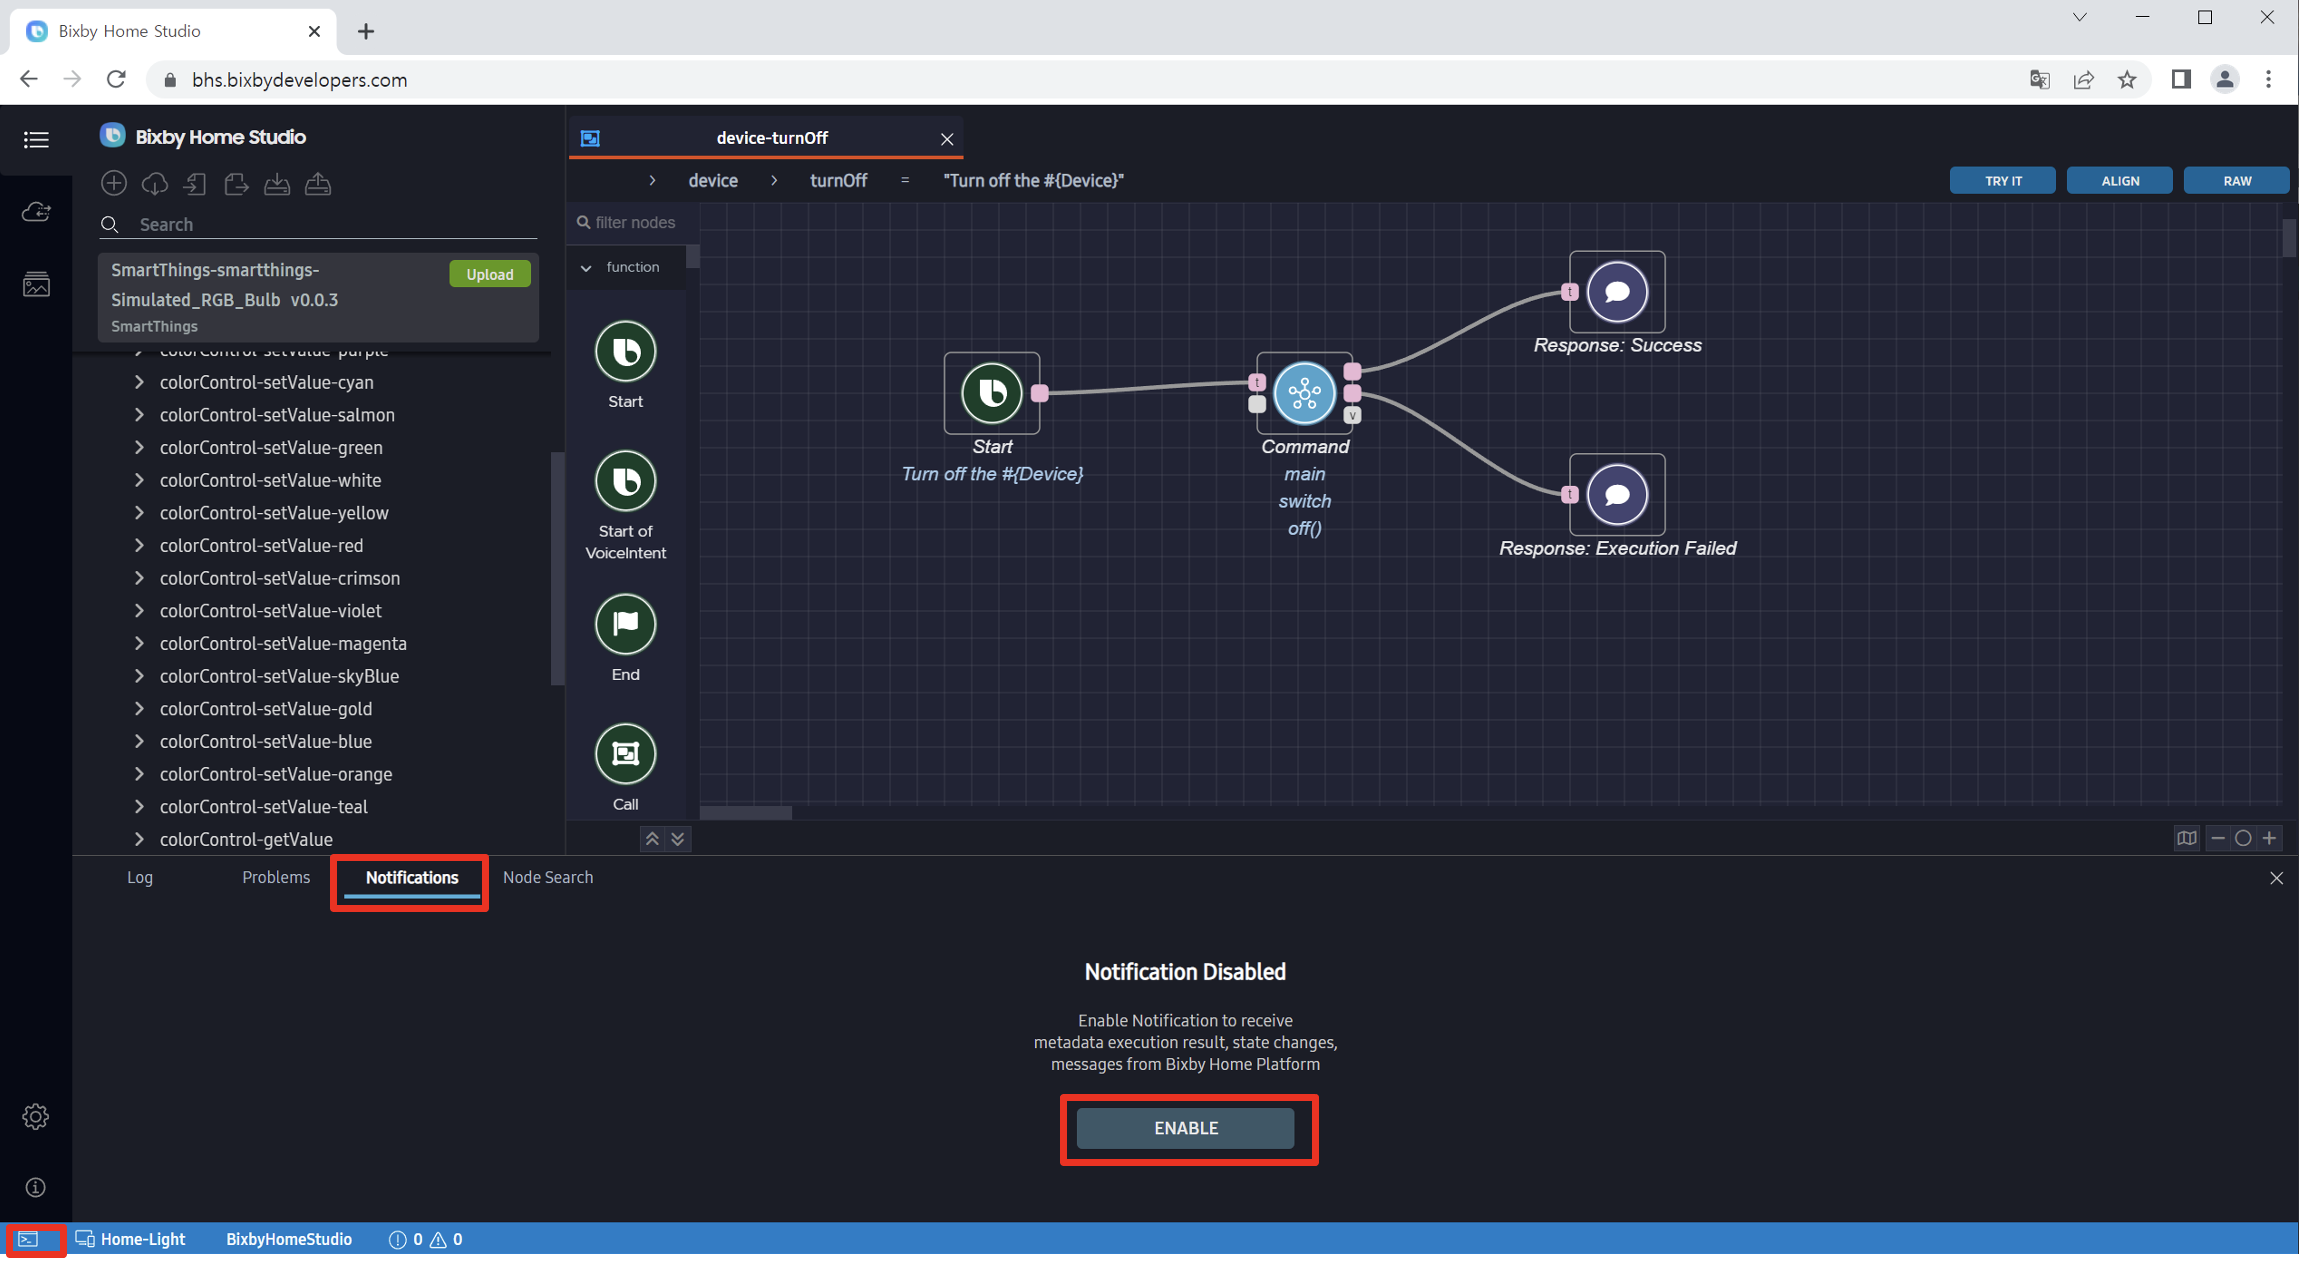
- In BHS, open the console by clicking on the console icon in the bottom left corner.
- Click on Notifications to open the Notifications tab.
- Click the Enable button underneath the Notifications Disabled message in the center of the Notifications tab.
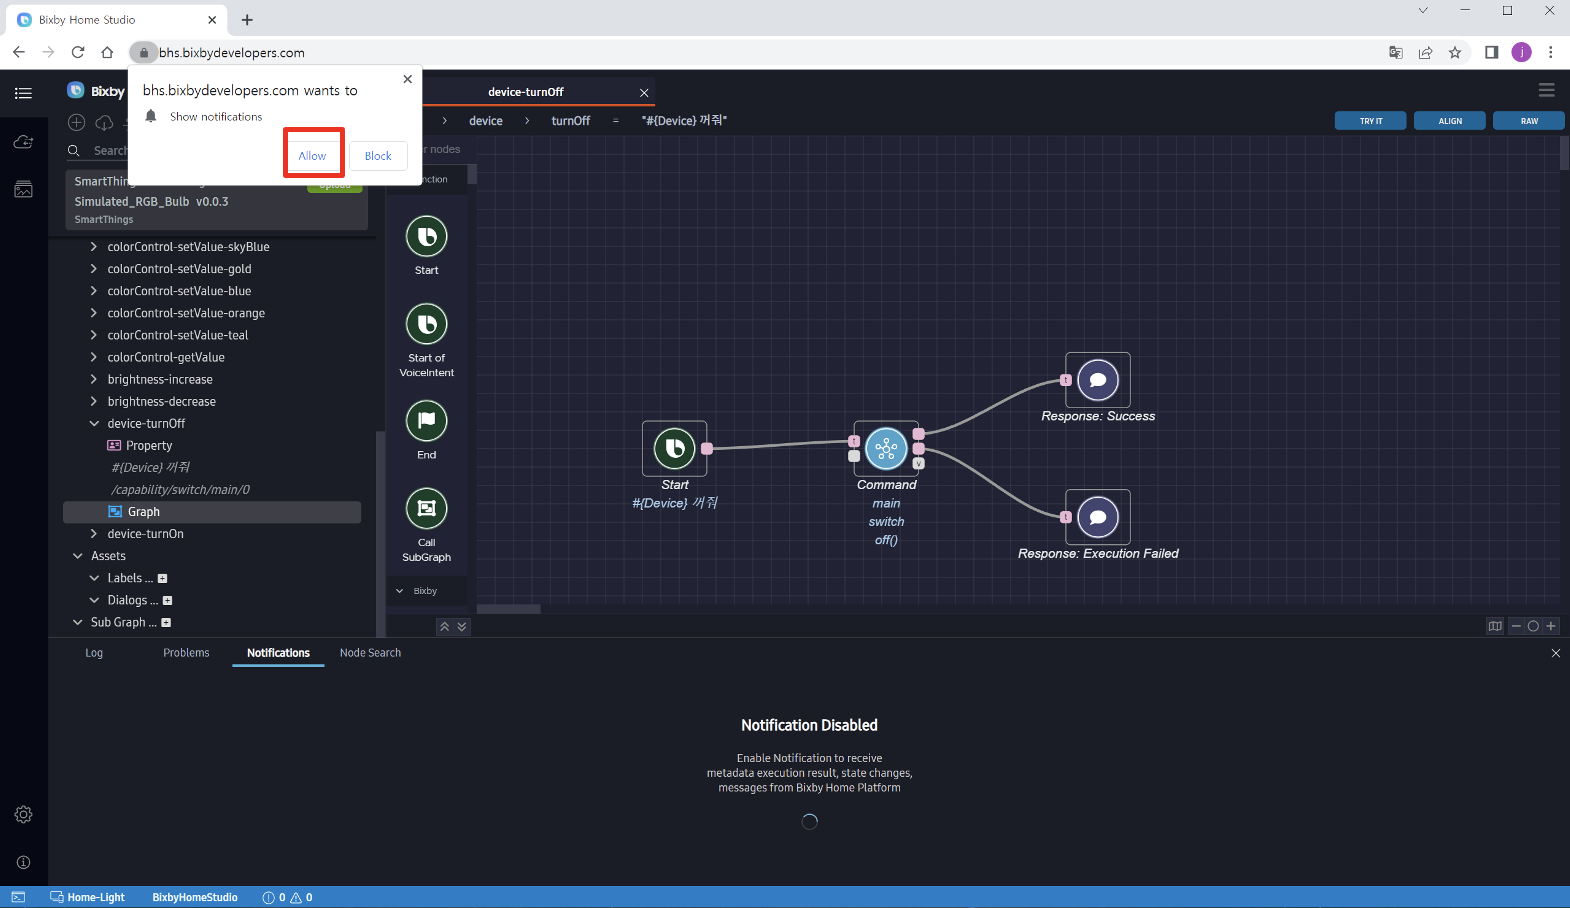
- A pop-up appears on the left that asks permission to show notifications. Click ALLOW.
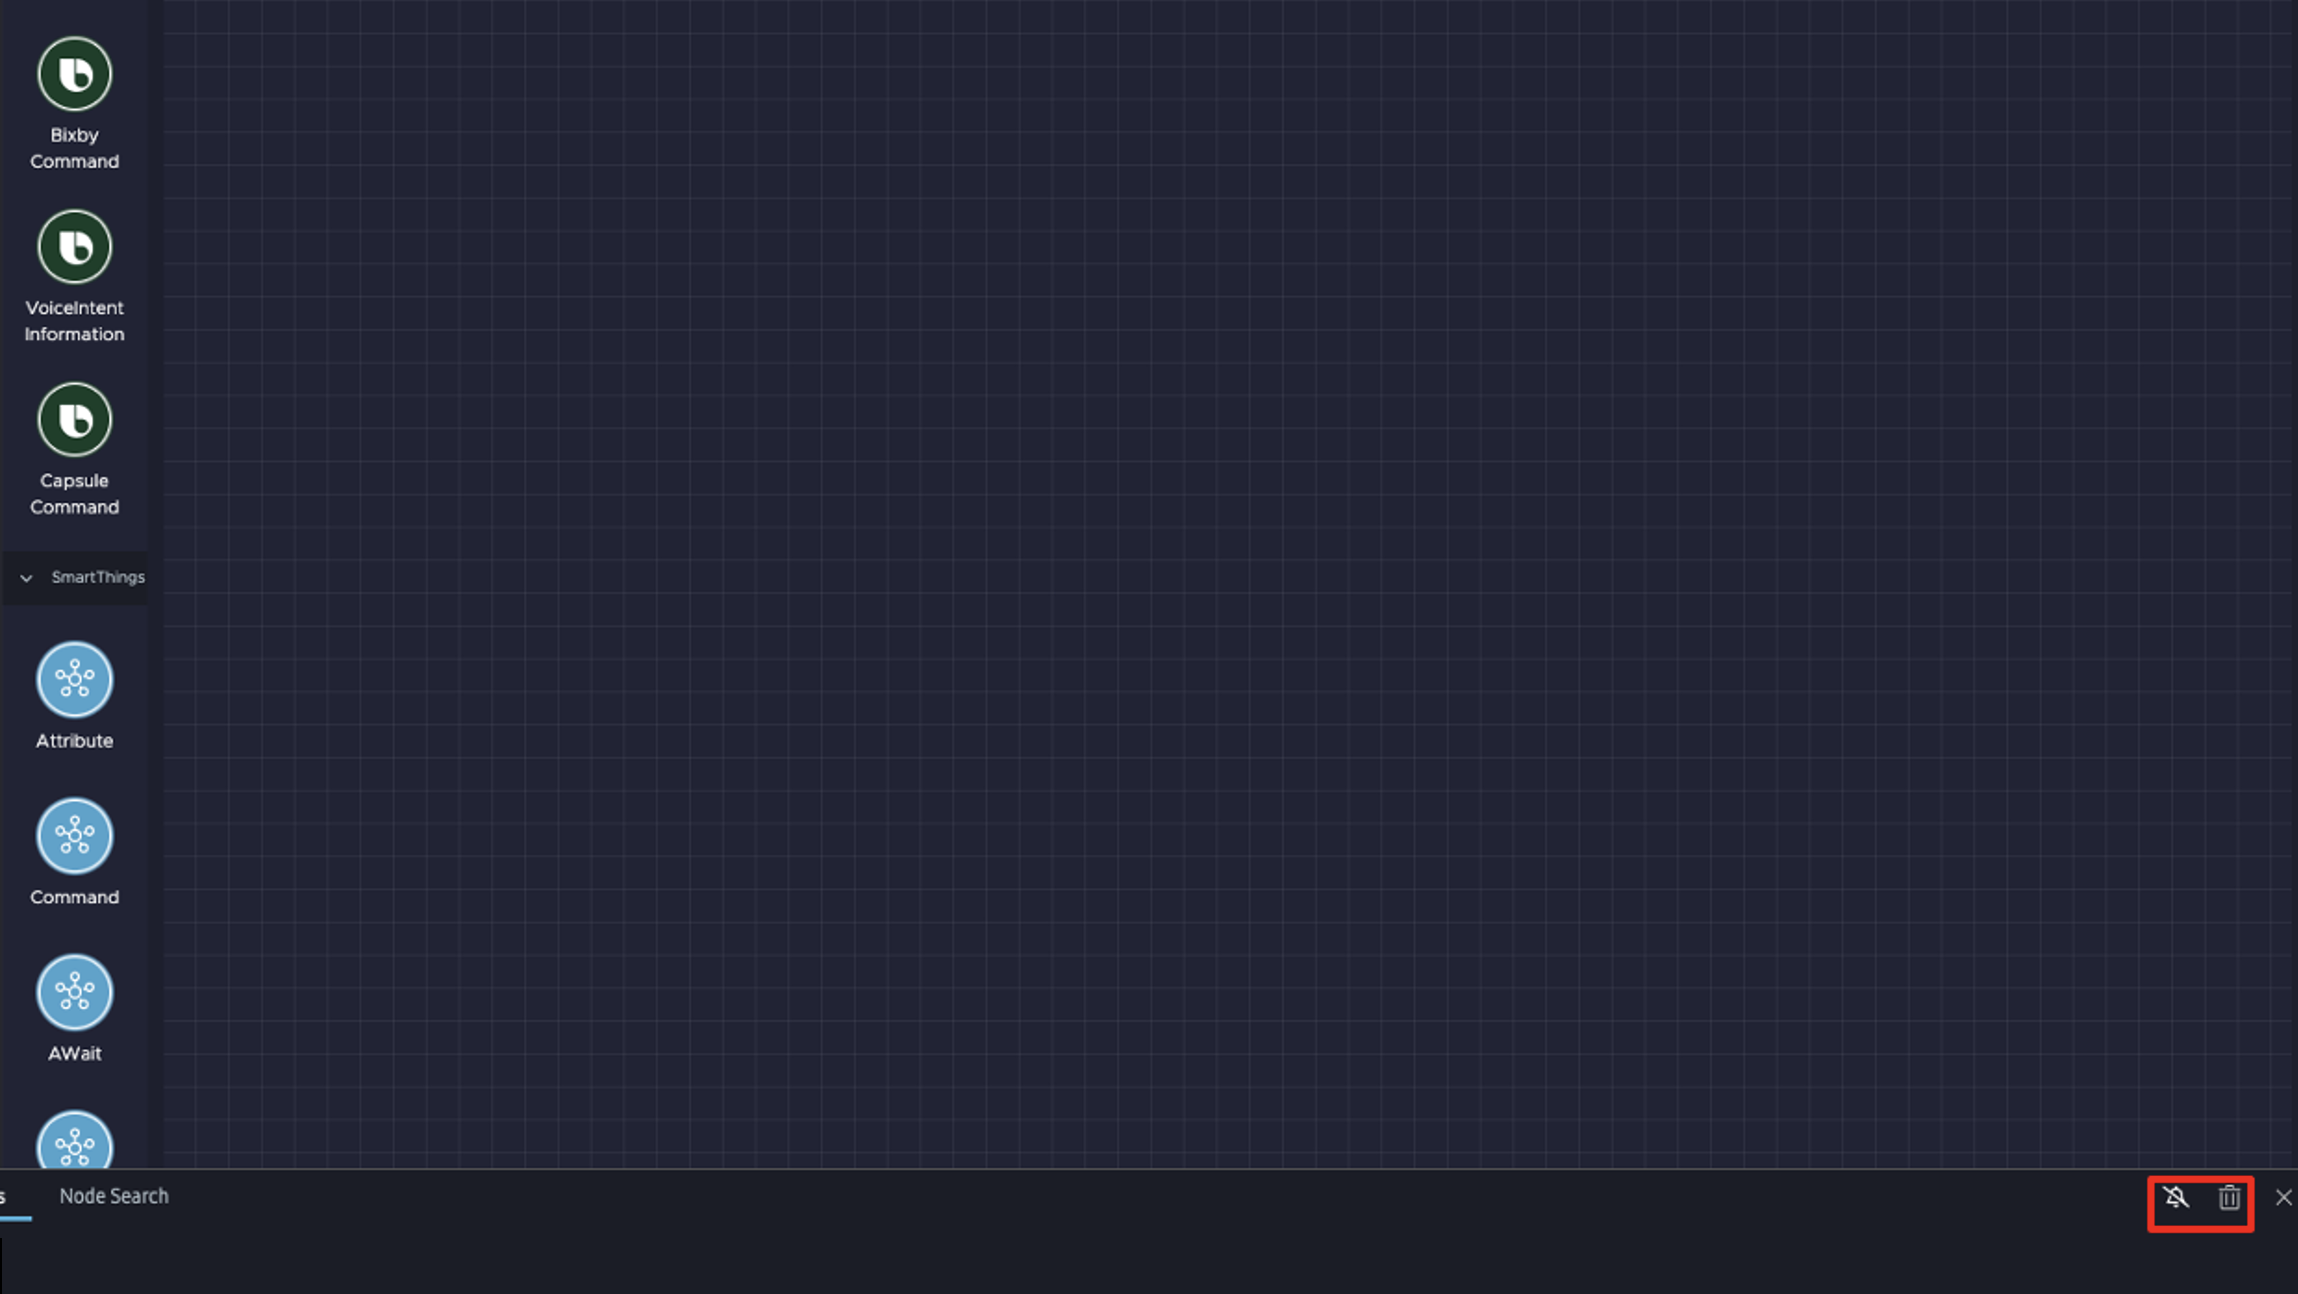
You will see a Disable Notifications and a Clear Notifications icon appear in the bottom right corner.
If using a Mac, use the Chrome or Firefox browser to enable and view push notifications.
After enabling push notifications in BHS, set up push notifications on your mobile device. To set up these notifications, do the following:
- On your mobile device, log in to SmartThings with your Samsung Account.
- Enable Developer Options if you haven't already.
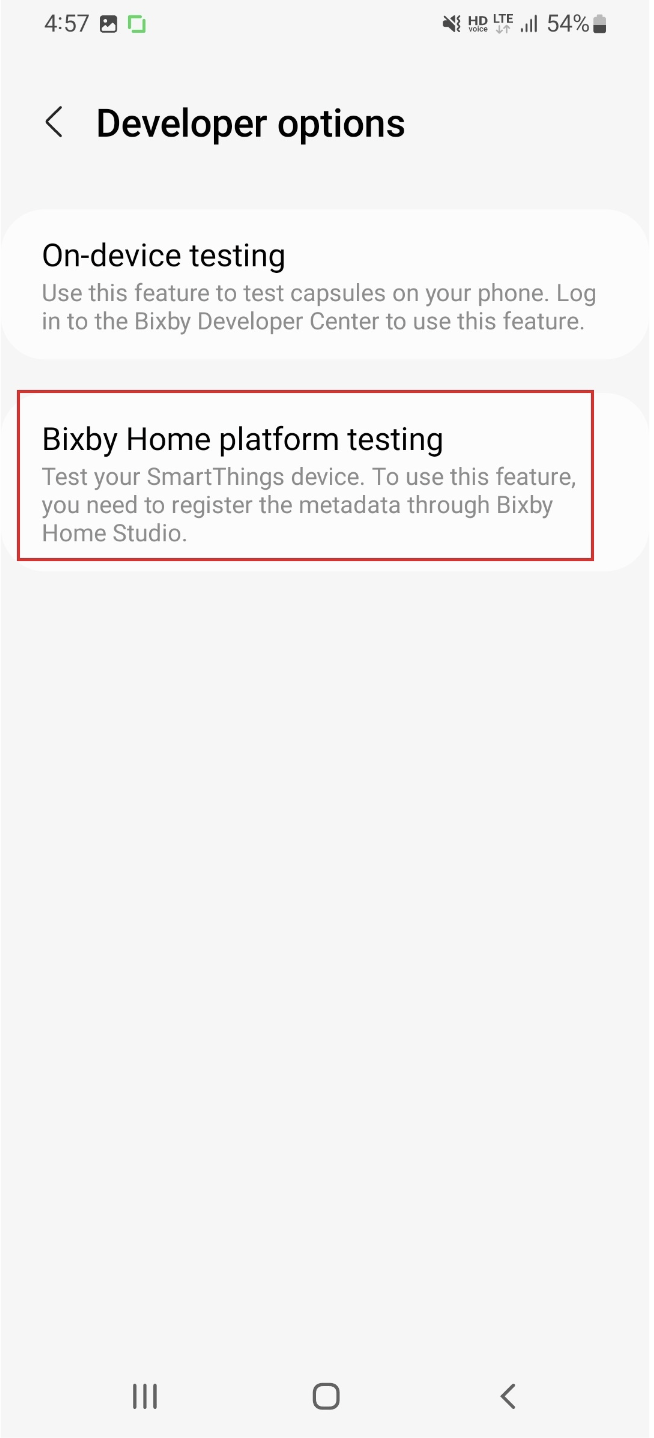
- In the Developer Options page, tap on Bixby Home platform testing.
- Enable the Test Mode option.
Send Push Notifications
After enabling and setting up push notfications, you can send push notifications to BHS. To send push notifications, do the following:
- On your mobile device, give Bixby a command, such as "Hi, Bixby. Turn on the light."
- Afterwards, you should receive a notification of the execution result in BHS, under the console's Notifications tab.
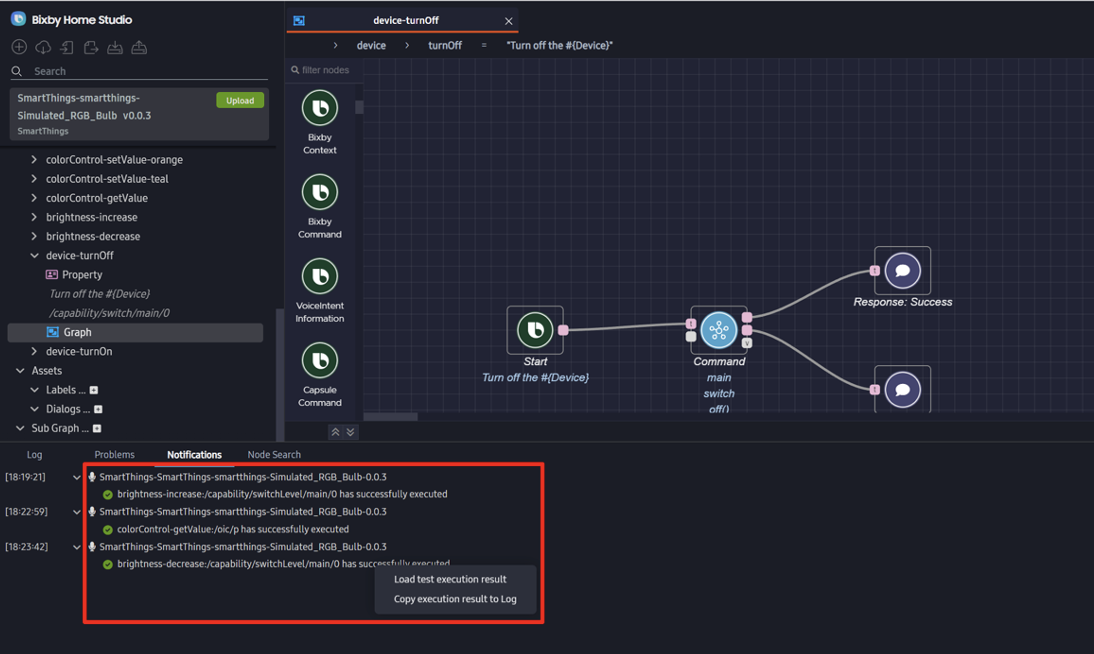
Manage Execution Results
You can load or copy execution results in the Notifications tab.
- Hover over a notification with your cursor, which opens a menu to the right.
- Make a selection:
- To load and view the execution graph, click "Load test execution result."
- To view the execution result in the Log tab, click "Copy execution result to Log".
You can pop the console out of the main editor window into a separate window to more easily read the console information while working on your metadata graphs.
Also, you can see a notifications indicator in the status bar.

Test Metadata
After you've successfully enabled on-device testing, you can test your metadata.
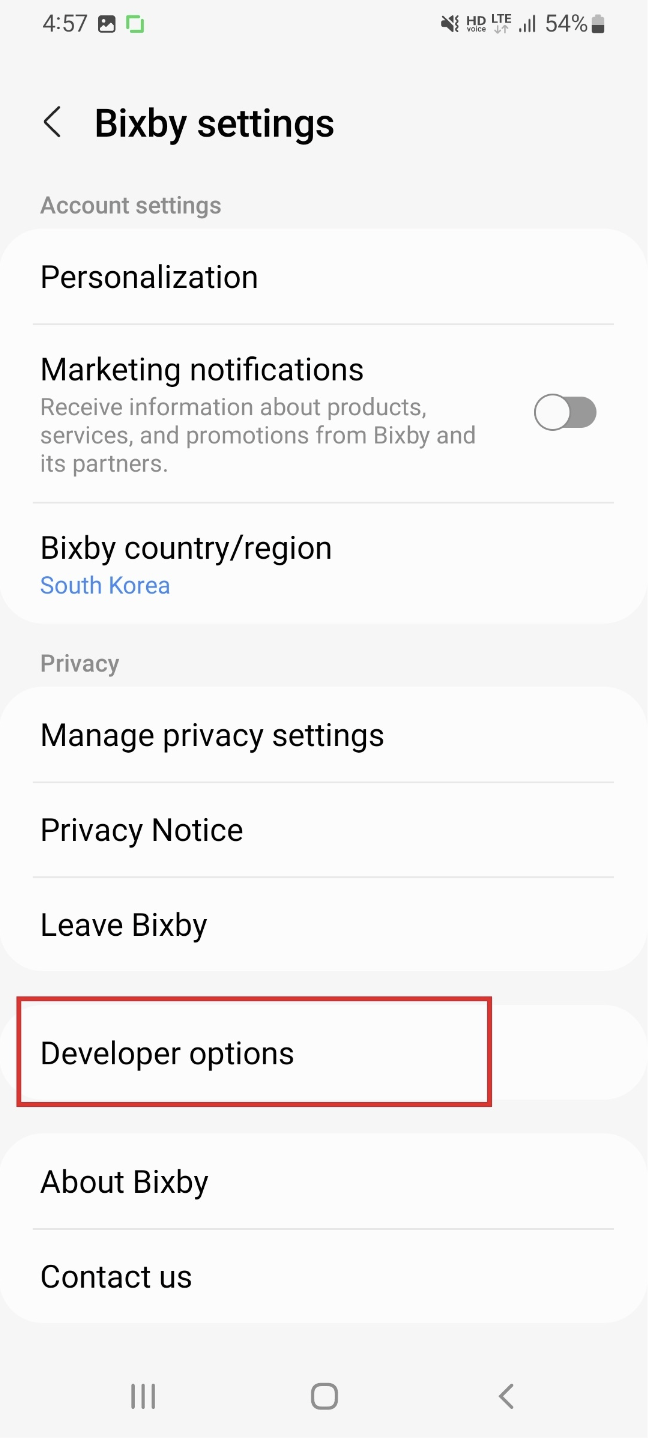
- Go to the Bixby settings screen and tap the now-visible Developer options.
- On the Developer options screen, tap Bixby Home platform testing. The Bixby Home platform testing screen will appear. (The On-device testing option only applies to developers who are testing Bixby capsules.
- To enable testing, turn on Test mode.
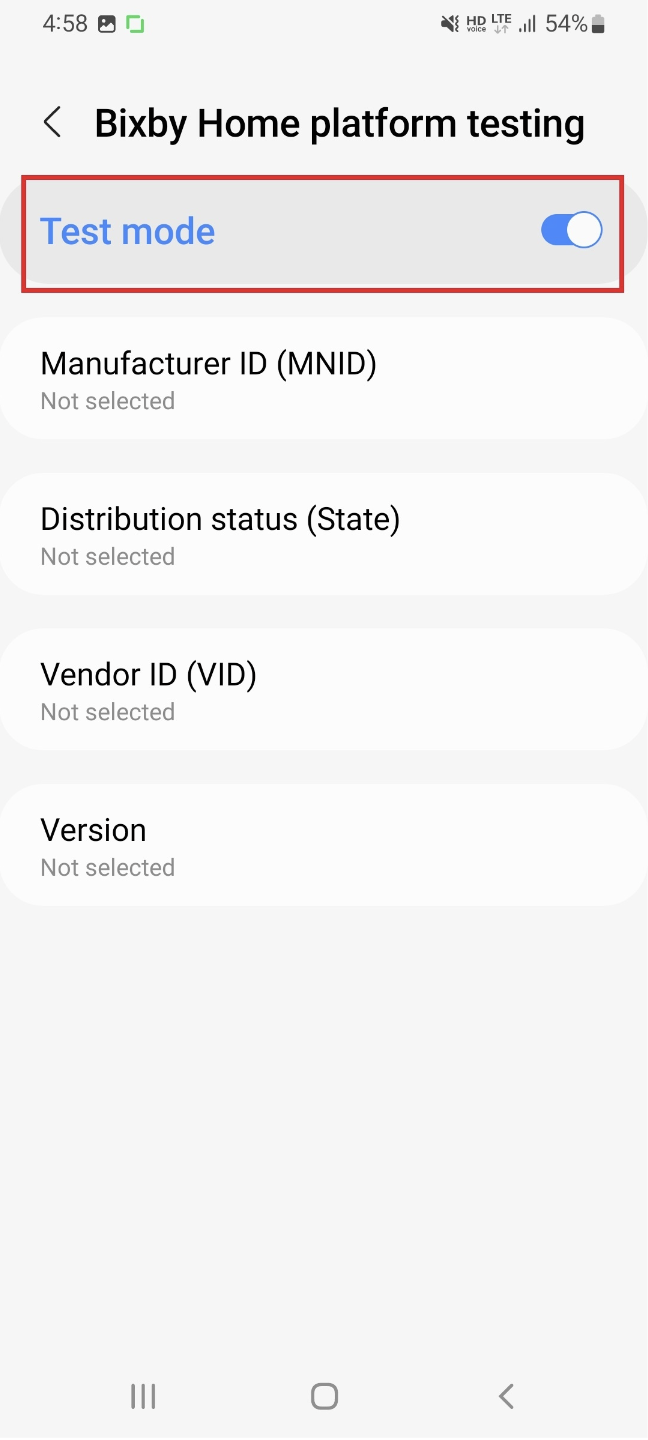 Now you can select metadata (MNID, State, VID, Version) on your mobile device.
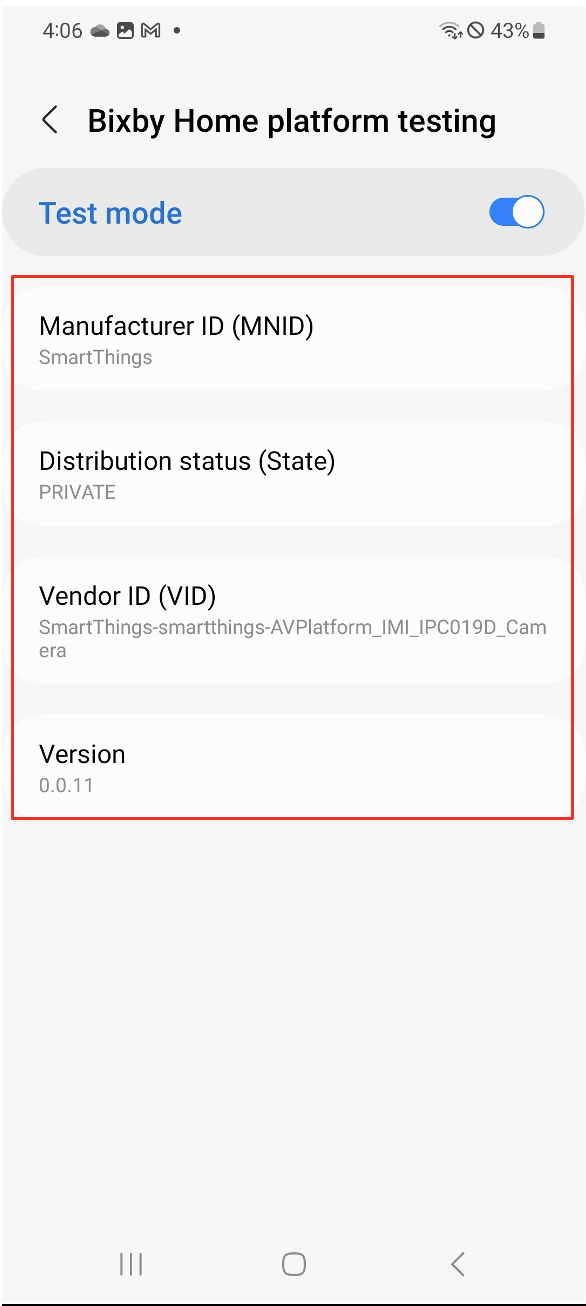
- Tap a metadata category, such as MNID or Version, so that a new screen appears with multiple radio button options.
- Select the desired option and then tap Select.

Once you've made your selections, you can start on-device testing. Return to the Bixby home screen and test utterances for your metadata.
To use Bixby regularly like an end-user, you need to disable Bixby Home Platform testing.
Test Virtual Devices
If you don't have an actual device to test on, you can create a virtual device. There are two kinds of virtual devices:
- Virtual devices created within Bixby Home Studio. These support fewer capabilities, but allow you to perform on-device testing.
- Virtual devices created within SmartThings. These support more capabilities, but do not allow on-device testing.
To create a virtual device within BHS, take the following steps:
- Check Use virtual device management in the BHS settings screen.
- Click the BHS Device tab. With virtual device management enabled, configurations for virtual devices and virtual device profiles will be visible.
- Create a new virtual device profile, if one does not exist. Your account must be configured with a valid manufacturer ID (MNID) to create a new profile.
- Create a virtual device with an existing virtual device profile.
To create a virtual device within SmartThings, see the SmartThings Community FAQ Creating Virtual Devices with the new architecture.
Video Tutorial: Simulated Devices
The following is a video tutorial on how to set up a simulated device for BHS.