
Creating Subgraphs
This guide assumes familiarity with the following information:
- The basics of the editor (Using Bixby Home Studio)
- The
Responsenode (Creating a Bixby Response Using Device Status)
In this guide, you'll learn how to use the Subgraph feature to modularize a graph and separate functionality into distinctive and reusable sections. This feature also reduces the complexity of a graph. For example, you can create a subgraph to calculate a conversion, check a specific attribute like if the power is on, or get date information.
You'll also learn how to do the following:
- Create a subgraph action flow with the
Start Subgraph,Calculation,SetReturn SubGraph, andEnd Subgraphnodes. - Add your subgraph to the main graph with the
Call Subgraphnode.
The device used in this guide is a simulated thermostat. The example utterance "Set the cooling temperature of the thermostat to 23 degrees celsius" will be used to design an action flow for this voice command, which includes a subgraph that converts an input temperature value from Celsius to Fahrenheit. This will allow Bixby to set the thermostat's cooling temperature to the Fahrenheit equivalent of the Celsius input.
First, add a subgraph to the metadata.
Add a Subgraph to the Metadata
In order to create and use a subgraph with your device, you have to add the subgraph to the Sub Graph Manifest in the metadata sidebar.
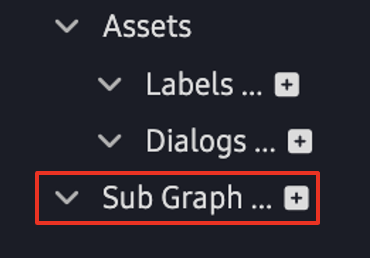
In the metadata sidebar on the left, click the add icon ![]() on the right of Sub Graph.
on the right of Sub Graph.
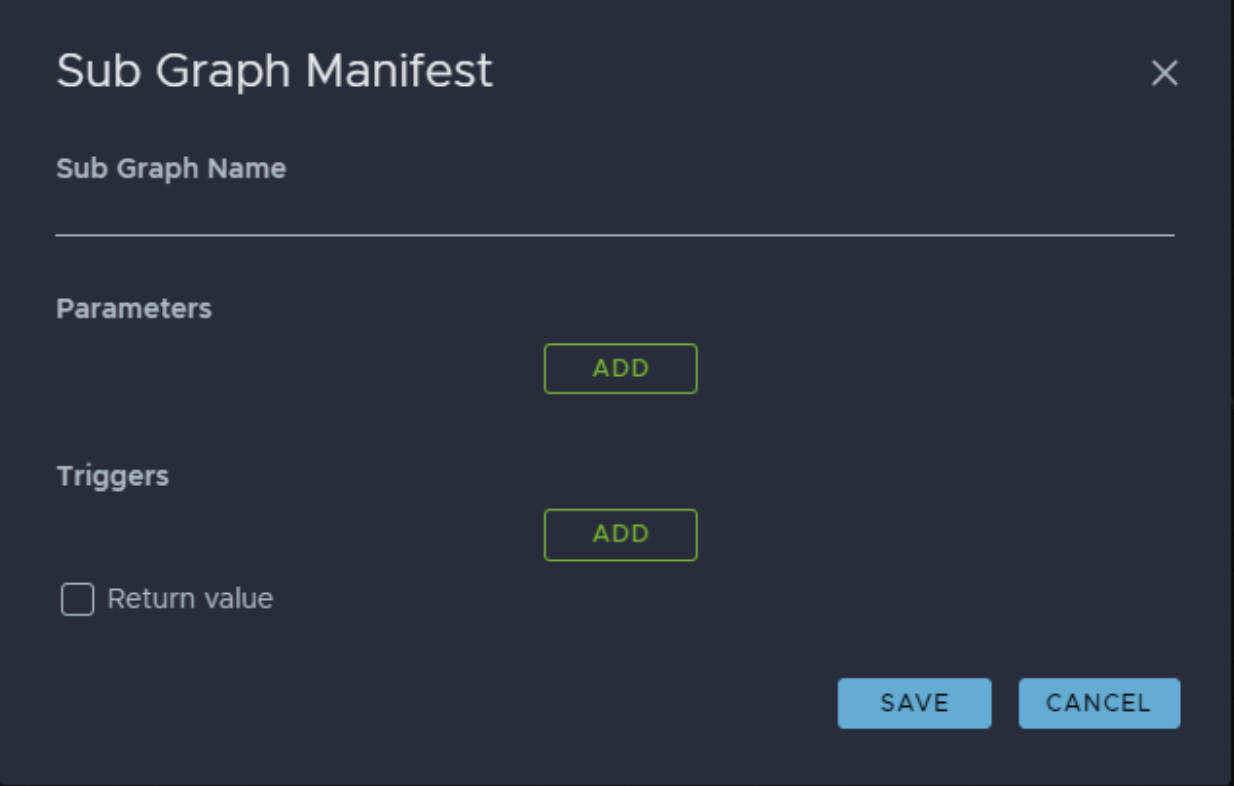
 A pop-up for the Sub Graph Manifest appears.
Next, customize the subgraph.
Customize a Subgraph
This section defines the parameters being passed to your subgraph and what information is returned by it.
- In the Sub Graph Manifest, type a Sub Graph Name and click SAVE. This example uses the Sub Graph Name
ToFahrenheit. This name shows up under theCall Subgraphnode, which will be called in the main graph.
- To the right of Parameters, click ADD.
- Select Parameters.
- Type a Parameter Name for the dynamic input value. This example uses
TempInCelsius. Each parameter you add becomes an input port on theCall Subgraphnode. - Select a Parameter Type from the menu, such as
Integer.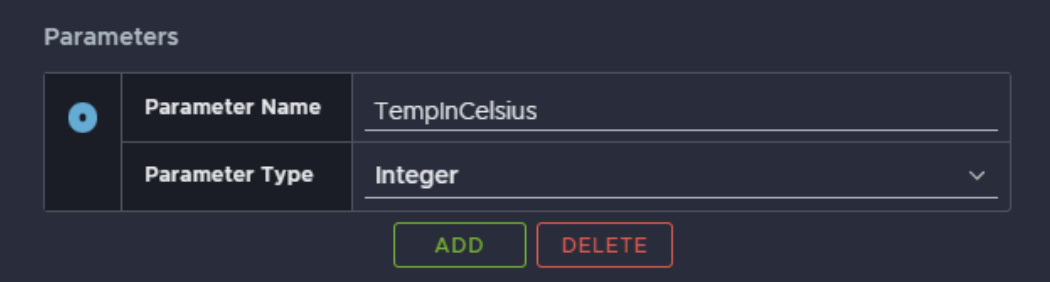
- To the right of Triggers, click ADD.
- Select Trigger Name.
- Type a Trigger Name. This example uses the name
main. Each trigger you add becomes a trigger port on theCall Subgraphnode.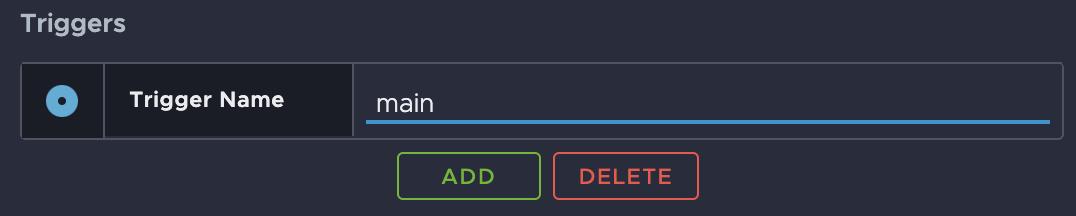
- Check the box for Return value. This ensures that Bixby returns the resulting value from the subgraph.

Now, you can create an action flow for the subgraph using relevant nodes.
Create the Subgraph's Action Flow
Subgraphs can be used in any main graph. With a subgraph, you can perform all functions available in a main graph, with the exception of creating Bixby responses. The subgraph editor doesn't have Response nodes.
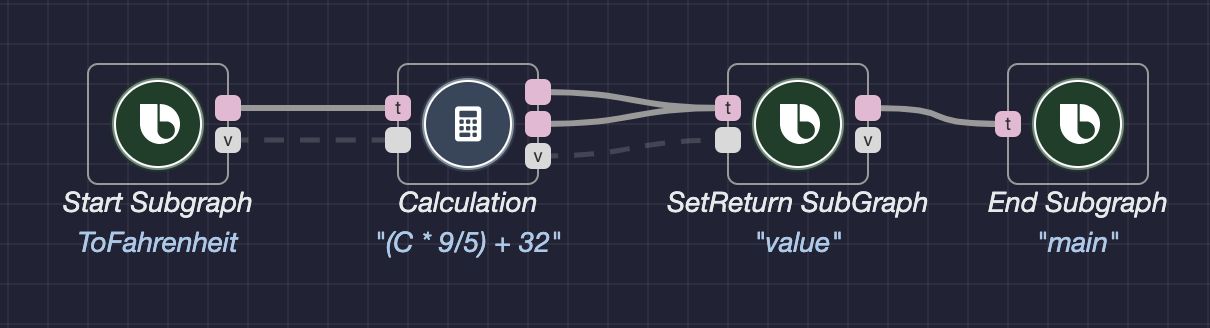
- Add a
Start Subgraphnode, which initiates the execution of a subgraph's action flow. - To test a subgraph, configure the
Start Subgraphnode with a default parameter value by clicking on the node and typing the value under the appropriate parameter. This example uses the parameter value23for theTempInCelsiusparameter.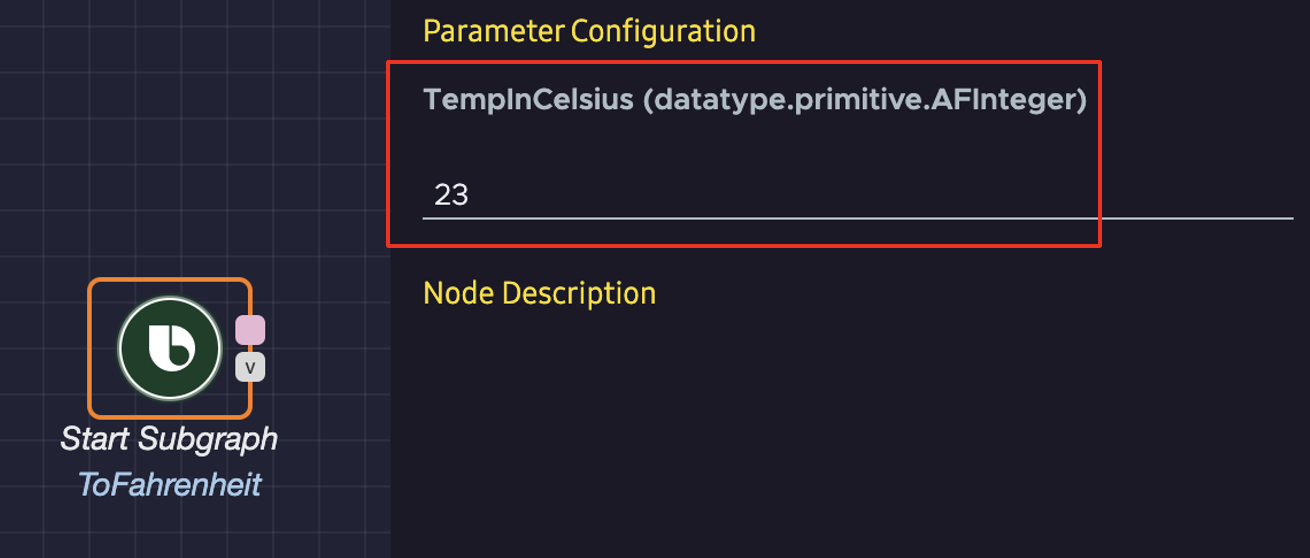
- Add additional nodes as needed to do a process, such as
CommandorSet Variable. This example uses aCalculationnode configured with the mathematical expression for converting a Celsius temperature value into a Fahrenheit one.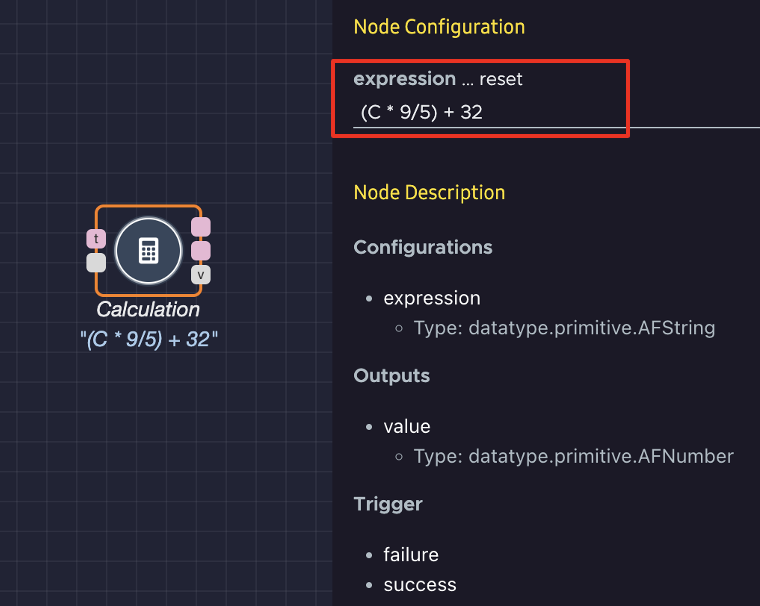
- Add a
SetReturn SubGraphnode, which sets the value the graph will return. - Configure the
SetReturn SubGraphnode with appropriate information. This example uses value as thereturnName.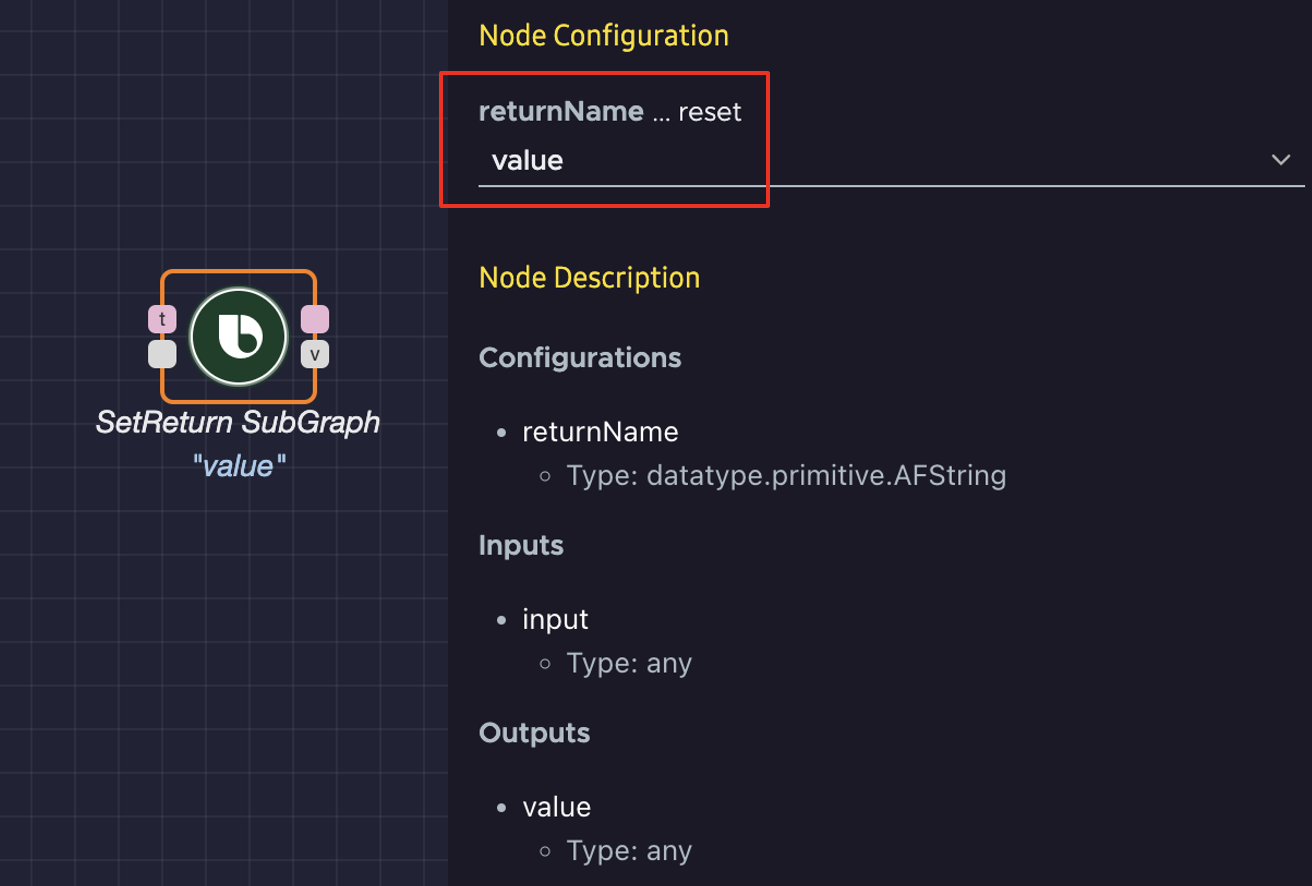
- Add a
End Subgraphnode, which sets the port to trigger upon completion of subgraph execution. - Configure the
End Subgraphnode with appropriate information. This example uses main as thetriggerName.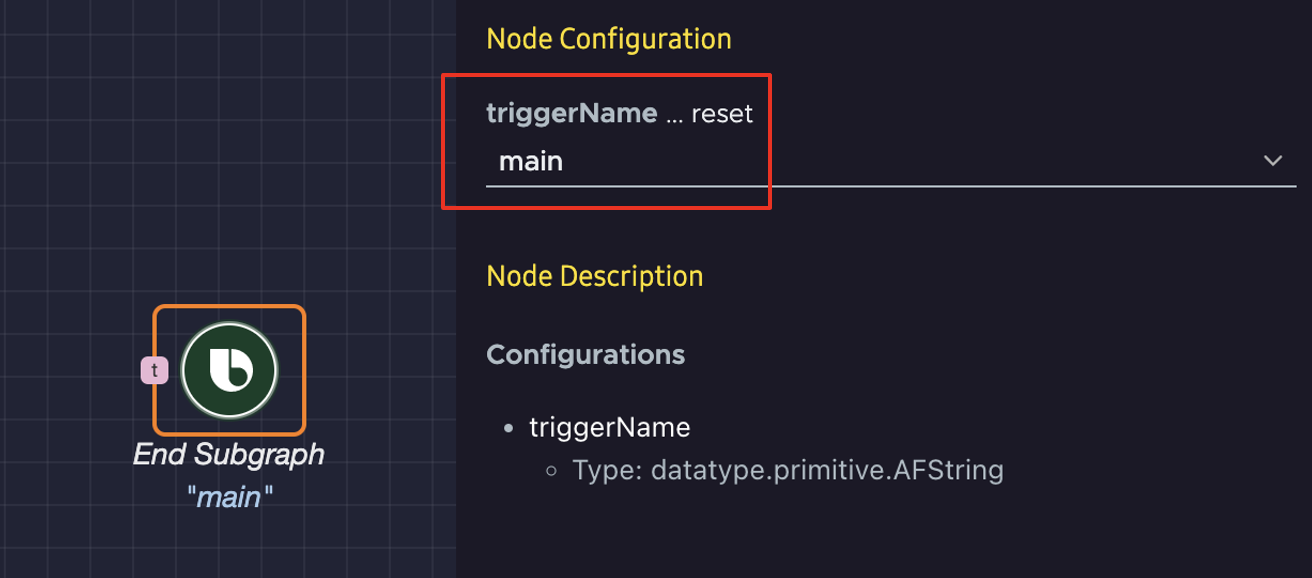
- Connect the nodes together as needed. This example shows a subgraph for converting a Celsius input value to a Fahrenheit one.
Next, test your subgraph.
Test Your Subgraph
To test the action flow, click the Try It button at the top right of the editor window. The flow editor should look like this:
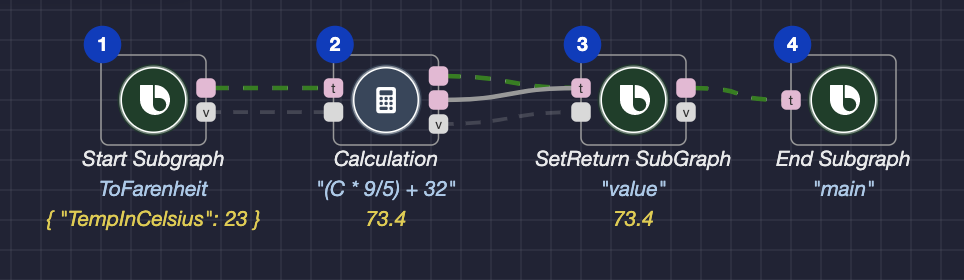
In this example's test run, Bixby first fetches the input value, which is 23 degrees Celsius. Then, Bixby uses the mathematical expression (C * 9/5) + 32 to convert 23 degrees Celsius to 73.4 degrees Fahrenheit. Then, Bixby returns the value of 73.4 and the execution process finishes.
You can now use the subgraph in your main graph's action flow.
Add Your Subgraph to The Main Graph
Incorporating a subgraph helps reduce the complexity of a main graph by allowing one node, Call Subgraph, to fetch the value returned from the operation performed in a specific subgraph.
To incorporate a subgraph into your main graph's action flow, do the following:
- If you haven't already, add the relevant voice intent to the Metadata profile for your device.
- Under the relevant voice intent, click Graph to switch to the main graph tab for it, which will be labeled with that voice intent.
- Add a
Startnode. - To test an action flow, configure the
Startnode with default parameter values. This example uses a default integer value of23for thecoolingTemperatureparameter and a default string value ofcfor thepredefinedCoolingTemperatureUnitparameter.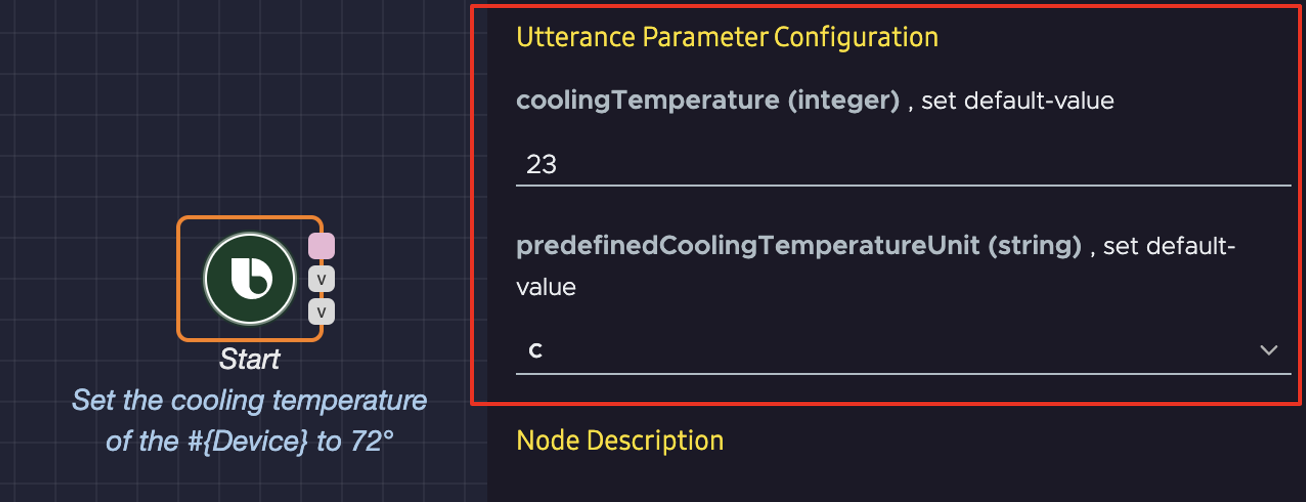
- Add a
Call Subgraphnode, which invokes a specified subgraph. - Configure the
Call Subgraphnode by clicking on the node and selecting agraphIdfrom the menu. This example calls theToFahrenheitSub Graph created earlier.
- Add a
Response: Successnode. - Connect the nodes together as needed. This example shows an action path that calls the
ToFahrenheitSub Graph: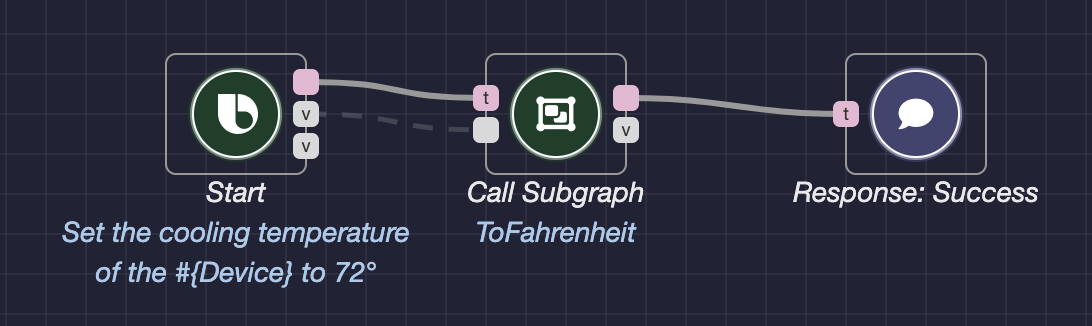
Test Your Action Flow
To test the action flow, click the Try It button at the top right of the editor window. The flow editor should look like this:
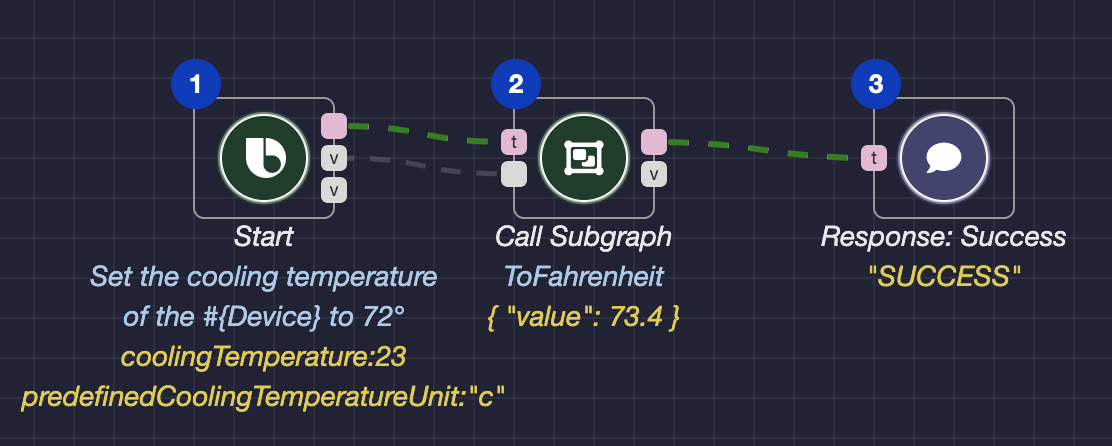
In this example's test run, Bixby first fetches the input value, which is 23 degrees Celsius. Next, Bixby fetches the value returned from the subgraph, which is 73.4 degrees Fahrenheit. Then, Bixby sets the device's cooling temperature to 73.4 degrees Fahrenheit. Finally, Bixby responds to the user by saying "SUCCESS."