
Data Conversion Using a JSON Query Node
This guide assumes familiarity with the following information:
- The basics of the editor (Using Bixby Home Studio)
- The
Commandnode (Sending a Device Command) - The
Constantnode (Creating a Bixby Response Using a Device Status) - The
Equal Comparisonnode (Concatenating Actions) - The
Responsenode (Creating a Bixby Response Using a Device Status)
In this guide, you'll learn how to get specific values in a usable format from raw JSON data using the JSON Query node. The device used in this guide is a SmartThings-enabled speaker, with the example utterance "Increase the volume of the speaker by 50".
For this voice command, you must get the result of a command and give the user the information. Sometimes the output of nodes (responses) are in JSON format. To extract information from these responses, you can use the JSON Query node.
Here is an example JSON response:
{
  "results": [
    {
      "id": "6a2e9434-5b19-47s0-92a8-685de69106a3",
      "status": "ACCEPTED"
    }
  ]
}
Extract Information With a JSON Query Node
To start extracting information, you first need to build your action flow with a Start node and a Command node, like in the Sending a Device Command guide.
- Connect the
Startnode's main port to theCommandnode's trigger port, and theStartnode'svolumeLevelvalue port to theCommandnode's Level port.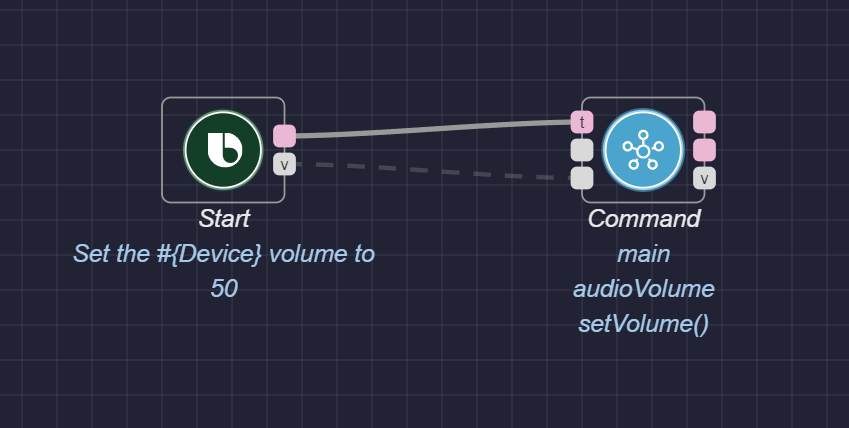
- Add a JSON Query node.
- Click the
JSON Querynode to open the Node Configuration menu on the right.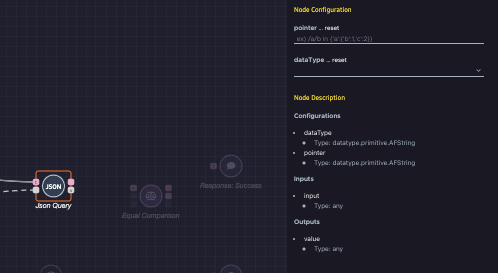
- Configure the node by entering a pointer value and selecting a dataType from the menu. This example uses the pointer value
/results/0/statusand the data typeString. This pointer value selects thestatusproperty of theresultsand parses thestatusproperty from the response JSON. The JSON Pointer configuration selects a value with the JSON Pointer specification.
- Connect the
Commandnode's success port to theJSON Querynode's trigger port, and its value port to theJSON Querynode's input port. - Add an
Equal Comparisonnode and configure it to use theequalTooperator. - Connect the
JSON Querynode's main port to theEqual Comparisonnode's trigger port, and its value port to theEqual Comparisonnode'sleftValueport. - Add a
Constantnode and configure it to theStringvalue of "ACCEPTED." - Connect the
Constantnode's value port to theEqual Comparisonnode'srightValueport. - Add a
Response: Successnode and aResponse: Execution Failednode to the action flow. - Connect the
Equal Comparisonnode's true port to theResponse: Successnode's trigger port, and its false port to theResponse: Execution Failednode's trigger port.
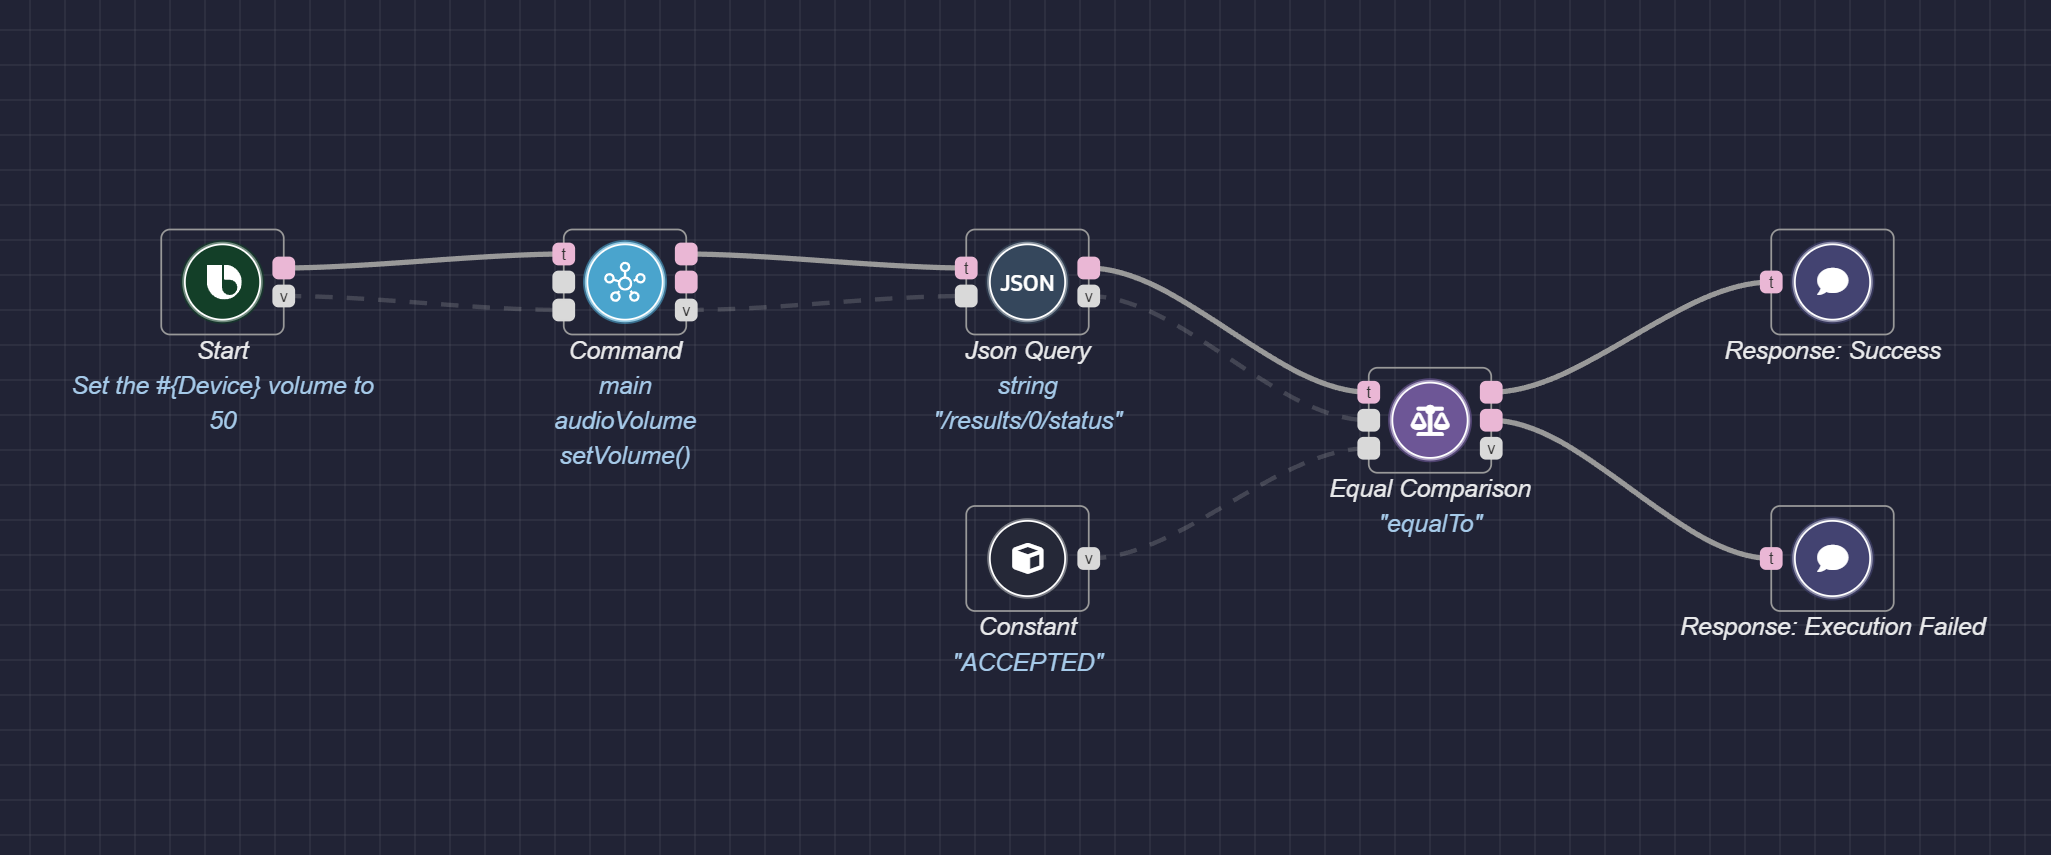
The following image shows the finished action flow:
The pointer defines the string syntax for identifying a specific value in a JSON object. Here's an example:
| Output Result Type | Input JSON (Example) | Pointer | Output |
|---|---|---|---|
| string or mixed | {
"id": "<uuid>",
"status": "ACCEPTED"
} | /status/ | "ACCEPTED" |
| JSON object | {
"results": {
"id": "<uuid>",
"status": "ACCEPTED"
}
} | /results/ | {
"id": "<uuid>",
"status": "ACCEPTED"
} |
| array | {
"results": [ {
"id": "<uuid>",
"status": "ACCEPTED"
} ]
} | /results/ | [ {
"id": "<uuid>",
"status": "ACCEPTED"
} ] |
| array object | {
"results": [ {
"id": "<uuid>",
"status": "ACCEPTED"
} ]
} | /results/0/status/ | "ACCEPTED" |
Test Your Action Flow
To test the action flow, click the Try It button at the top right of the editor window. The flow editor should look like this:
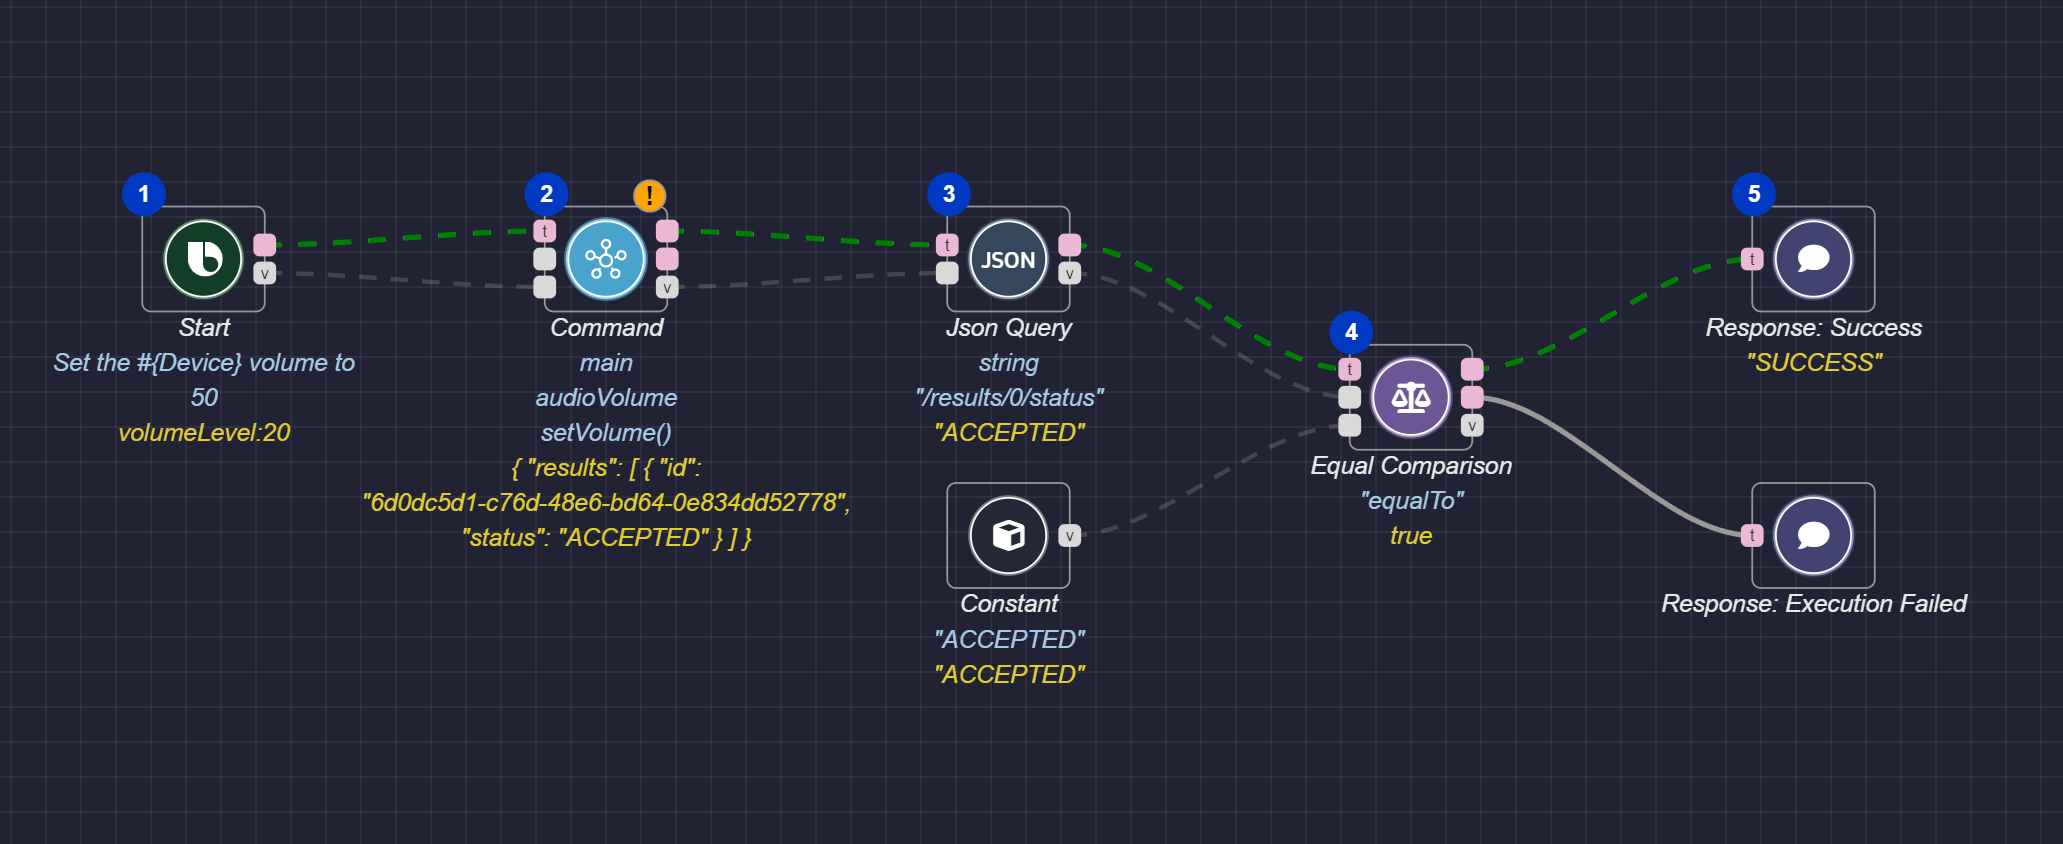
As shown in the example graph, the user's utterance value is 50. The user utterance "Increase the volume of the speaker by 50" executes the SmartThings Capabilities audioVolume command. For more information, see Sending A Device Command With an Argument.
For the audioVolume POST command, the server responds with JSON:
{
  "results": [
    {
      "id": "6d0dc5d1-c76d-48e6-bd64-0e834dd52778",
      "status": "ACCEPTED"
    }
  ]
}
The JSON Query node selects the status property of the results and parses the status property from the response JSON. Bixby then compares the status property output by the JSON Query node to the string "ACCEPTED" in the Constant node. The Equal Comparison node determines that these values are equal and triggers the "SUCCESS" response.
Additional Resources
The Node Recommendation feature enables you to get recommendations for next possible nodes, and can make it easier to create a graph.