
Quick Start Guide
Ready to integrate Bixby with your SmartThings device? This Quick Start Guide shows you the basics of Bixby Home Studio (BHS). You'll learn how to do the following:
- Launch the BHS editor to start building a logical action flow.
- Configure BHS settings.
- Create a new project and initial Voice metadata file for a SmartThings device for a single voice intent.
- Test your action flow in the BHS editor.
Let's get started and equip your device with Bixby intelligence!
The device used in this guide is a SmartThings-enabled light bulb. You'll use the example "Send a command to a SmartThings device" to create an action flow for the Voice command "Switch on the light." Once you've followed these steps, Bixby should be able to turn on the light with the Voice command "Switch on the light."
Launch the Editor
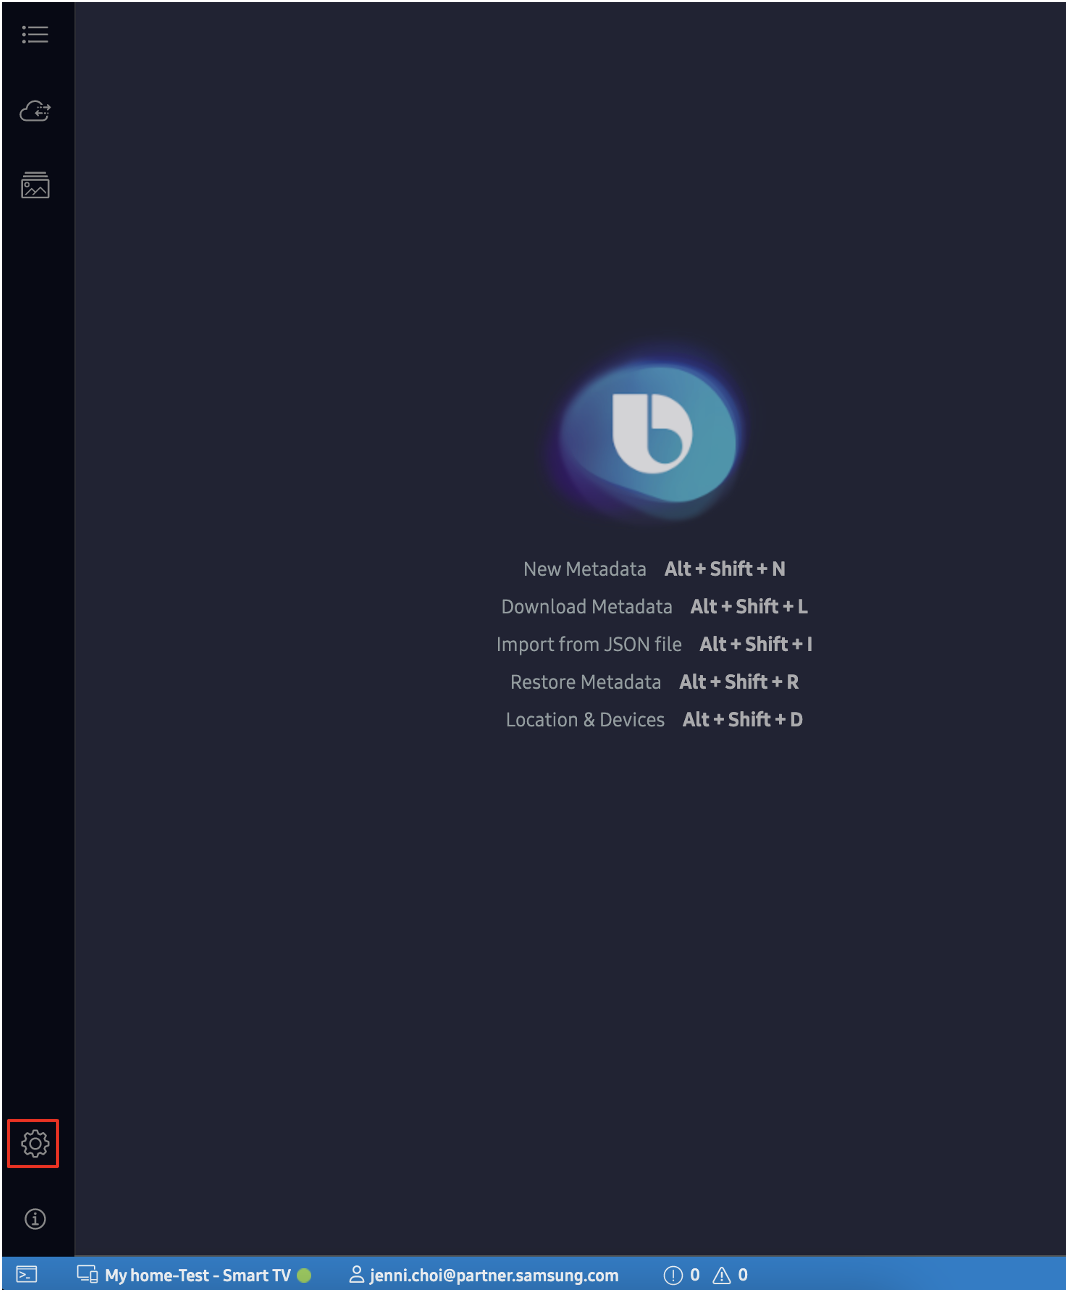
Launch BHS in your browser by visiting https://bhs.bixbydevelopers.com.
BHS displays the Settings window. If you're not already logged in to your Samsung Account, you'll receive a prompt to sign in.
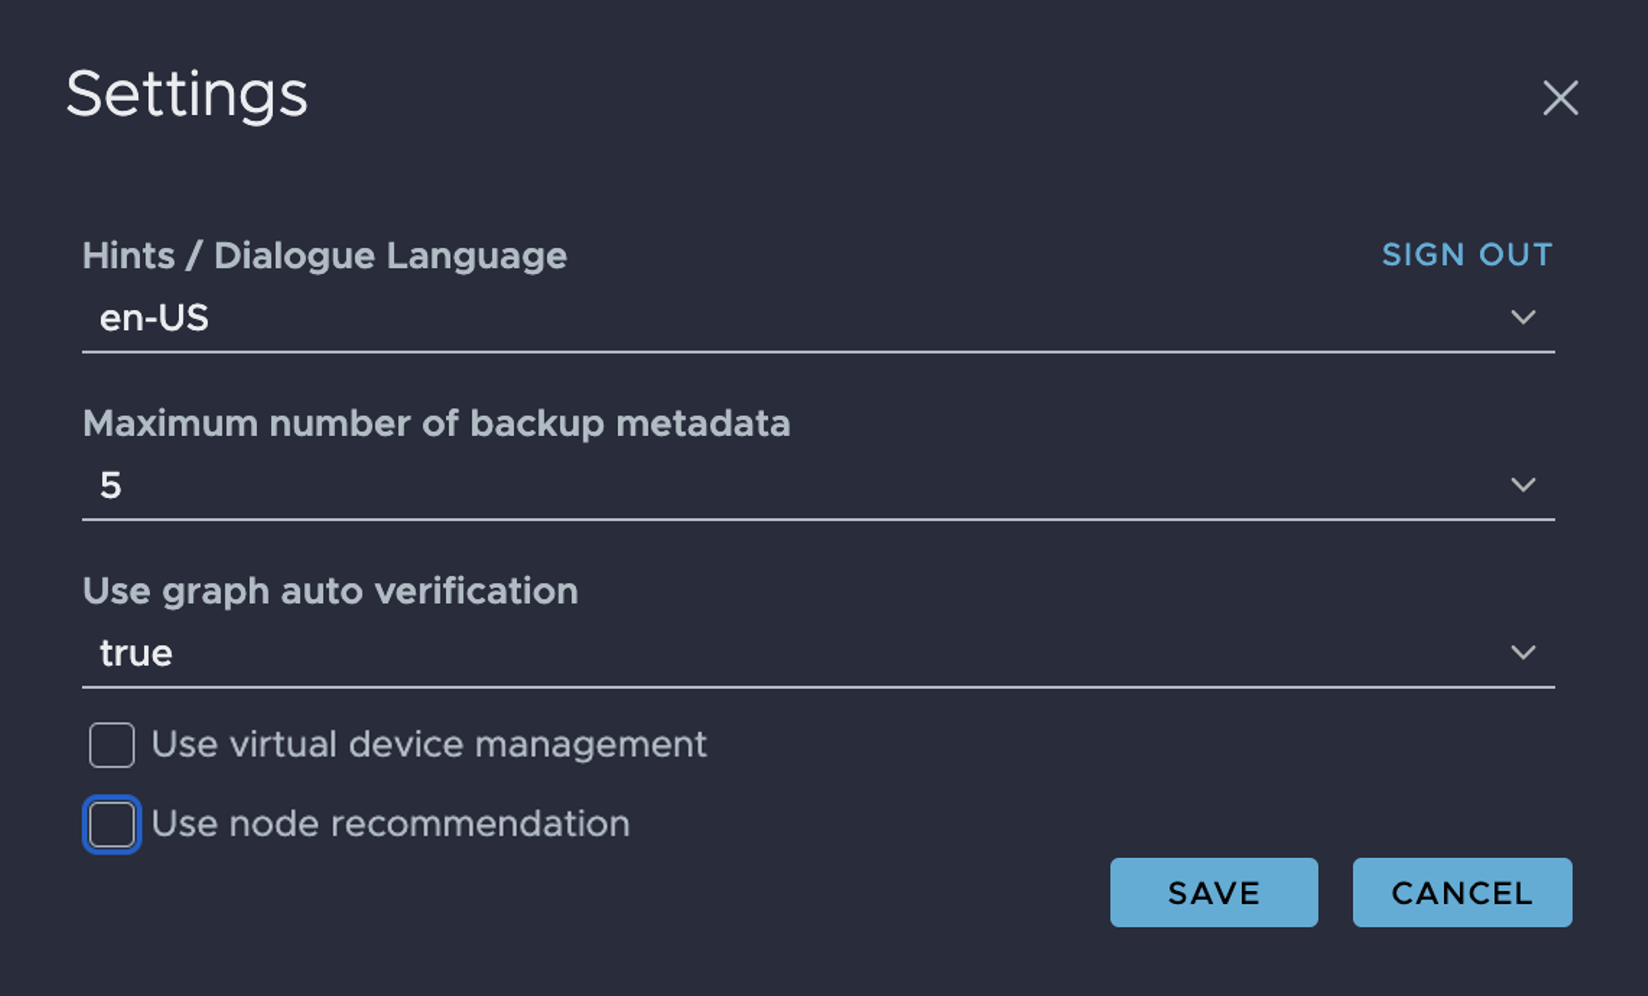
Configure BHS Settings
If BHS doesn't open the Settings window by default, click on the Settings icon in the sidebar on the left.
Here's how to configure BHS for your device:
- Select the preferred language for testing purposes under Hints/Dialogue Language.
- Select the maximum number of backups for metadata.
- Click on Save.
Create a New Project
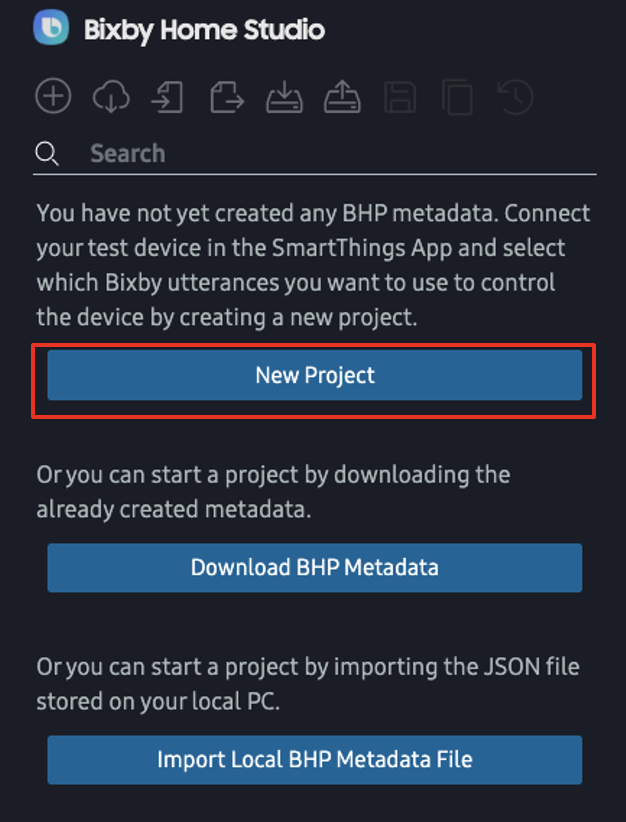
Since you haven't created a BHS Project yet, you'll be prompted to do one of the following:
- Create a new project.
- Download existing Bixby Home Platform (BHP) metadata for a project.
- Import a JSON metadata file from your local computer.
Click the New Project button. In the future, you can use the first three toolbar buttons on the top to create, download, or import new projects.
The next screen prompts you to fill in the project's device and metadata information.
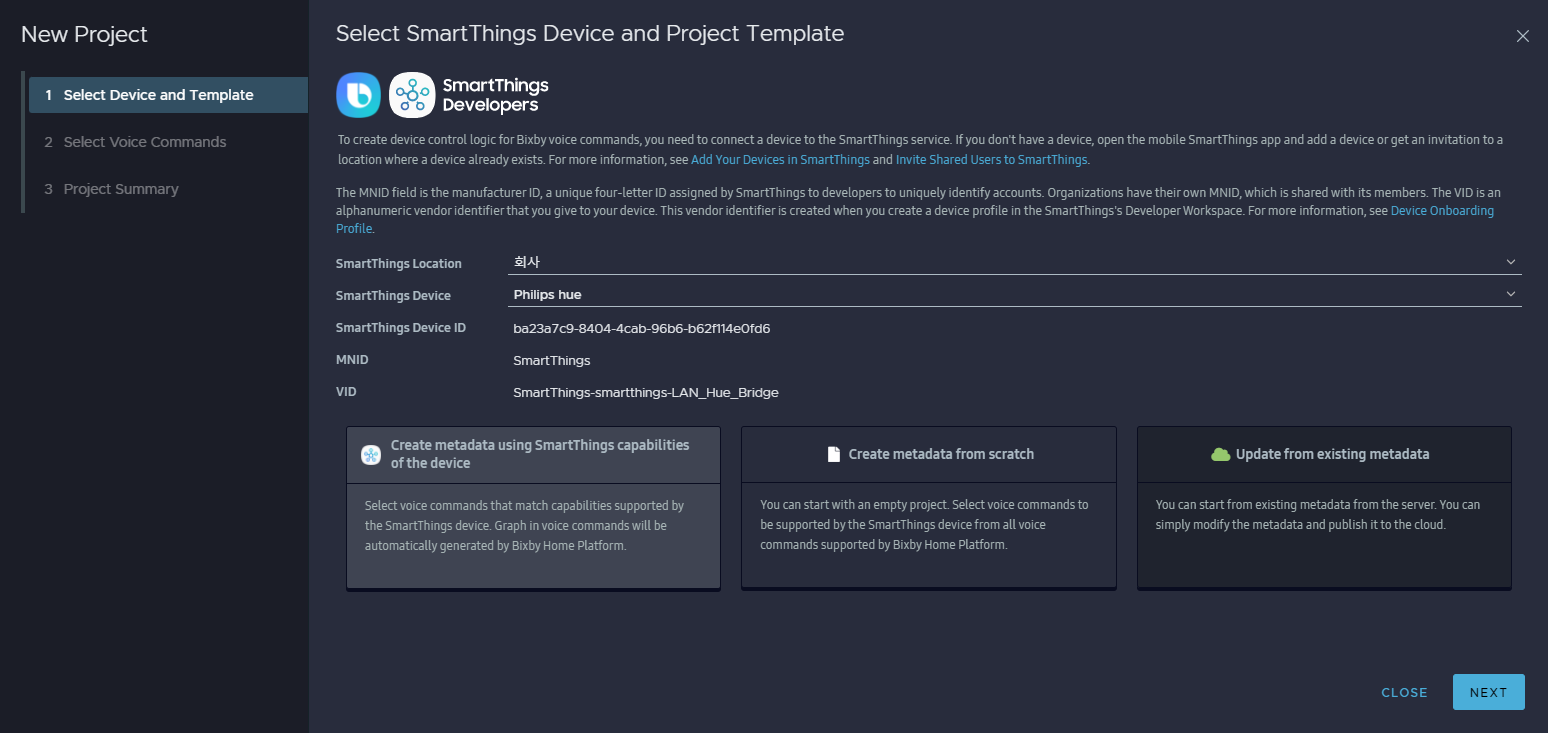
Fill in the following information:
- SmartThings Location: The location of the device you want to control, as configured in SmartThings.
- SmartThings Device: The device you want to control, as configured in SmartThings. If a device is offline, then “[offline]” will be displayed next to the device name. The default status is online.
Choose how to create the initial metadata from these options:
- Create metadata using SmartThings capabilities of the device. Choose this option if your device already supports existing SmartThings capabilities.
- Create metadata from scratch. Choose this option if you want to create all of your own metadata.
- Update from existing metadata. Choose this option if you're working with other people, so you can download an existing metadata file.
For the lightbulb example, select the first choice. Then click NEXT.
You can edit the metadata after the project is created, by clicking on the BHS Metadata icon in the left sidebar.
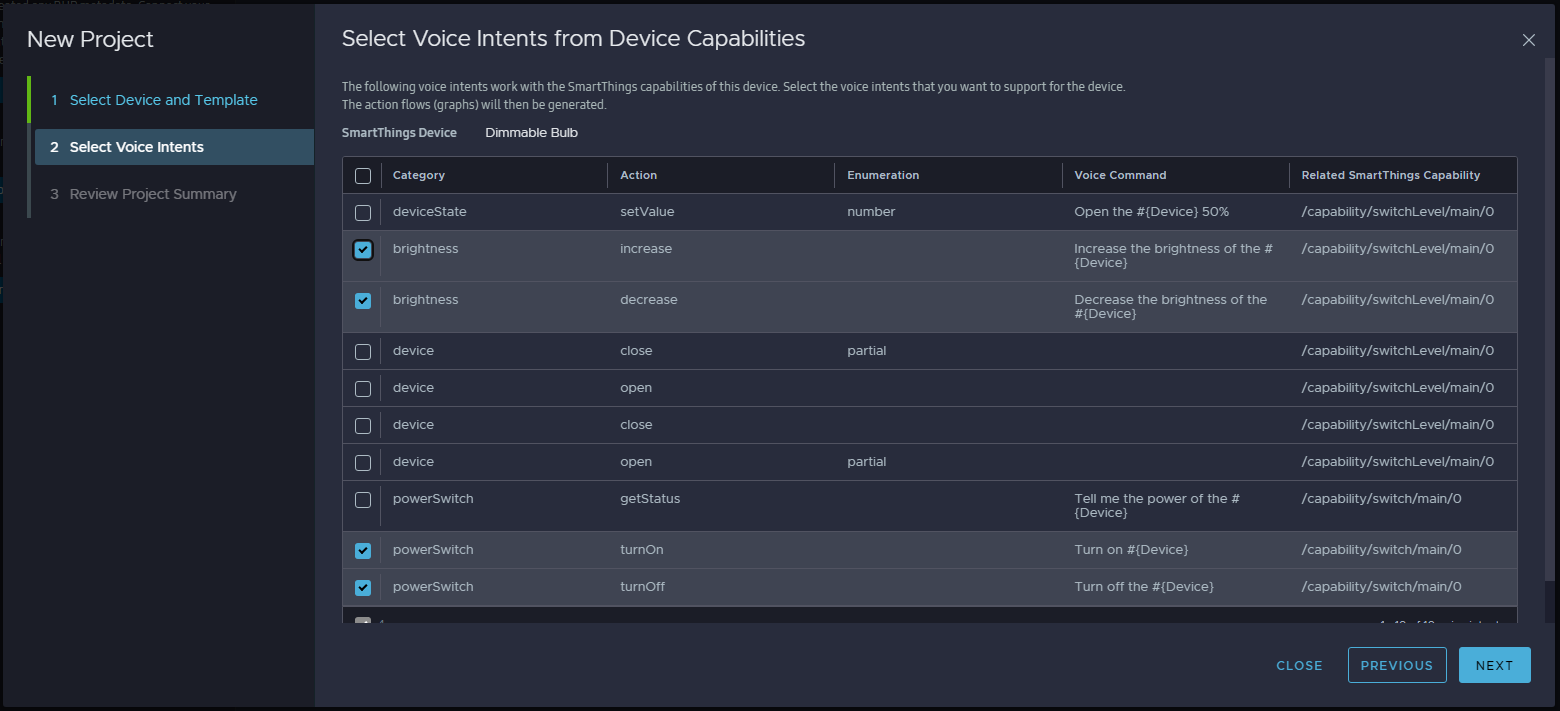
Select a Voice Intent
Now you're prompted to select voice intents from the selected device's existing capabilities. Voice intents are a set of user intentions that Bixby can understand from natural voice commands. Different capabilities support various voice intents.
For more information on voice intents, see the Voice Intents reference page.
If you select "Create metadata from scratch," you have to choose a Bixby Voice Category first. This pulls up all the related SmartThings device commands that are supported. Choosing "Create metadata using SmartThings capabilities of the device" helps narrow down the available commands you can work with.
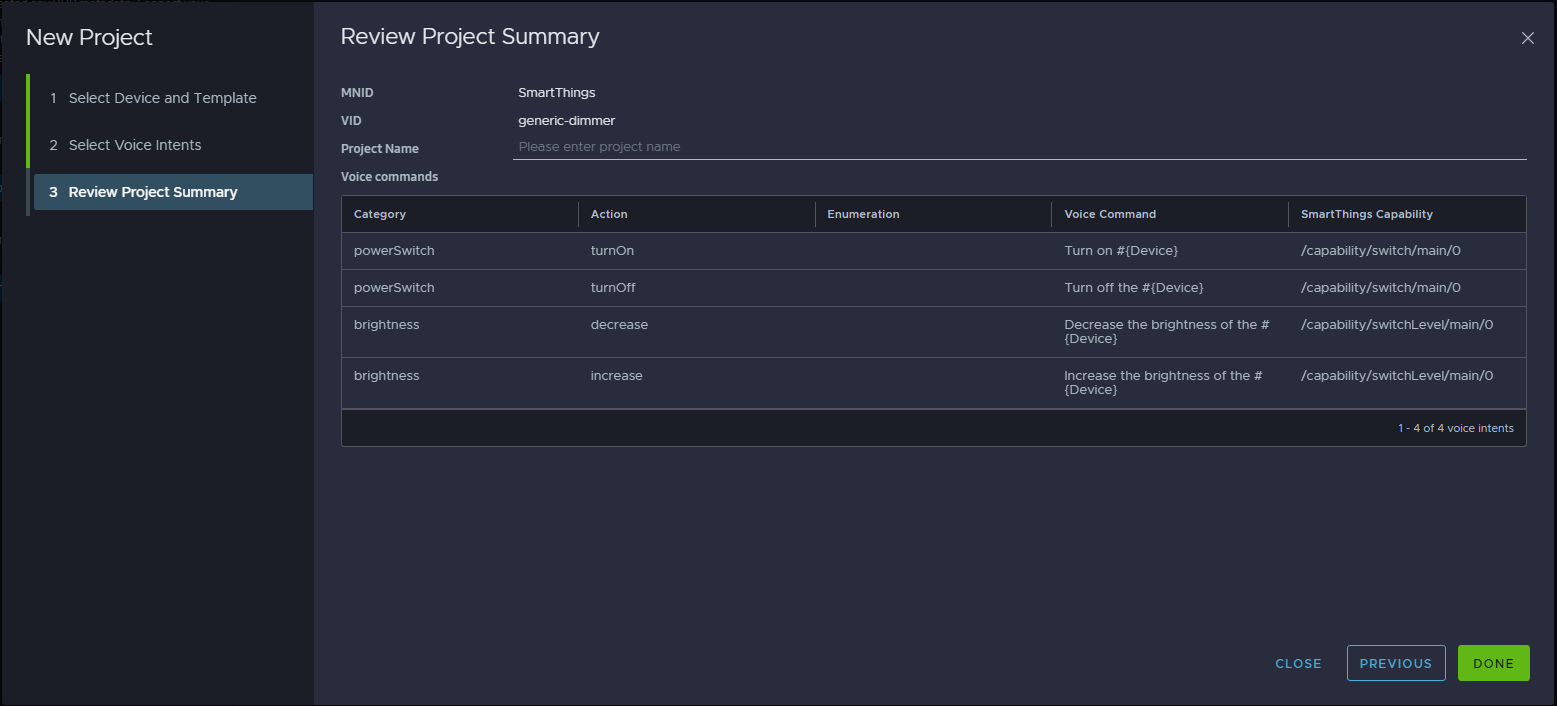
Select the voice commands you want to add to the project. Voice commands control the project's device. For this example, choose the "Turn on #{Device}" voice command. Then click NEXT. You can now view the Review Project Summary screen.
Add the project name and click DONE.
BHS now displays its main editor screen with the voice intents you added, displayed in the Voice Intents section of the left sidebar.
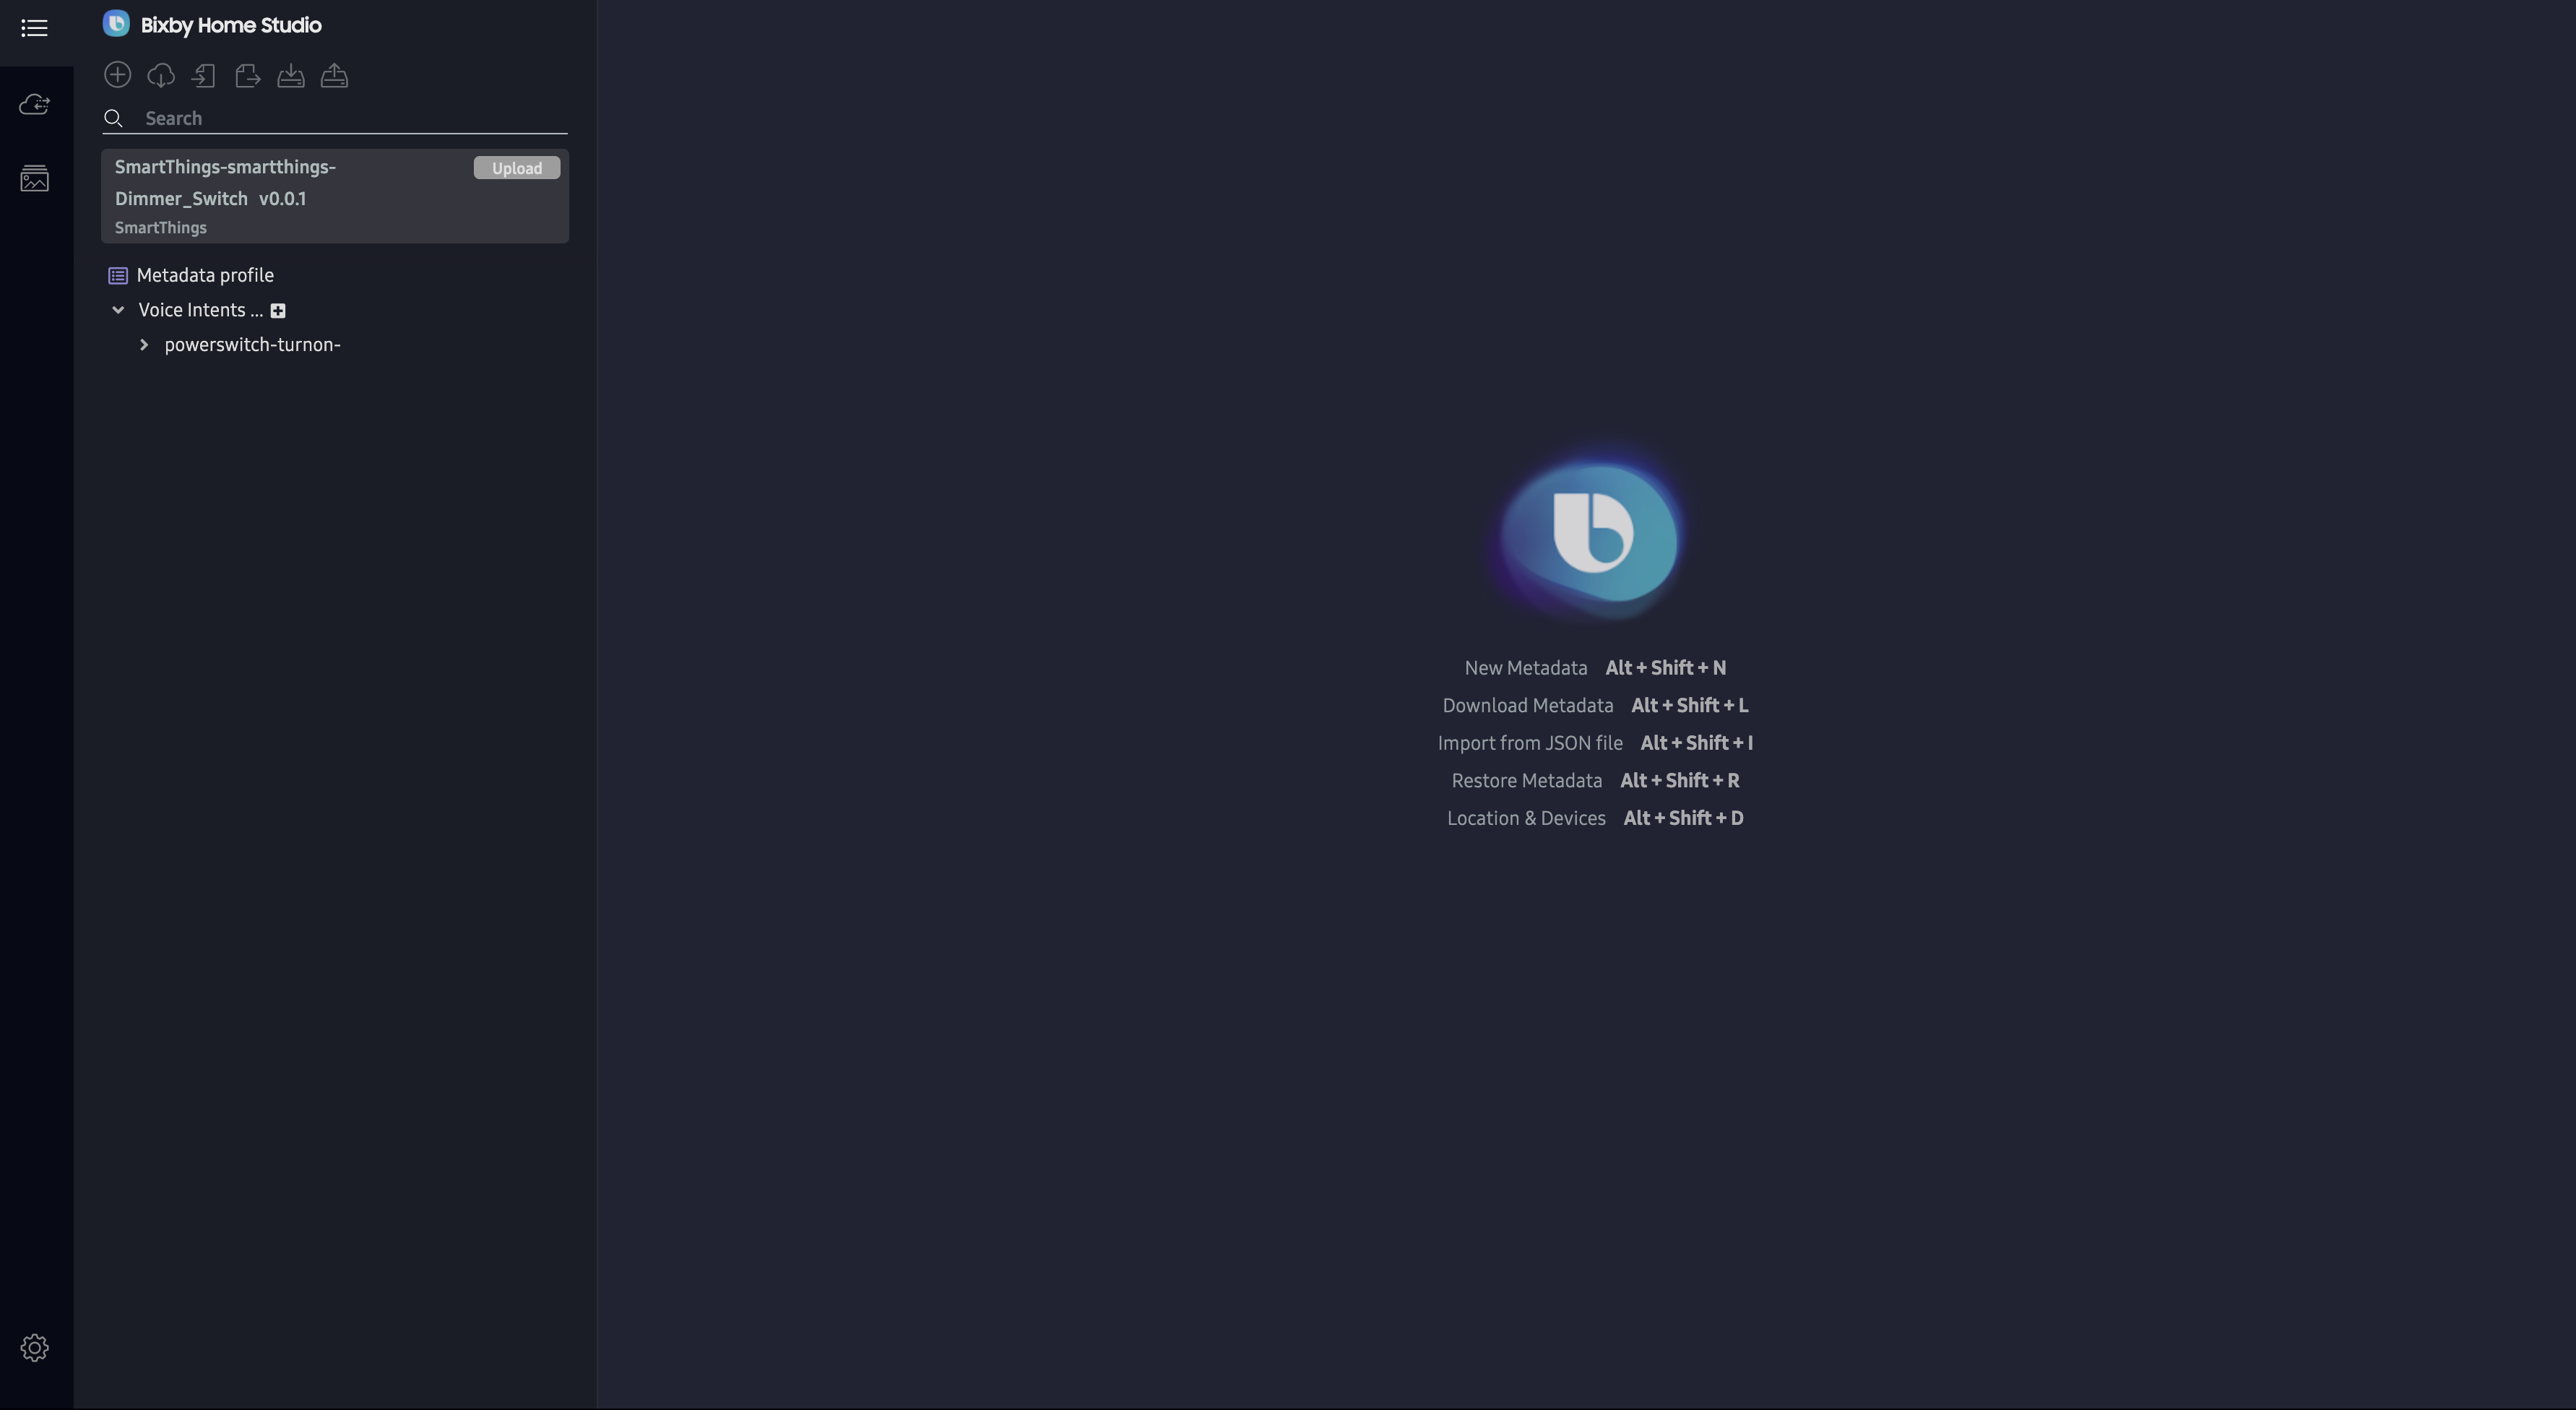
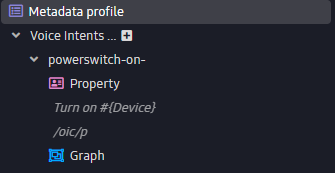
Expand the voice intents to see the Property and Graph links.
For more information about the editor screen and how to add more voice intents, read How to Use the Bixby Home Studio Editor.
Action Flow
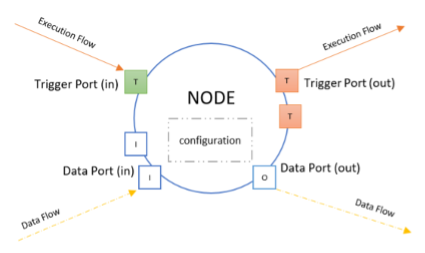
To specify what action the device should perform for a voice intent, you need to associate the voice intent with an action flow. An action flow is a graph consisting of linked nodes of different types that create a logical sequence of actions. Nodes are the functions that developers can use in BHS.
A node consists of the following components:
- Configuration describes how the node is set up.
- Data input/output ports transfer information into and out of a node.
- Triggering ports are the node ports that receive or send execution flows.
For more information, see the Nodes reference page.
Build an Action Flow
Follow these steps to create and test a logical action flow for a specific voice intent for the device.
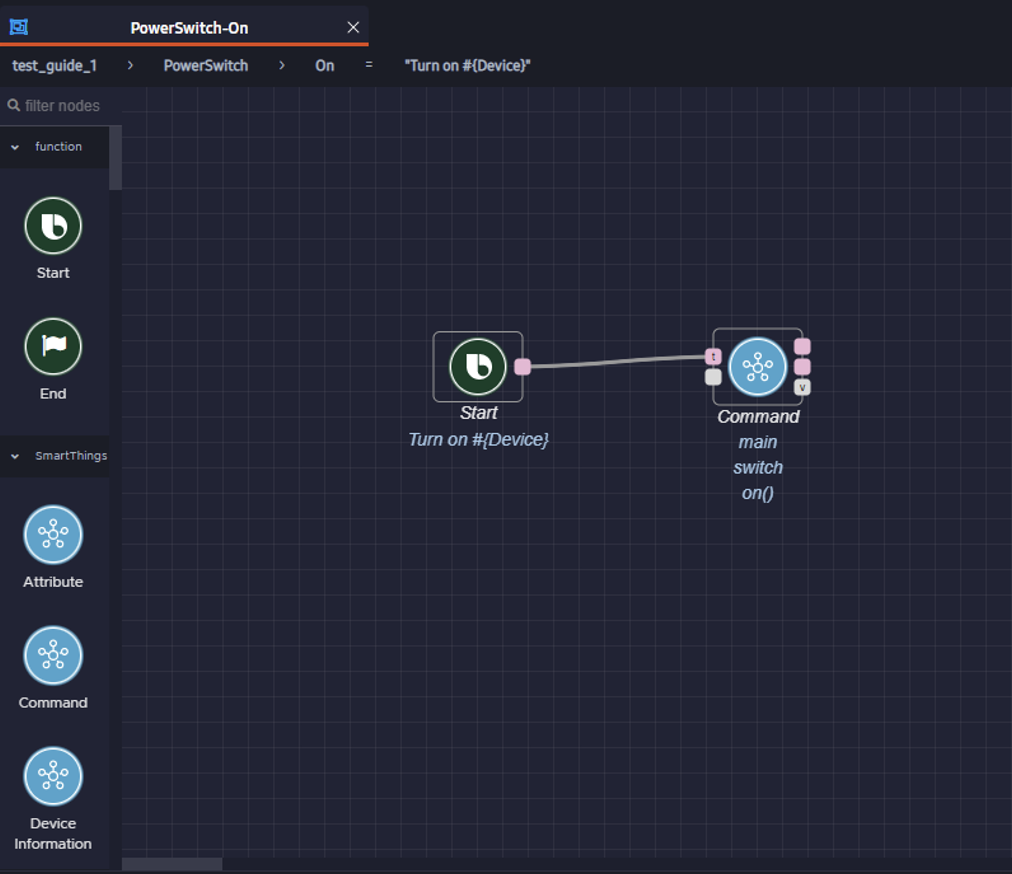
Place the Start and Command Nodes
All action flows begin with a Start node. The user triggers the action flow by uttering a relevant command. The Command node sends a command to the device.
- If you haven't already, click on the Graph link under the chosen voice intent. For this example, click on Graph under the
powerswitch-turnonvoice intent. - Drag and drop the
Startnode from the node menu to the flow editor area. - Drag and drop the
Commandnode to the flow editor area. - Connect the output trigger of the
Startnode to the trigger port of theCommandnode. This allows theStartnode to trigger theCommandnode.
Set the Execution Command
Now you'll define what the Command node does.
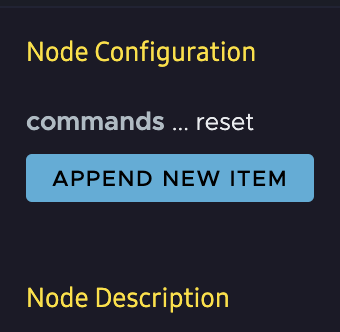
Click on the
Commandnode to select it.Click on APPEND NEW ITEM to add a command.
Select
mainas the component, if not yet selected.Select the command capability from the Node Configuration menu. For this example, choose
switch.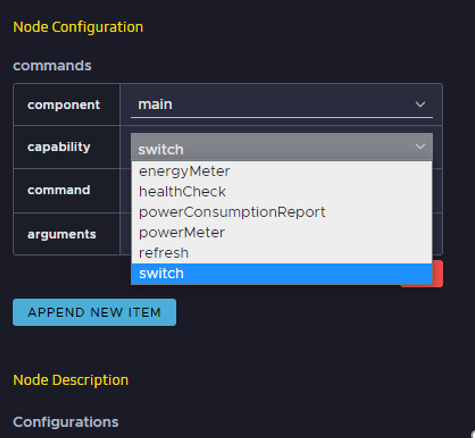
Select a command for the selected capability and click SAVE. For this example, use the command
on.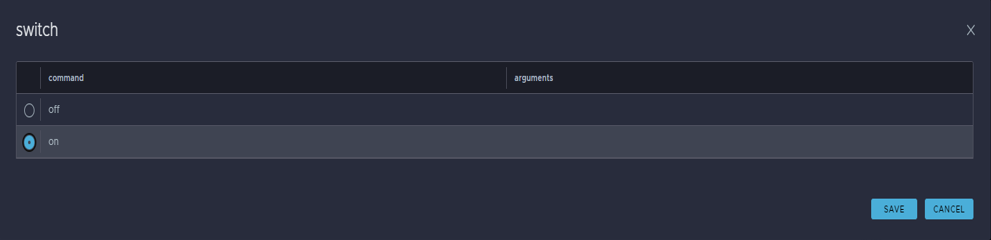
You have now created an action flow that sends a Switch on command to the light bulb.
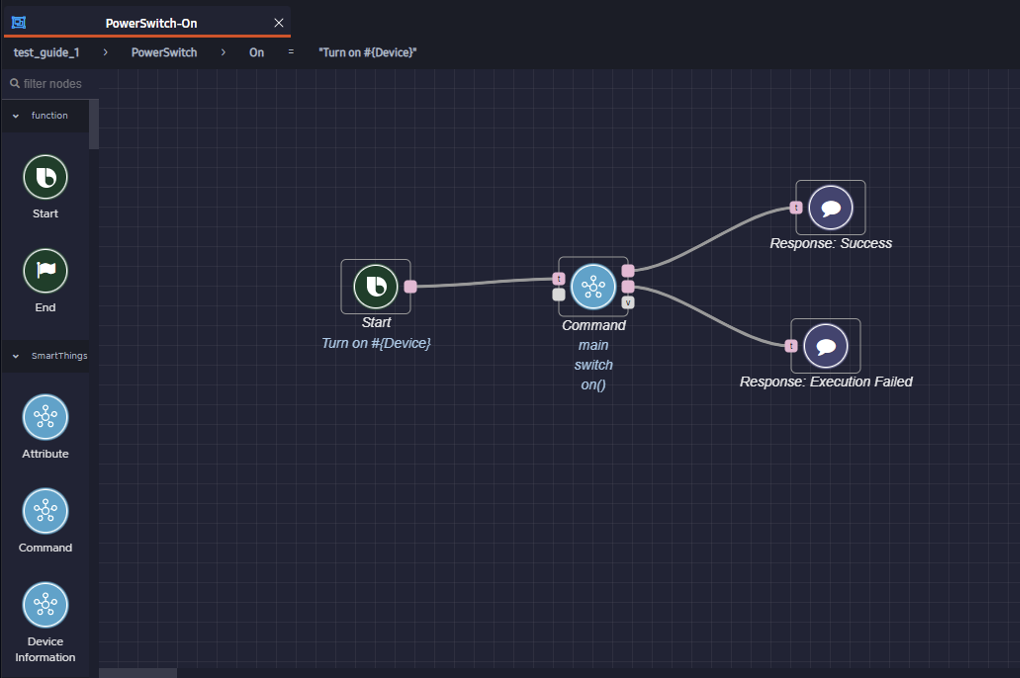
Generate Responses
Response nodes inform users about the success or failure of the device commands.
- Drag and drop the
Response: SuccessandResponse: Execution Failednodes to the flow editor area. - Connect the success output port of the
Commandnode to the trigger port of theResponse: Successnode. - Connect the failure output port of the
Commandnode to the trigger port of theResponse: Execution Failednode.
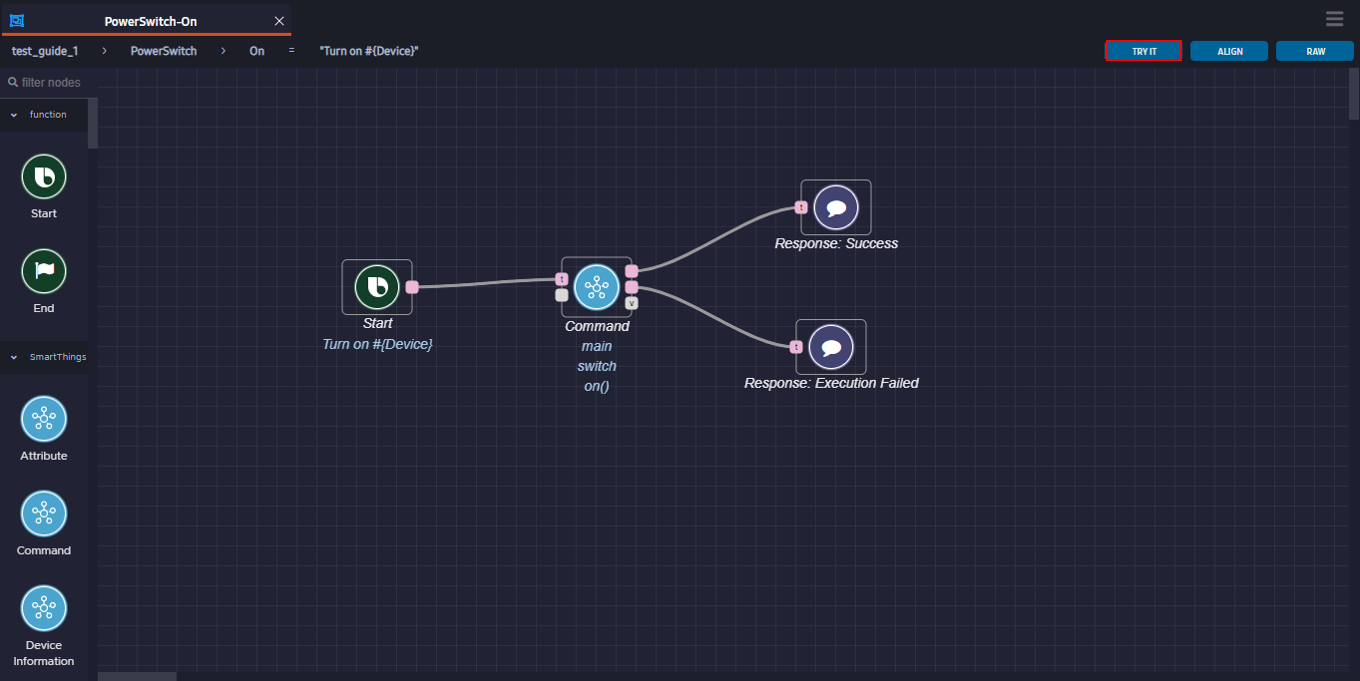
Test in the Editor
Use the Try it feature of the editor to test if the action flow works as intended on a real device. Make sure your device is turned off. Then click on the Try it button in the menu bar at the top.
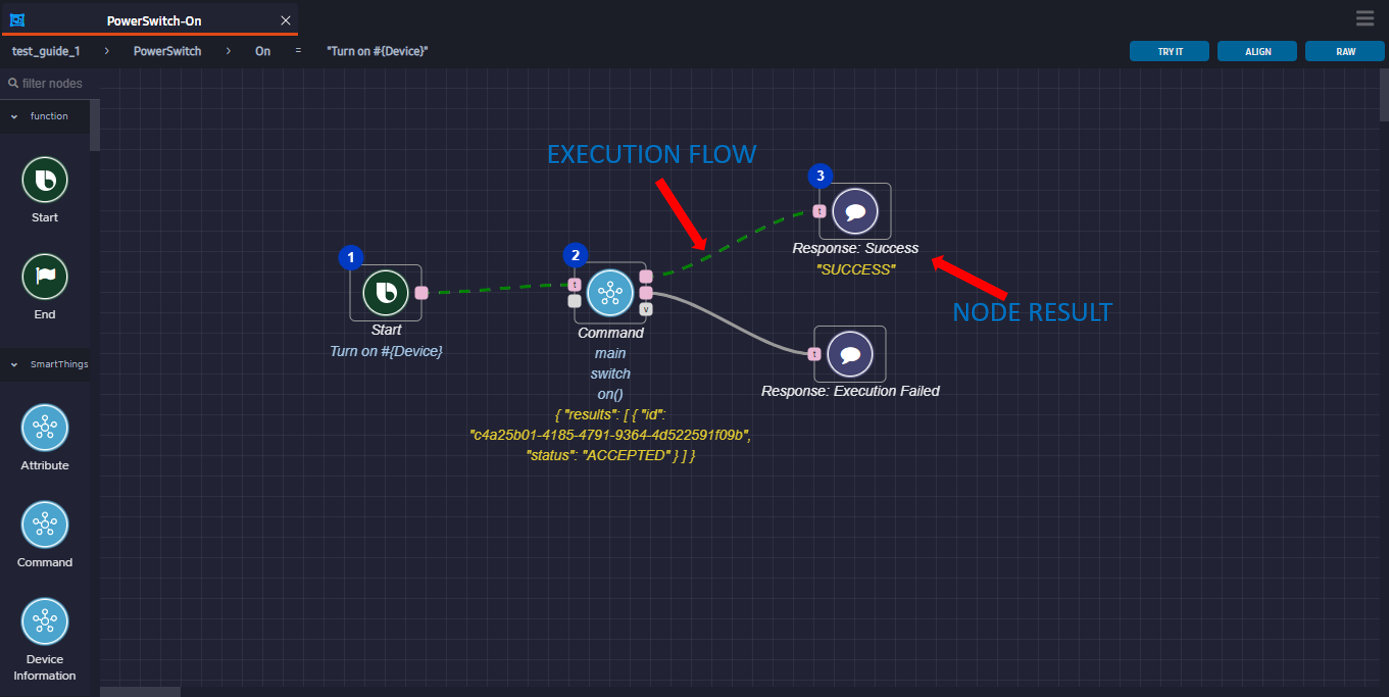
You should see a confirmation that your device is switched ON. You can see the green flowing line over the execution path. Any obtained values, responses, etc. are shown below the corresponding nodes.
Next Steps
You've now successfully created and tested an action flow for a voice intent! The action flow created for this tutorial is simple, but you can choose to add additional nodes to create a more complex action flow. You can also add action flows for additional voice intents that you want to include in the Voice meta information.
To take a deeper dive into BHS, read the following documentation:
- The various Developers' Guides for BHS describe how to use more of the nodes in detail.
- The references describe the various voice intents, SmartThings capabilities, data types, and nodes available to use.
- The learning resources contain sample graphs for you to try, as well as additional videos about BHS.
Video Tutorial: Bixby Home Studio Quick Start Guide
The following is the 2022 video version of this tutorial.