
Publishing the Bixby Device Graph (BHS Metadata Submission)
Once you have created and thoroughly tested your metadata, you can submit it to be published for use by end users.
You can add or edit voice actions for devices with metadata submissions. Once you create a new metadata file or update an existing one, you can submit your metadata file for publishing and release approval, and track its progress.
On-device testing and submissions of metadata for voice commands are only available to device manufacturer developers who have registered their device with SmartThings. For more information, see the Start Developing guide on the SmartThings Developers website.
Submit BHS Metadata
BHS enables you to create new metadata or update existing metadata with the icons in the metadata sidebar.
 New Metadata: used to create new metadata for a device.
 Load Metadata: used to update existing metadata of a device.
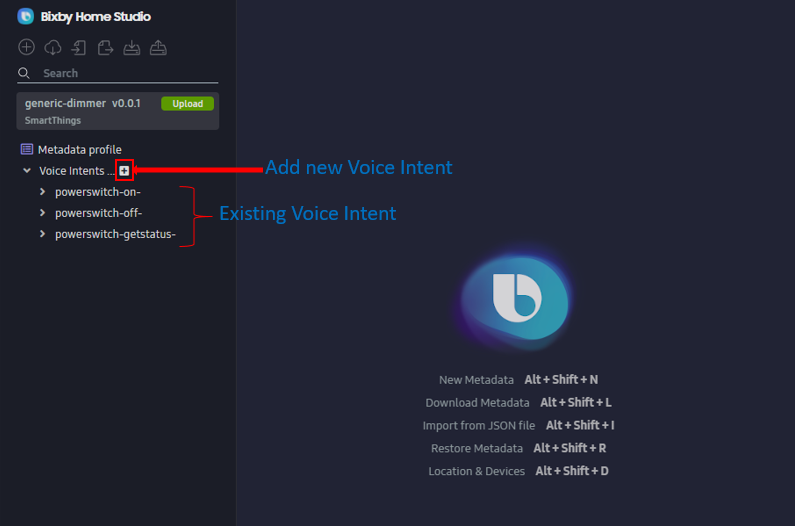
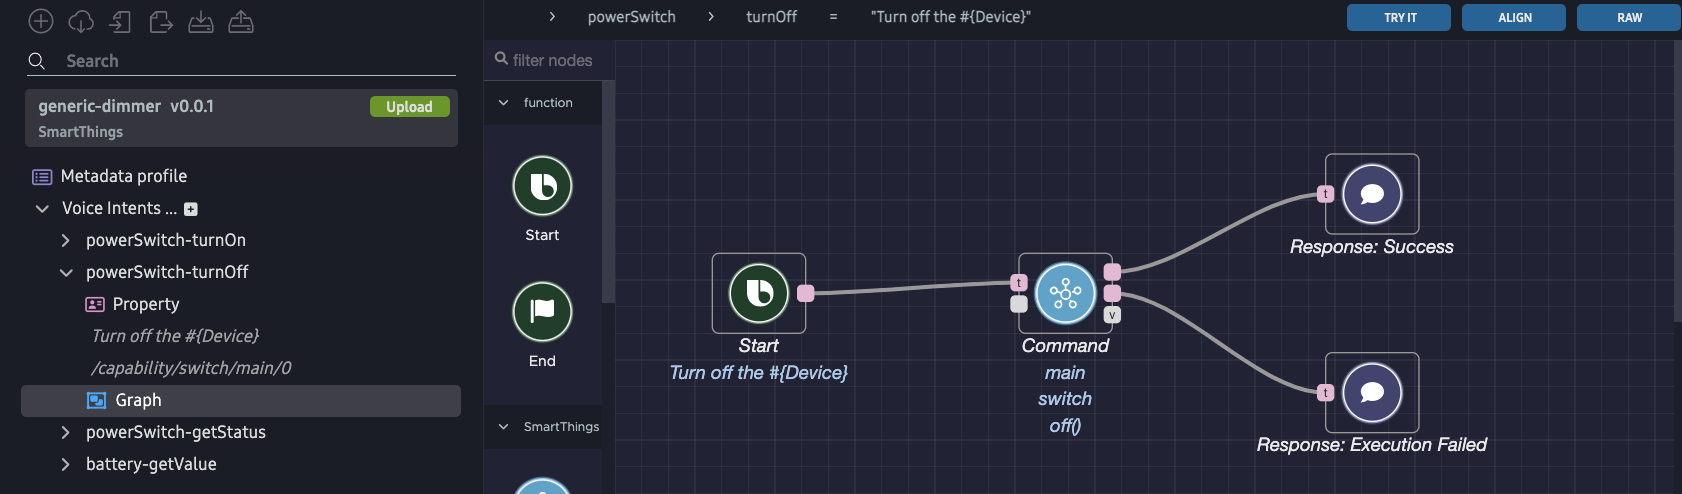
Once you load a new or existing metadata file, this file will have a list of voice intents. In this example, the editor shows the metadata file for generic-dimmer with three voice intents.
Edit Voice Intent Options
You have three options for editing voice intents. Once you've done at least one of the following, you can submit your metadata for approval:
Add a New Voice Intent
To add a voice intent, click the Add Voice Intent icon ![]() to the right of Voice Intents in the Metadata profile section.
to the right of Voice Intents in the Metadata profile section.
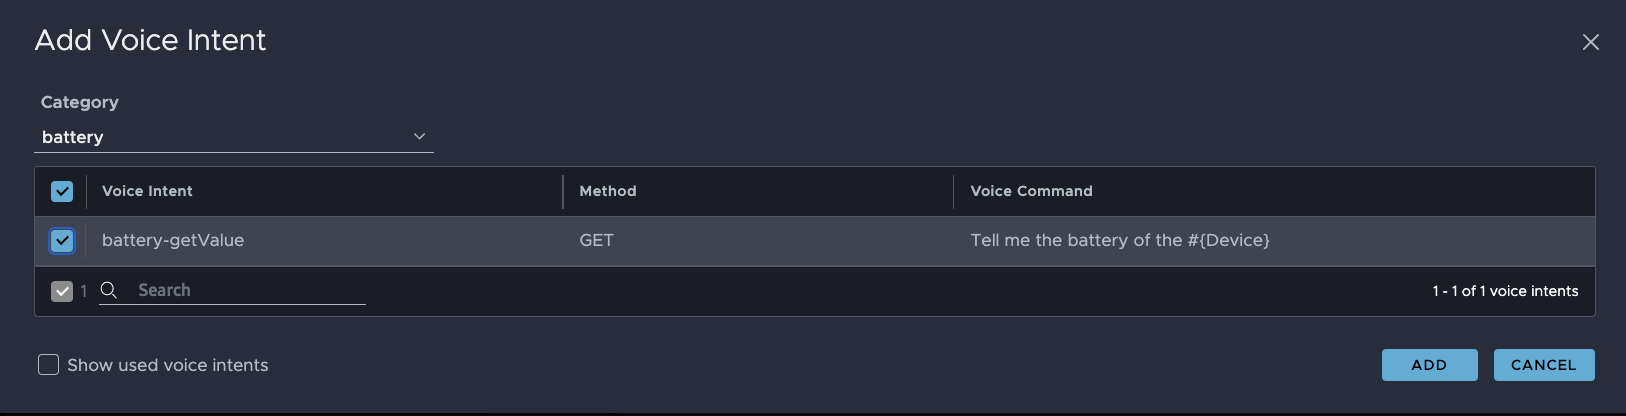
A pop-up appears, as seen in the following image. Select a category from the menu, and then select a voice intent from the list that appears. Click ADD.
The added voice intent appears in the list under Metadata profile in the metadata sidebar.
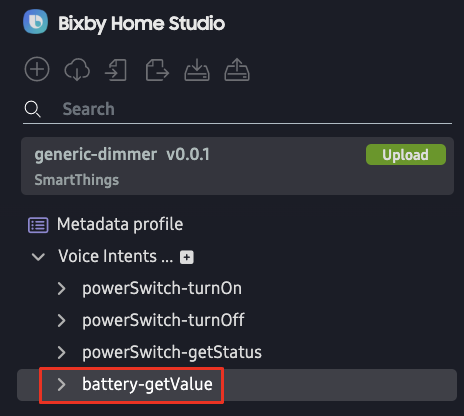
After adding the new voice intent, you can update the graph for this voice intent, and then proceed to submitting it. For more information on adding to this graph, see Creating an Action Flow in the Using Bixby Home Studio guide.
Update an Existing Voice Intent
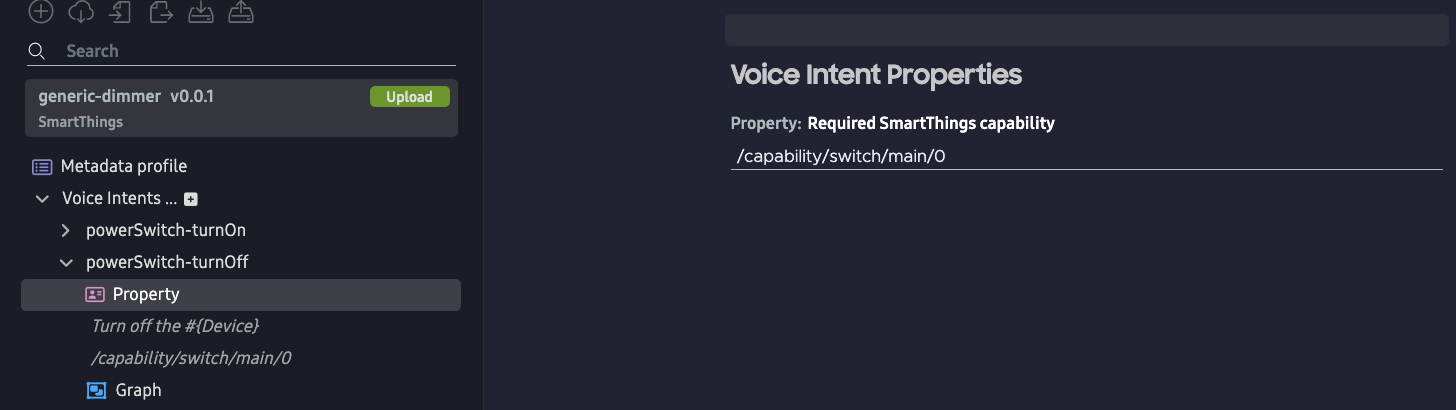
To update an existing voice intent, click a voice intent under Metadata profile to open its metadata information.
To make changes to the capability information for a device, click Property under the selected voice intent.
To make changes to a graph directly, click Graph under a voice intent.
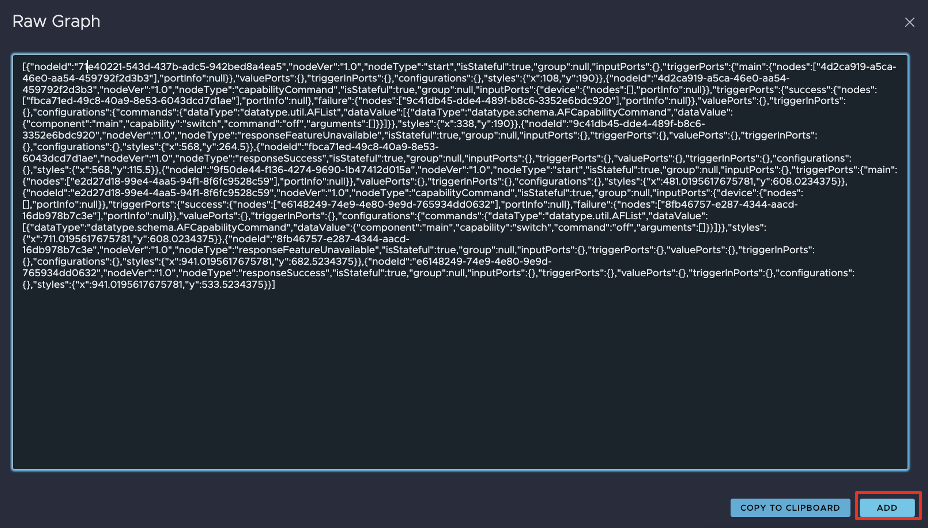
To make changes to the JSON for a graph, click RAW in the top right corner.
![]()
In the pop-up, make changes to the raw JSON and click ADD.
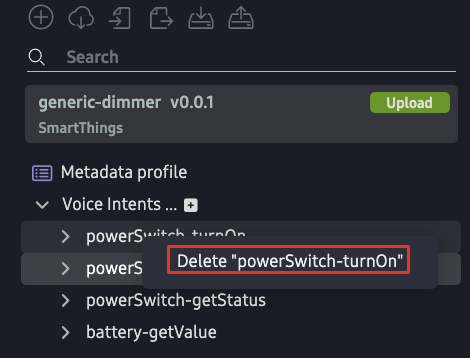
Delete an Existing Voice Intent
To delete an existing voice intent, right click the voice intent. Then, click Delete "%voice intent%". The following example deletes the powerSwitch-turnOn intent.
Prepare Metadata Submissions
Now that you've created new metadata or updated existing metadata, you can submit your metadata for approval to publish and release:
Click Metadata profile in the metadata sidebar. You can view the current version (the version before you applied updates) on the left of the upload button. In this example, it's
0.0.1. The Metadata profile tab opens, and you can view the Meta Profile (Name, Version, MNID, VID). The Meta Profile version number shows the current version.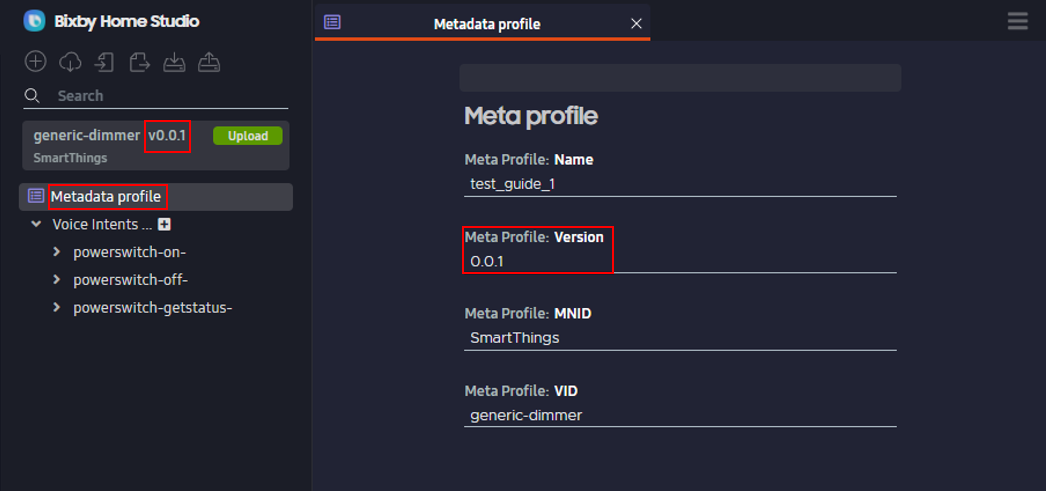
Update the version to the next version number. In this example, you can use
0.0.2. Confirm that the updated version number displays in the metadata sidebar.
Alternatively, you can click the Upload button in the metadata sidebar. In the Metadata Submission Message pop-up, you can update the metadata version. You can also compare changes between your new metadata file and the original one you updated by clicking COMPARE WITH 0.0.1.
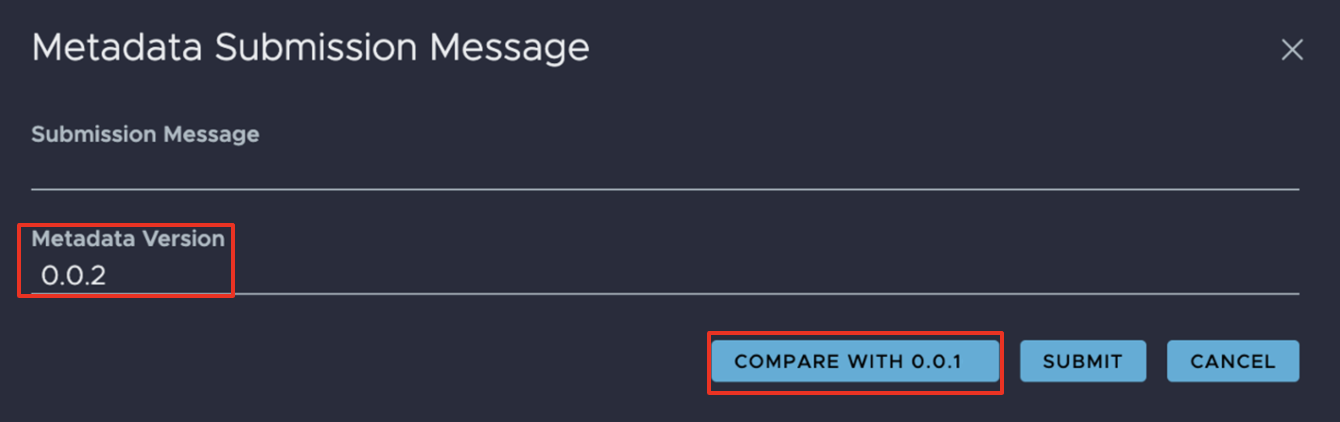
Use the Metadata Submission Message pop-up to add a Submission Message that describes the changes you've made to the metadata.
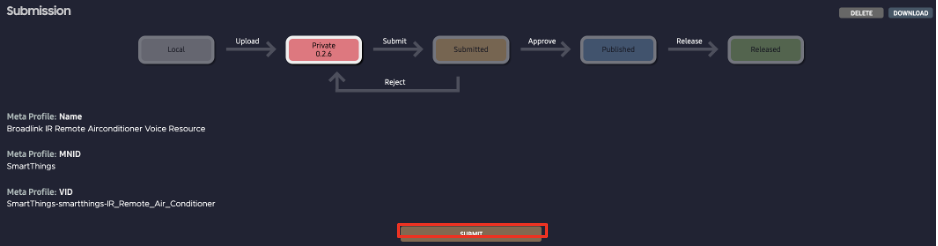
Click SUBMIT. The Submission Tab opens. Your metadata moves from the Local submission state to the Private submission state.
Click SUBMIT.
Next, you'll decide whether to test your metadata or skip this step before submitting.
Test Submissions
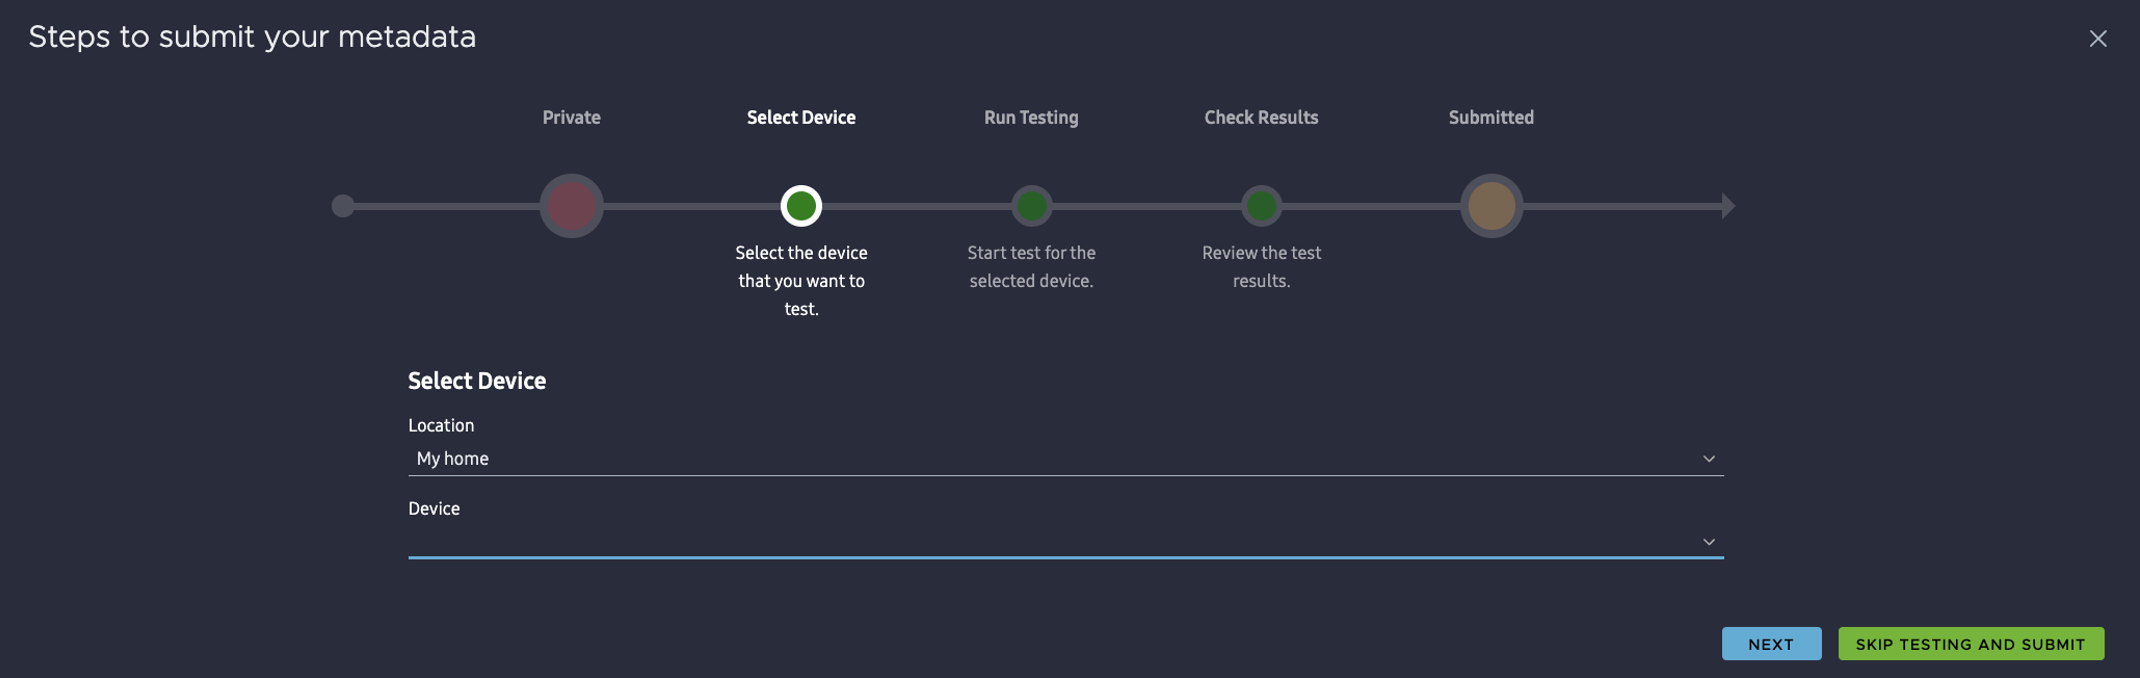
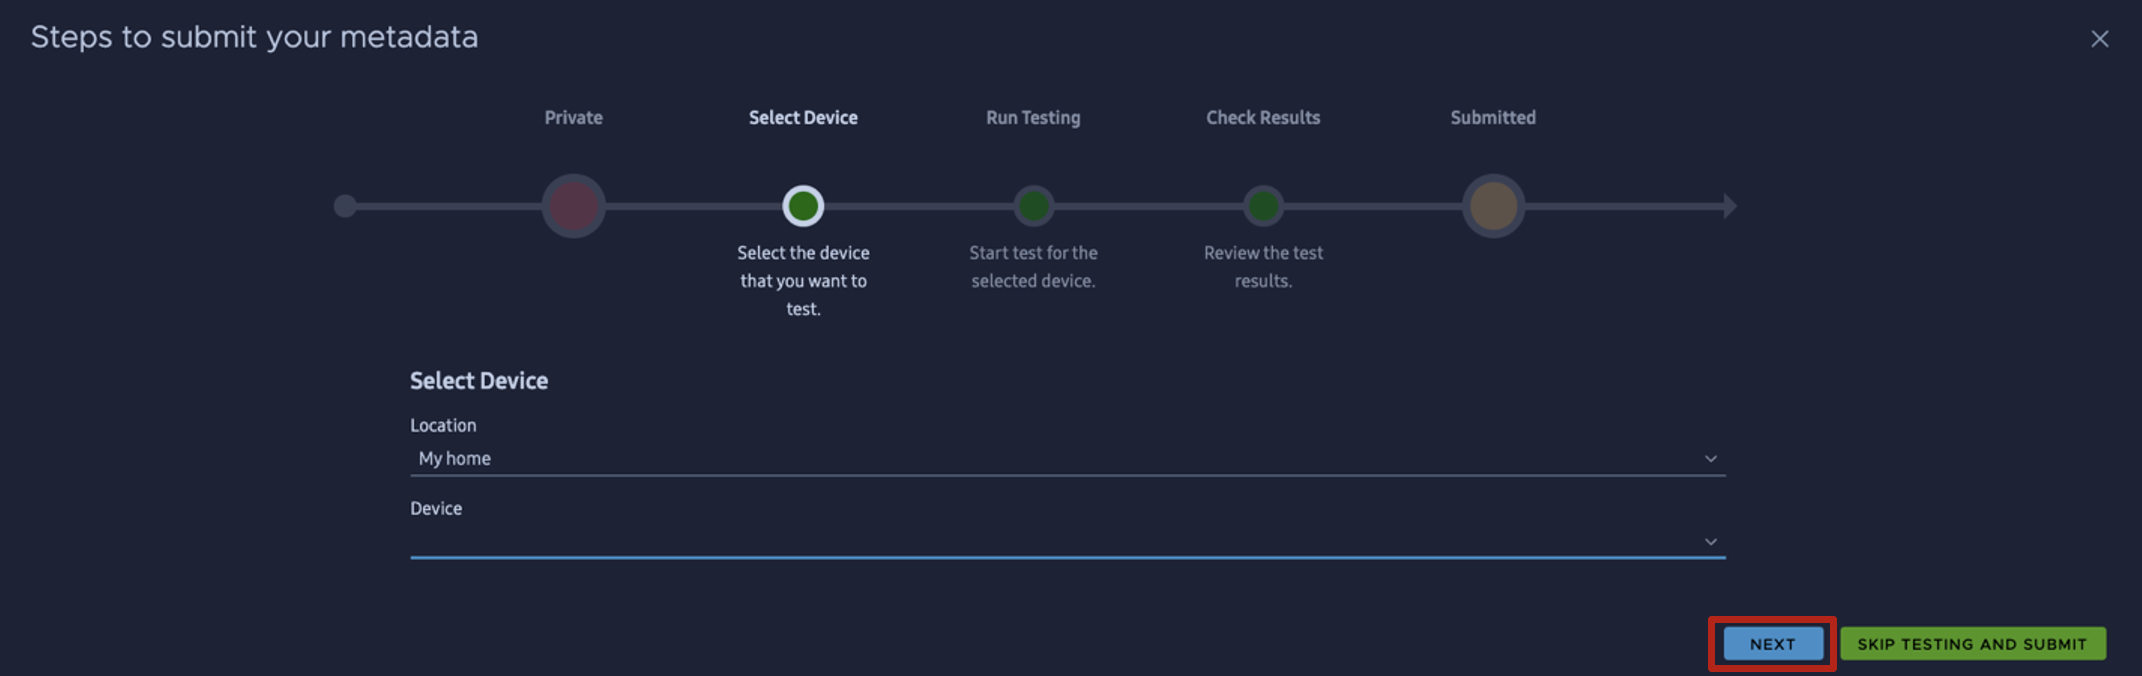
A pop-up appears that shows the steps to submit your metadata. You have two options:
Testing before submission allows developers to discover and fix errors. It also helps the Bixby Home Platform team verify that the metadata will not affect platform stability.
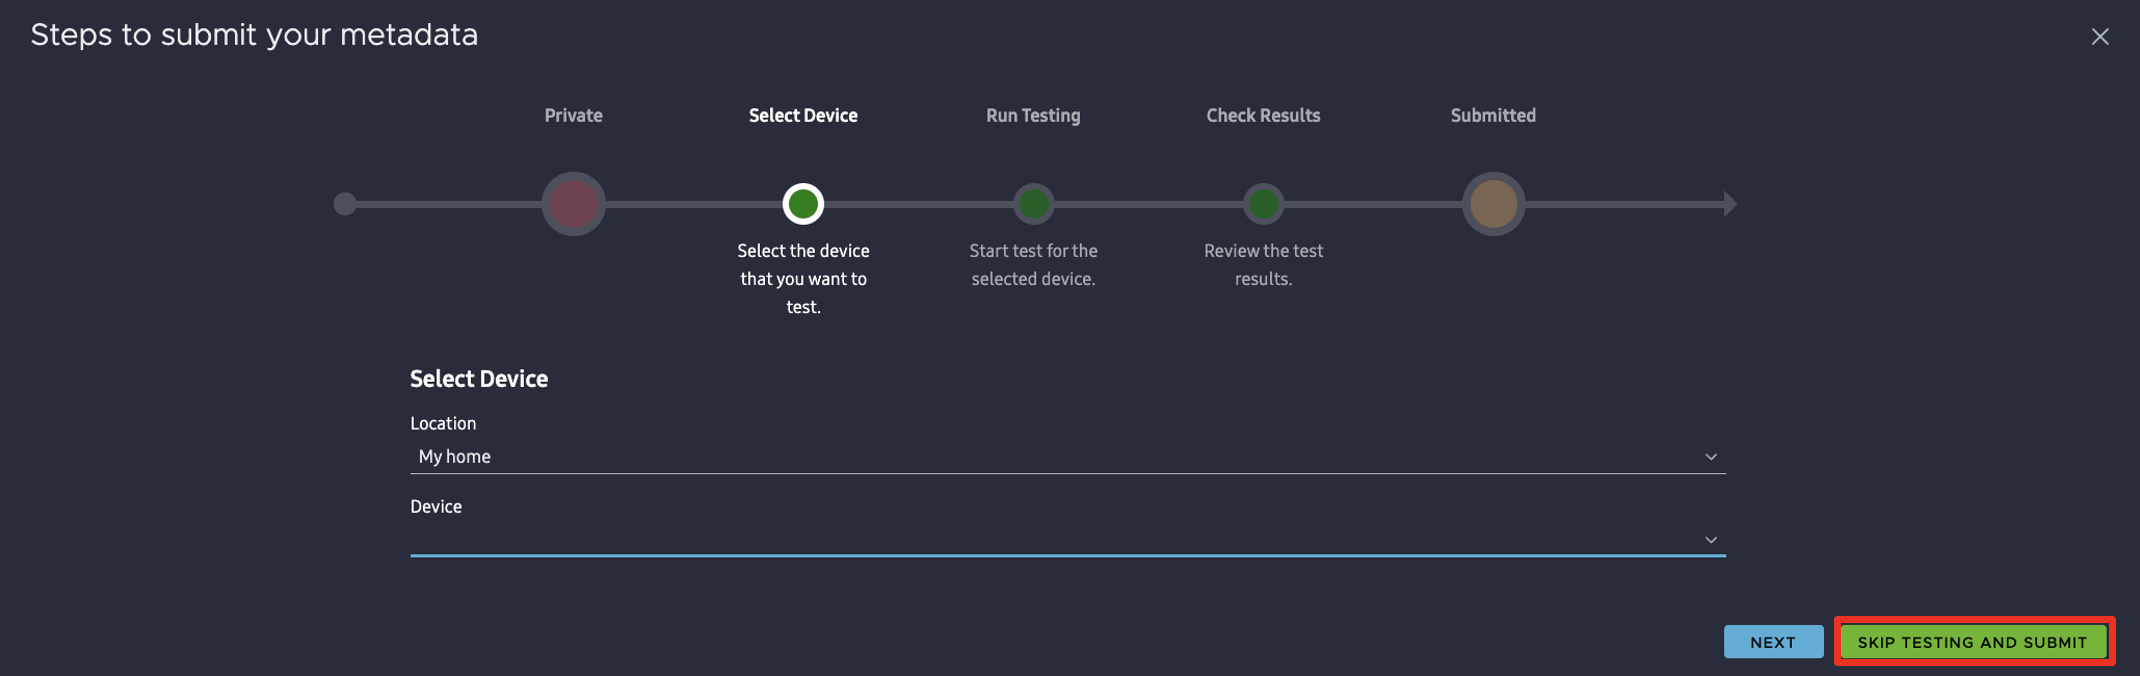
Skip Testing Before Submission
To submit metadata without testing it, click SKIP TESTING AND SUBMIT.
A Metadata Submission Message pop-up appears. Add a message about the submission that explains what has changed since the last transition in submission state. Click SUBMIT.

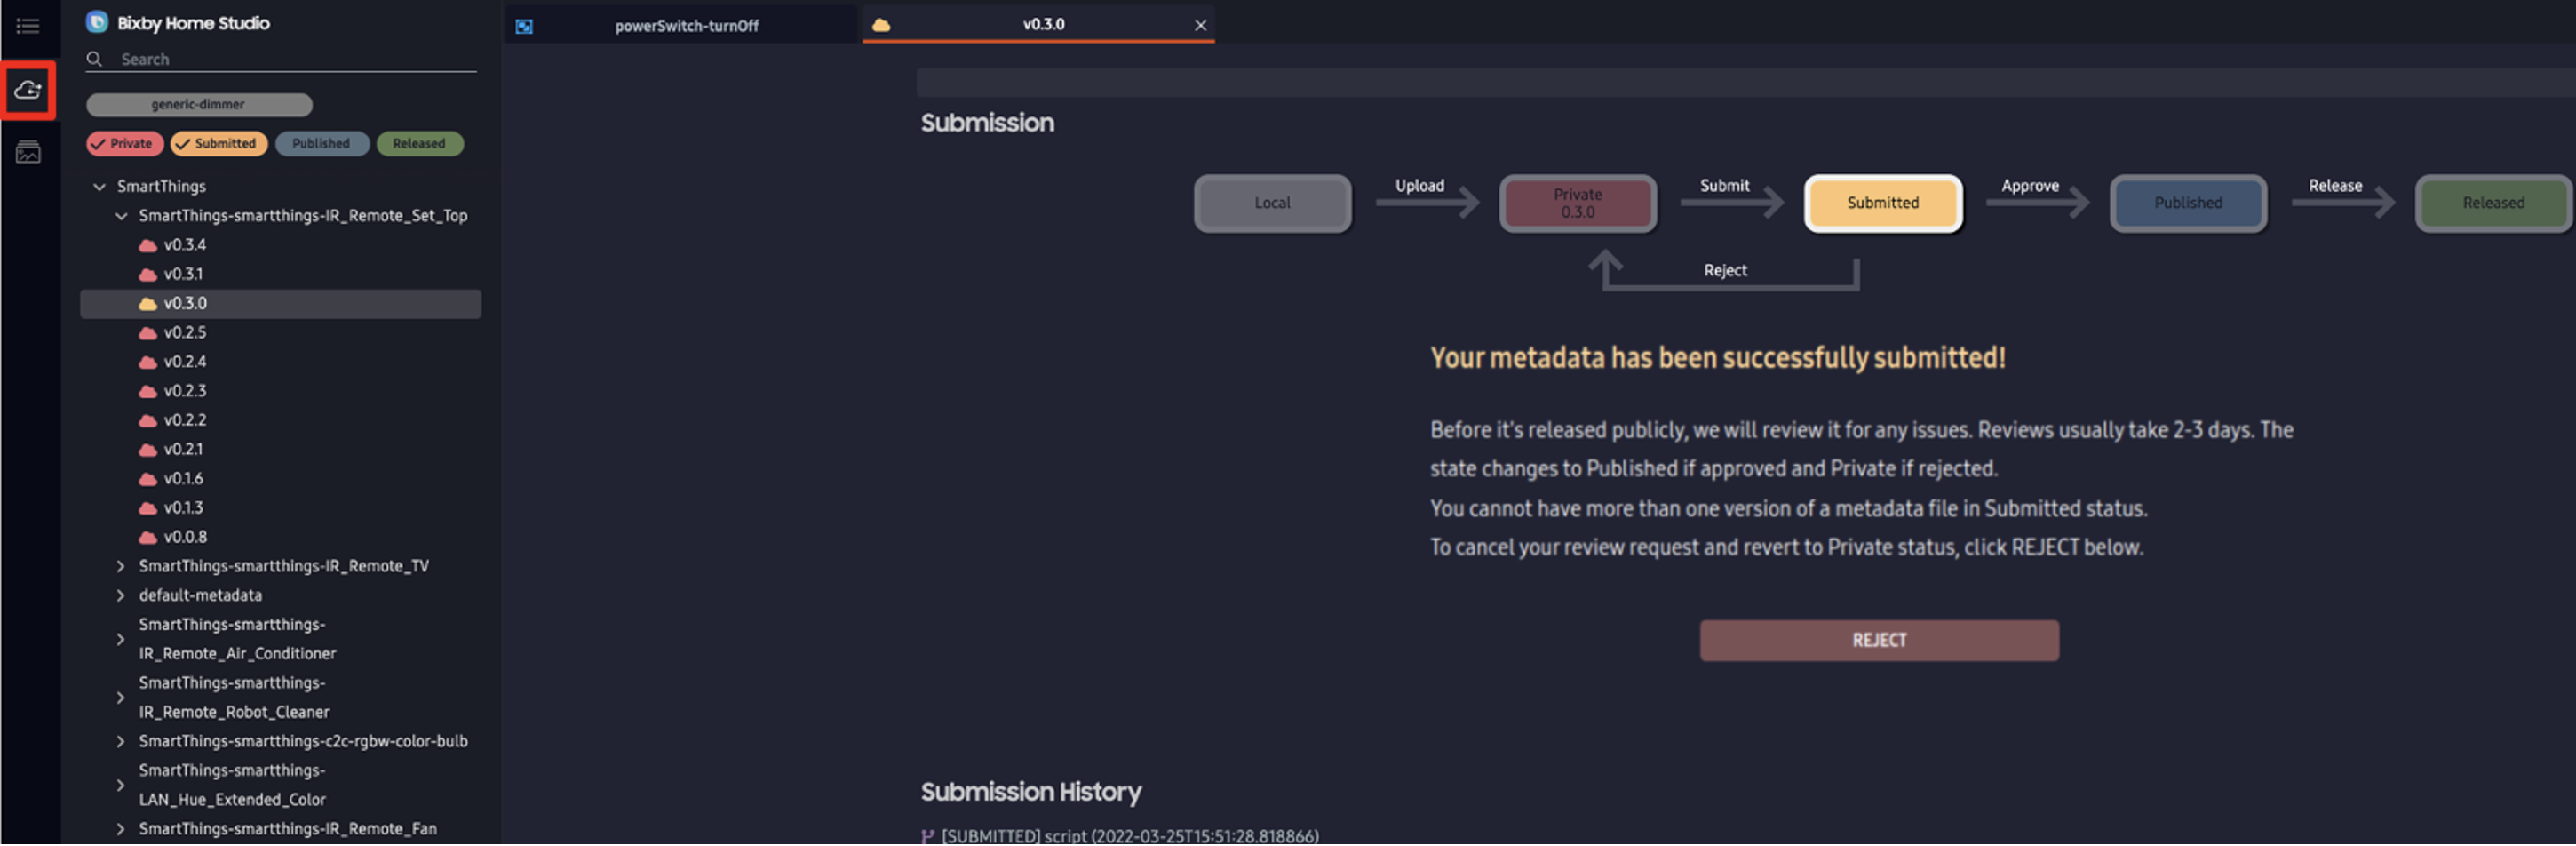
A confirmation screen appears, with a message that you successfully submitted your metadata.
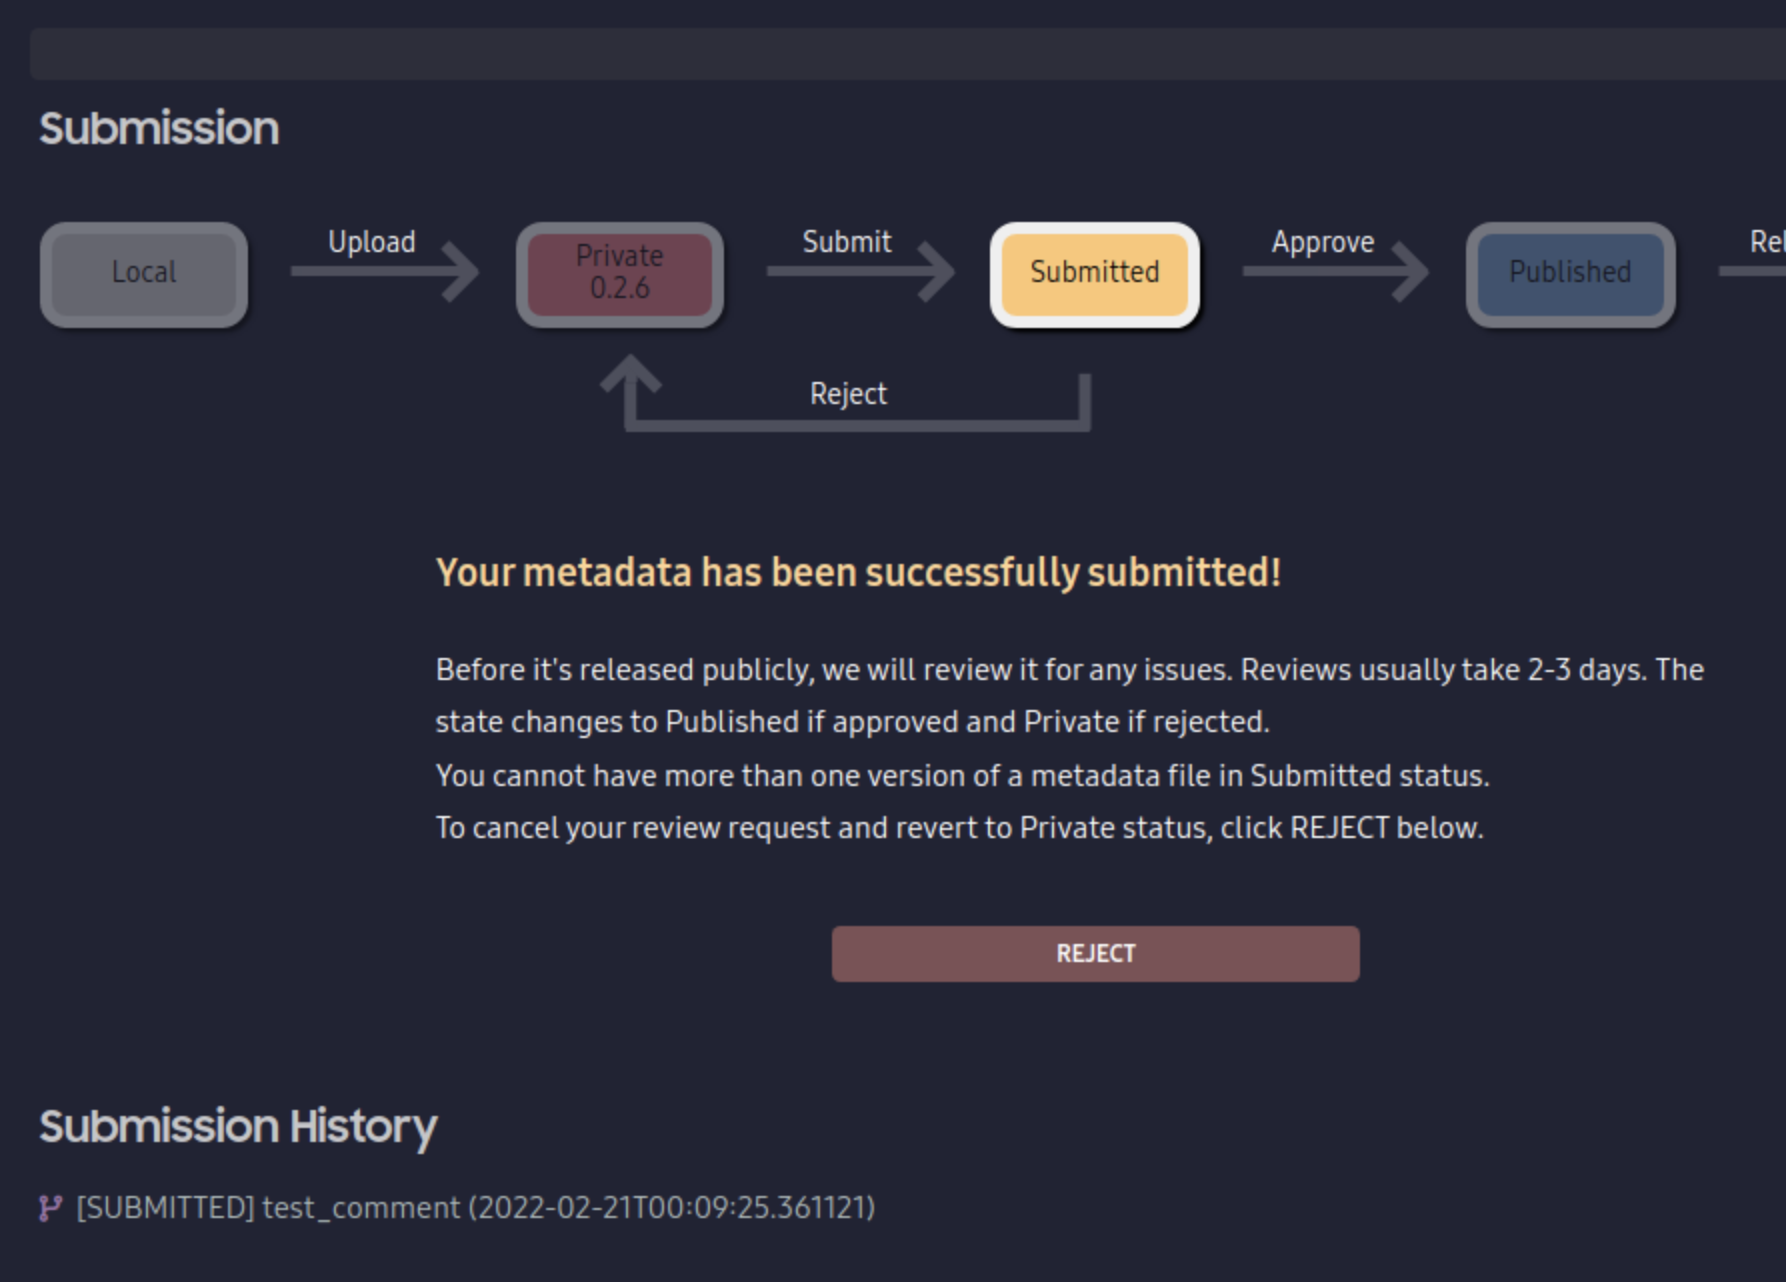
The metadata will be forwarded to the release manager. If your metadata submission gets approved, the release manager releases it to the public per the deployment schedule.
While you can skip testing if you've tested it thoroughly on your own, it's still recommended to perform testing here as well.
Test Metadata Before Submission
You can verify the metadata before submission:
- Select the location and device to test the metadata.
- Click NEXT.
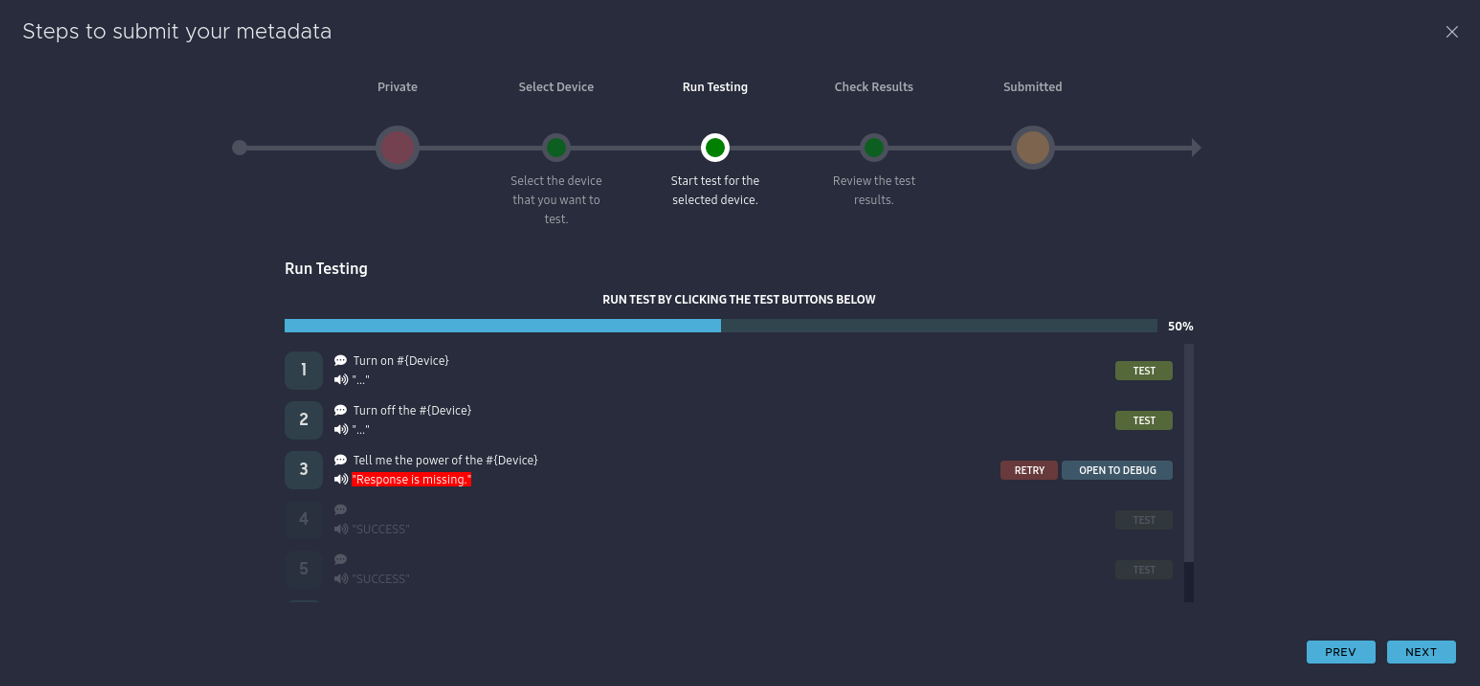
- Click the TEST buttons against the action flows to test the metadata.
- You can review the test results. Click DONE.
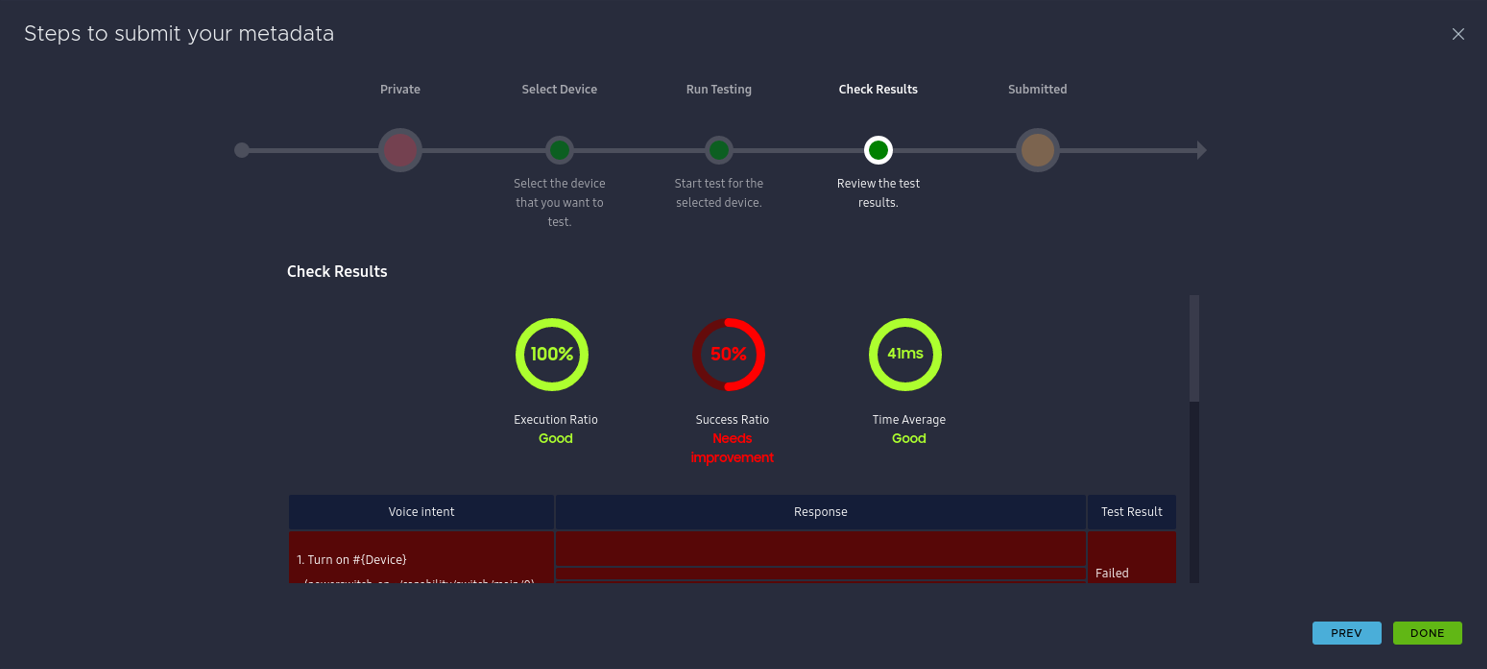
- The Execution Ratio shows how many voice intents were successfully executed.
- The Success Ratio shows how many of those voice intents successfully reached their goal.
- The Time Average shows how quickly each action flow completed, and if it completed in a reasonable amount of time.
- A Metadata Submission Message pop-up appears. Add a message about the submission that explains what has changed since the last transition in submission state. Click SUBMIT.
A confirmation screen appears, with a message that you successfully submitted your metadata.
The metadata will be forwarded to the release manager. If your metadata submission gets approved, the release manager releases it to the public per the deployment schedule.
Compare Metadata Changes
Before submission, if you want to compare metadata changes between a file and another version of it, you can do this in two ways:
- Compare the original file with a recently updated one
- Compare two versions of a submitted metadata file
You can also filter the types of changes when comparing.
For a visual comparison between the current graph and the most recently deployed version, see Showing Visual Differences Between Graphs.
When comparing two versions of metadata, you can tell the type of change based on the icon next to the file name:
- Changes with green ADDED icons indicate additions.
 .
. - Changes with red DELETED icons indicate deletions.
 .
. - Changes with yellow MODIFIED icons indicate modifications.
 .
.
Compare Original and Updated Files
You can compare the original file and your updated one when submitting an updated metadata file for publishing:
After you make updates to an existing metadata file and upload your new version, click COMPARE WITH {metadata file version number} in the Metadata Submission Message pop-up.
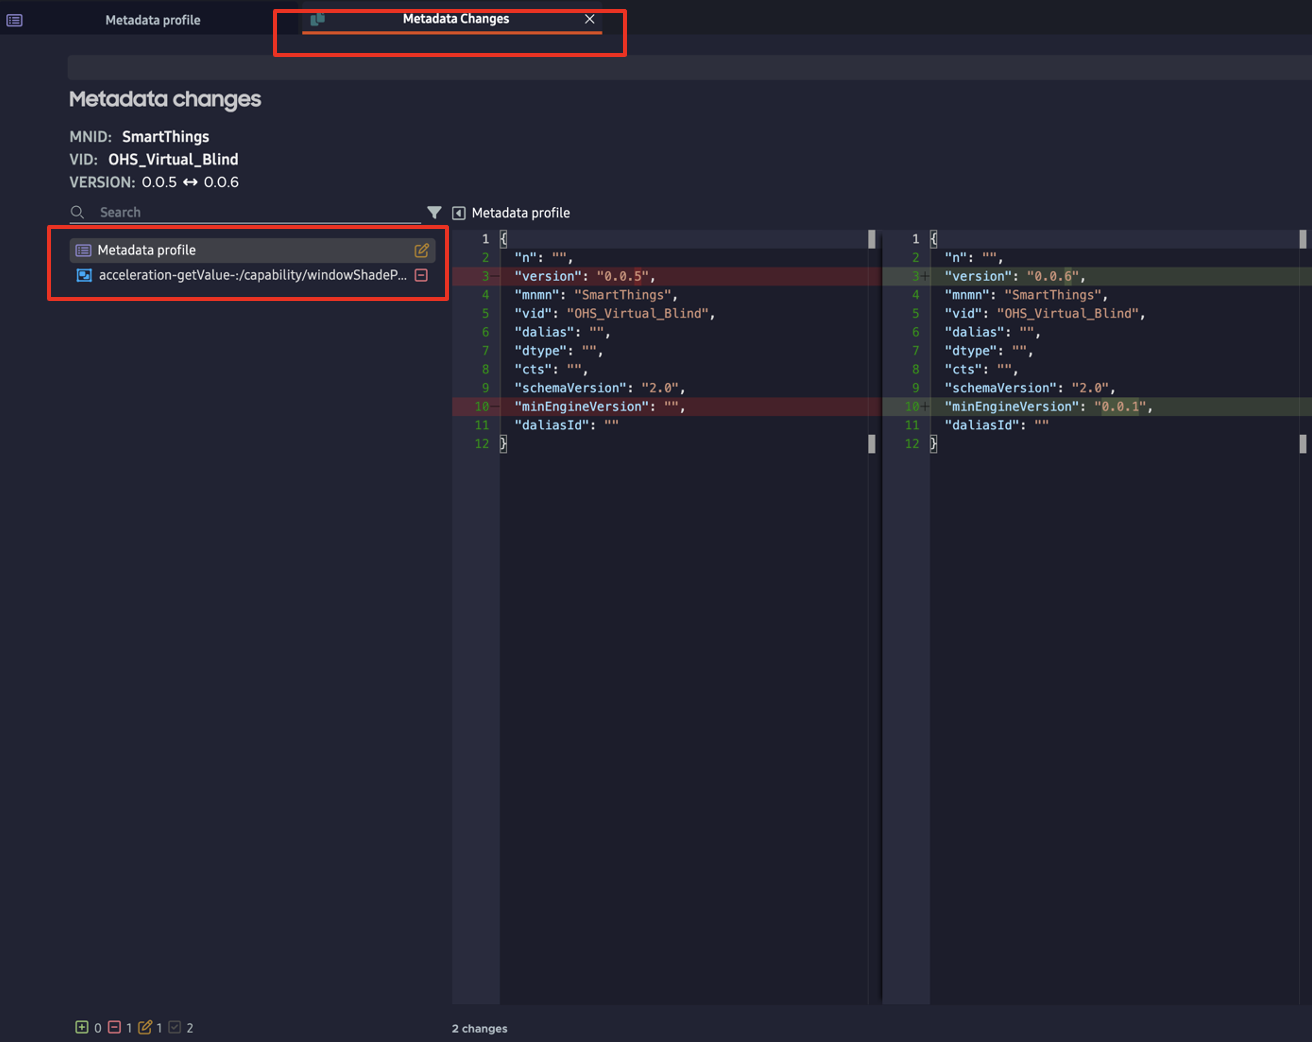
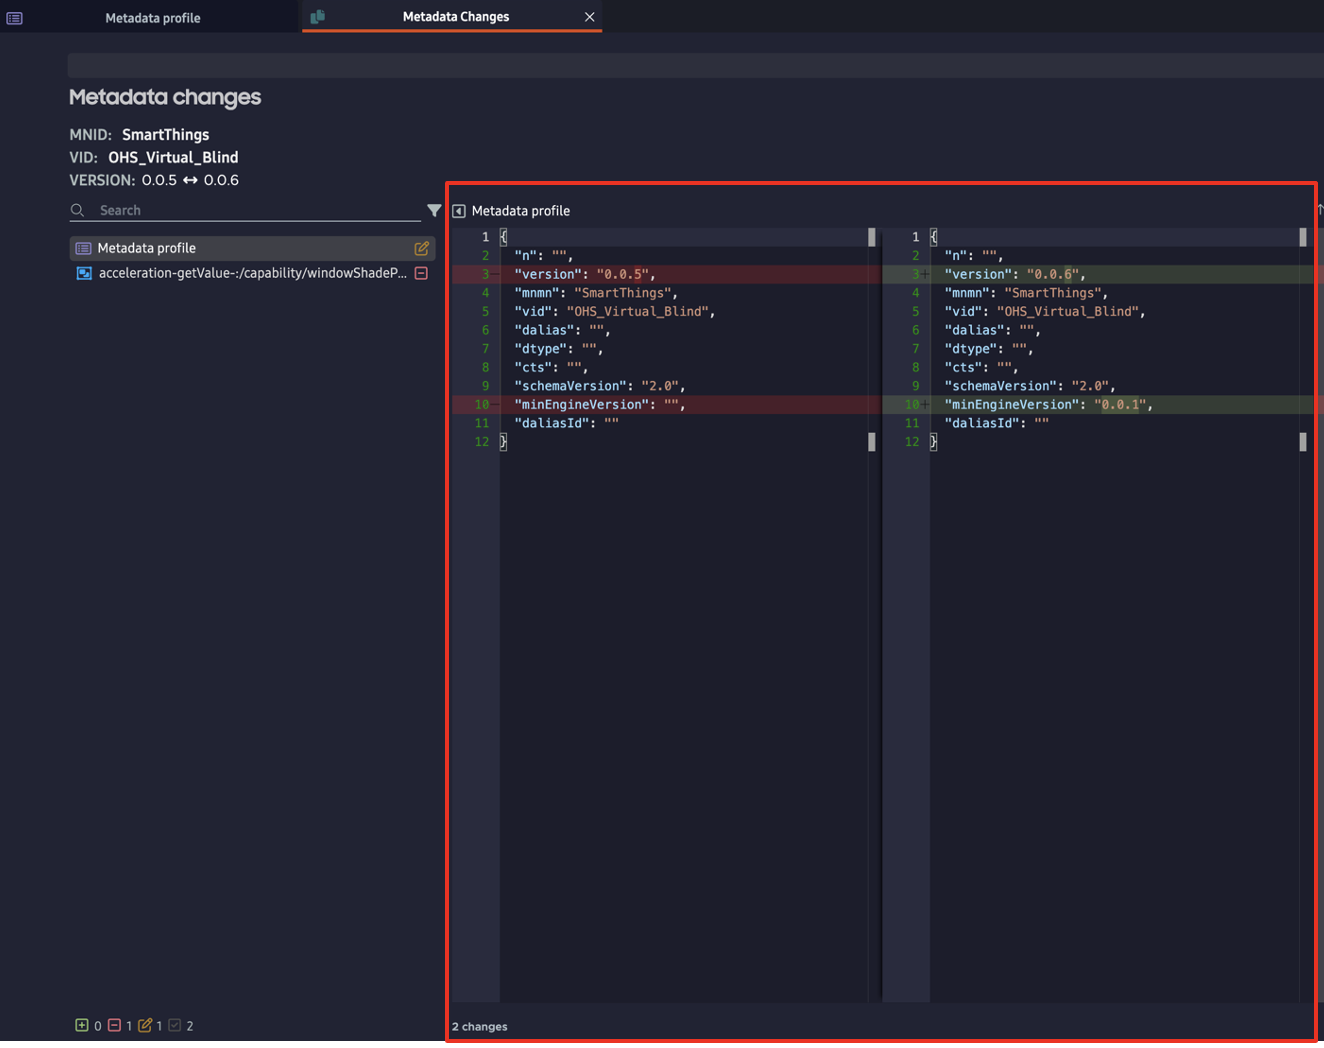
The Metadata Changes tab opens. Click on a listed change under Metadata changes on the left to see comparisons of the two files.
Compare Two Versions of a File
To compare any two versions of a metadata file:
Click the Submission icon in the activity bar on the left.
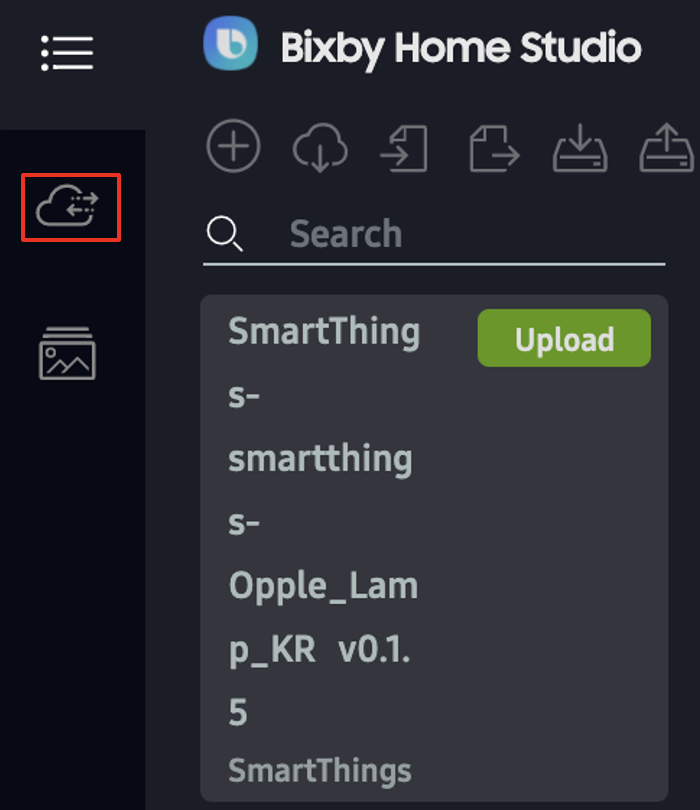
At the top left, Enter the Vendor Identification Number (VID) assigned to your device in the search bar.

Open the menu for the relevant device category, such as SmartThings or Samsung Electronics.

A list of files with different metadata versions appears. Choose two files to compare. Drag one on top of the other to compare them.

The Metadata Changes tab opens. Click on a listed update under Metadata changes on the left to see comparisons of the two files.
Filter Metadata Changes
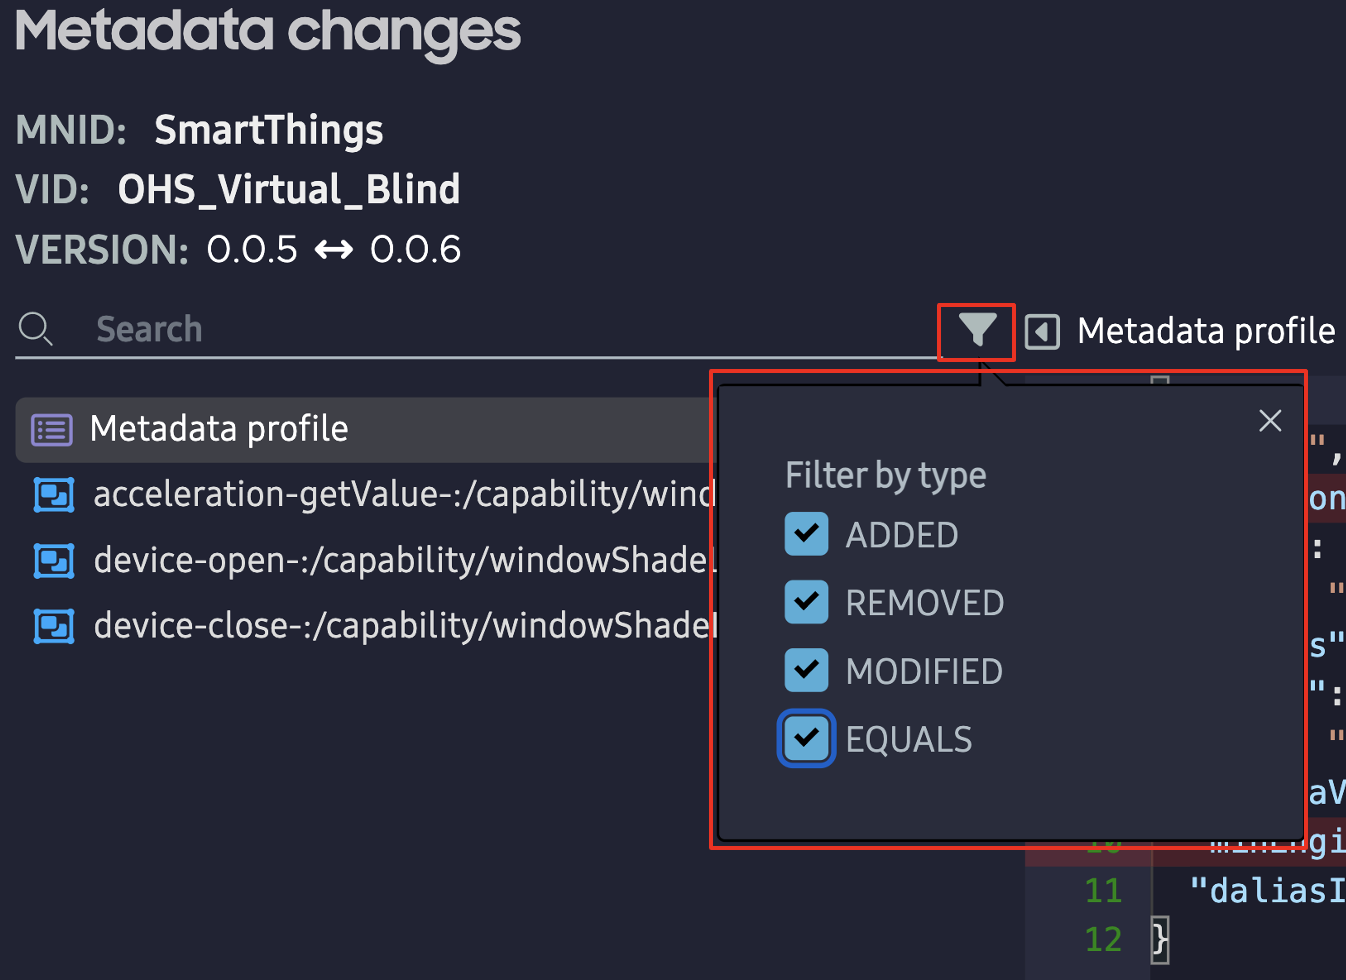
In both situations, you can show only certain types of changes by using the filter icon to the right of the listed metadata changes. A pop-up appears where you can make your selection by clicking one or more boxes for these listed options:
- ADDED: Sections that have been added in the updated metadata file.
- REMOVED: Sections that have been removed in the updated metadata file.
- MODIFIED: Sections that have been modified in the updated metadata file.
- EQUALS: Sections that remain unchanged.
The original file appears to the left of the updated one. You can see the changes highlighted in green in the updated file.
Submit Messages
Whenever a user changes the submission state of the metadata, a message (log) prompt appears. When you're changing the status of your submission, the message you submit should give information on what has changed in the metadata.
The recipients of your message will also differ depending on the transition state:
- Local to Private: members of the device manufacturer's team
- Private to Submitted: the release manager
The release manager writes a message to the members of the device manufacturer's team for the following transition states:
- Submitted to Private - This message explains why the submission was rejected.
- Published to Released - This message lets the device manufacturer's team know that their submission was approved.
Submission States
If updating existing metadata, your version number must be higher than that of the original file before submitting. Also, you cannot have multiple versions of the same metadata file in the Submitted state at the same time.
There are five submission states:
Local: The metadata file is stored locally but hasn't been uploaded.
Private: Your metadata file has been uploaded. However, it hasn't been submitted to the release manager.
Submitted: Your metadata file has been submitted. The release manager reviews the metadata for any issues. Reviews usually take about 2 to 3 days. When they've completed the review, the status can have two outcomes:
- If the release manager doesn't find any issues with the metadata, it moves to the Published state.
- If the release manager rejects the file, the submission reverts to the Private state.
Published: Your metadata submission has been submitted and published on the Bixby Home Platform (BHP) server. However, it hasn't been released publicly to end users.
Released: Your metadata submission has been publicly released to end users, and other BHP developers can view and use it.
View Submission History
To view metadata submission history and state transition details, click the Submission icon in the activity bar on the left, which opens the submission sidebar. Click on a device from the list to open its entire submission history. Then click a version to view that submission's history.
To view submissions in specific states, select one or more states at the top of the submission sidebar. You'll see a check mark on the selected states.
