
Creating Custom Response Dialogs
This guide assumes familiarity with the following information:
- The basics of the editor (Using Bixby Home Studio)
- The
Commandnode (Sending a Device Command) - The
Responsenode (Creating a Bixby Response Using Device Status)
In this guide, you'll learn how to use the Custom Dialog Feature to customize the dialog response for a voice command. This allows you to specify Bixby's responses to users instead of using default responses. The device used in this guide is a SmartThings-enabled air conditioner; you will add a custom dialog response when the air conditioner fails to turn on.
In general, you should try to follow the style and tone of Bixby when creating custom dialog. For more information, see the Dialog Design Pattern Guide.
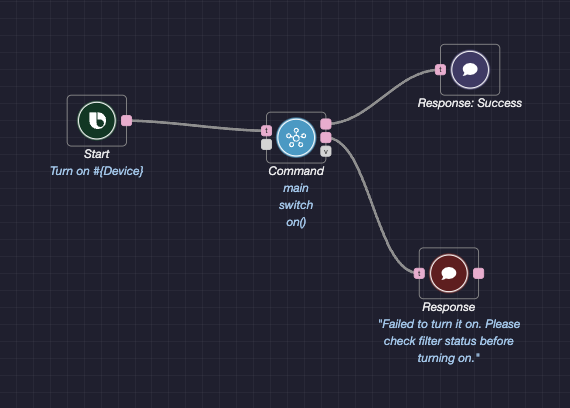
Start creating the action flow for this example by dragging a Start node and a Command node from the action flow nodes sidebar to the editor area. Then, connect the Start node's main port to the Command node's trigger port.
Add Custom Dialog to the Metadata
In order to create and use a custom dialog with your device, you have to add the dialog to the dialogs menu in the metadata sidebar.
- In the metadata sidebar on the left, click the add icon
 on the right of Dialogs in the Assets menu.

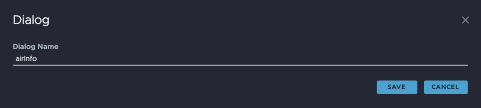
- A pop-up appears, prompting you to type a dialog name. For this example, type "airInfo" and click SAVE.
- Select a locale for the custom dialog by clicking an empty box next to one of the listed locales. For this example, select
en.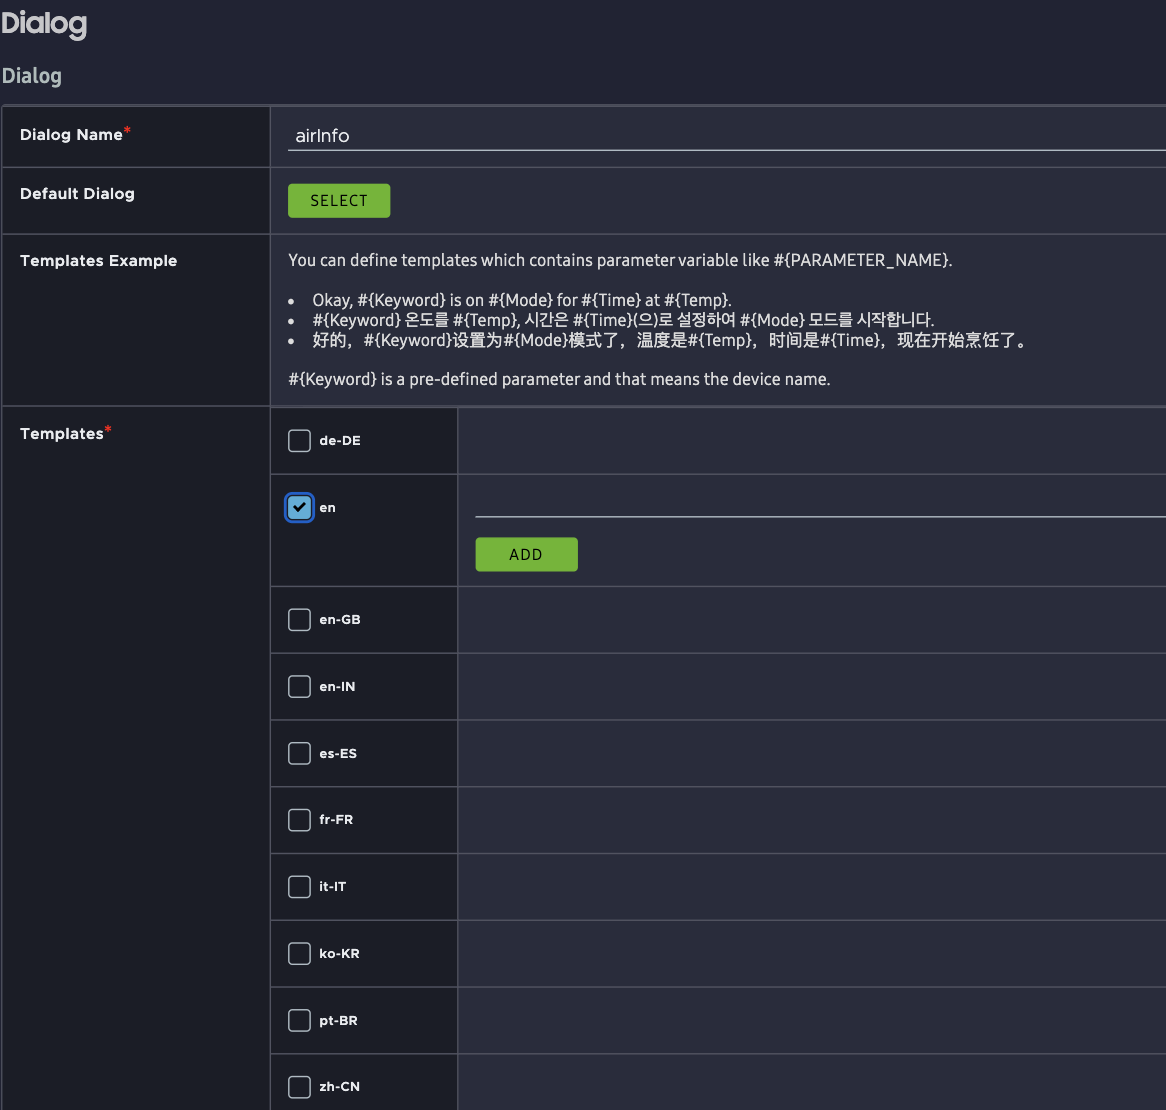
- On the blank line, type in the custom dialog. For this example, use "Failed to turn it on. Please check filter status before turning on." To add more custom dialogs, click ADD.
 The new custom dialog option,
 airInfo, will appear under Dialogs in the metadata sidebar.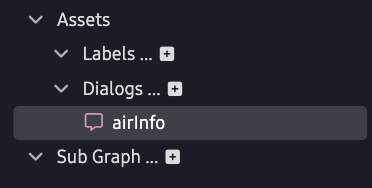
You can now use the custom dialog in your action flow.
Use Custom Dialog
To use custom dialog in your action flow, do the following:
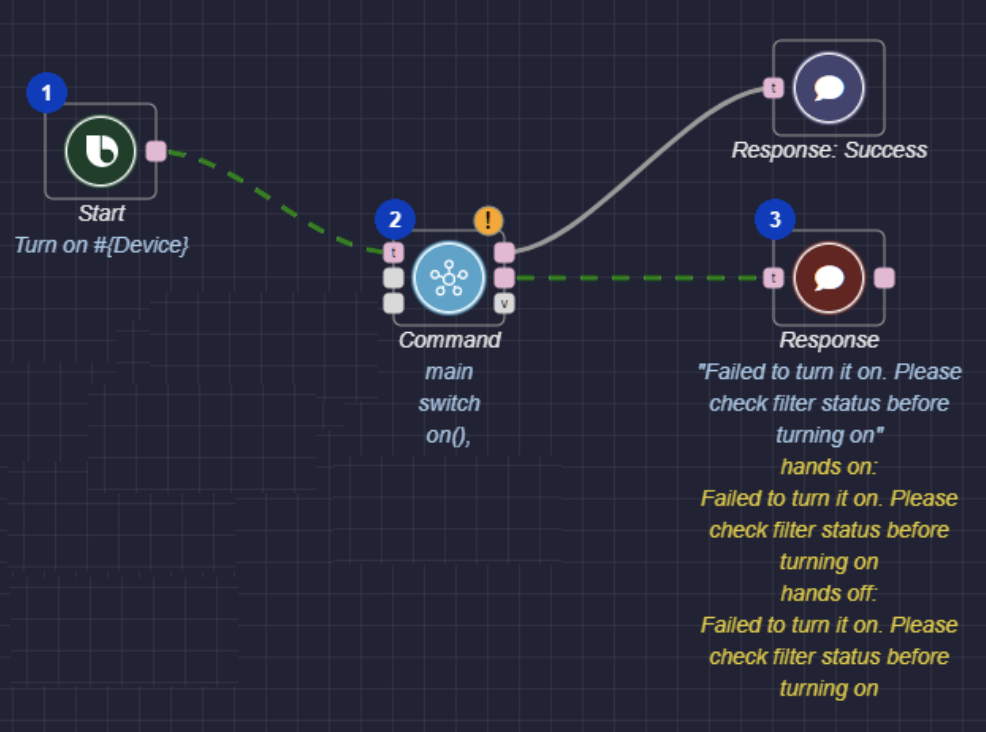
- Add one
Response: Successnode and oneResponsenode to the graph. - Connect the
Commandnode's success port to theResponse: Successnode and the failure port to theResponsenode. - Click the
Responsenode that is connected to theCommandnode's failure port. This opens the Node Configuration menu on the right. - Click the SELECT DIALOG button.
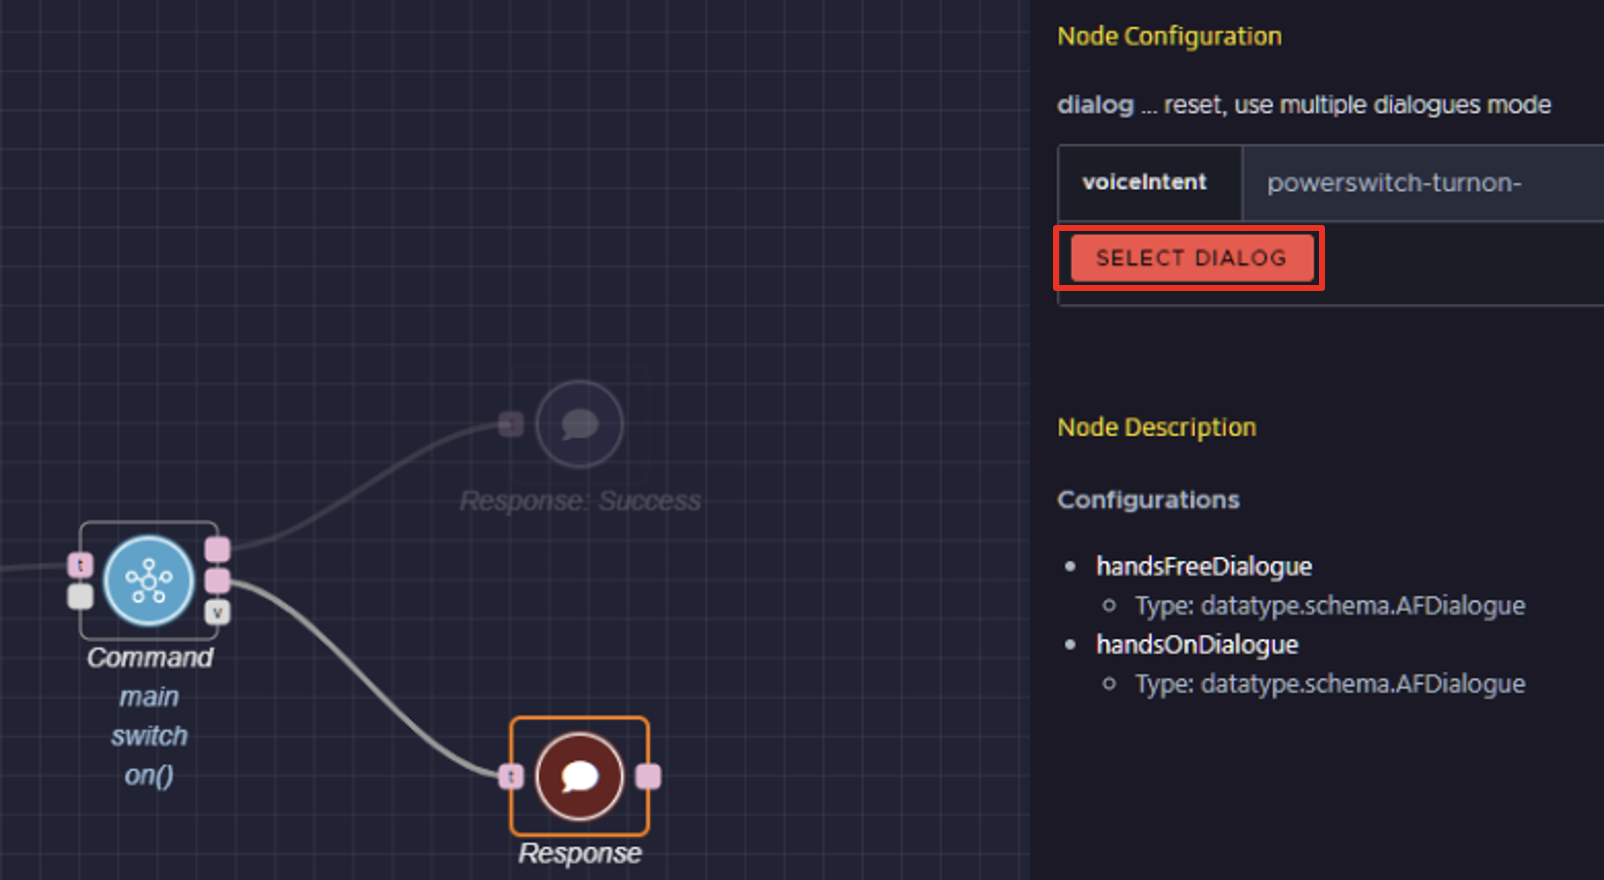
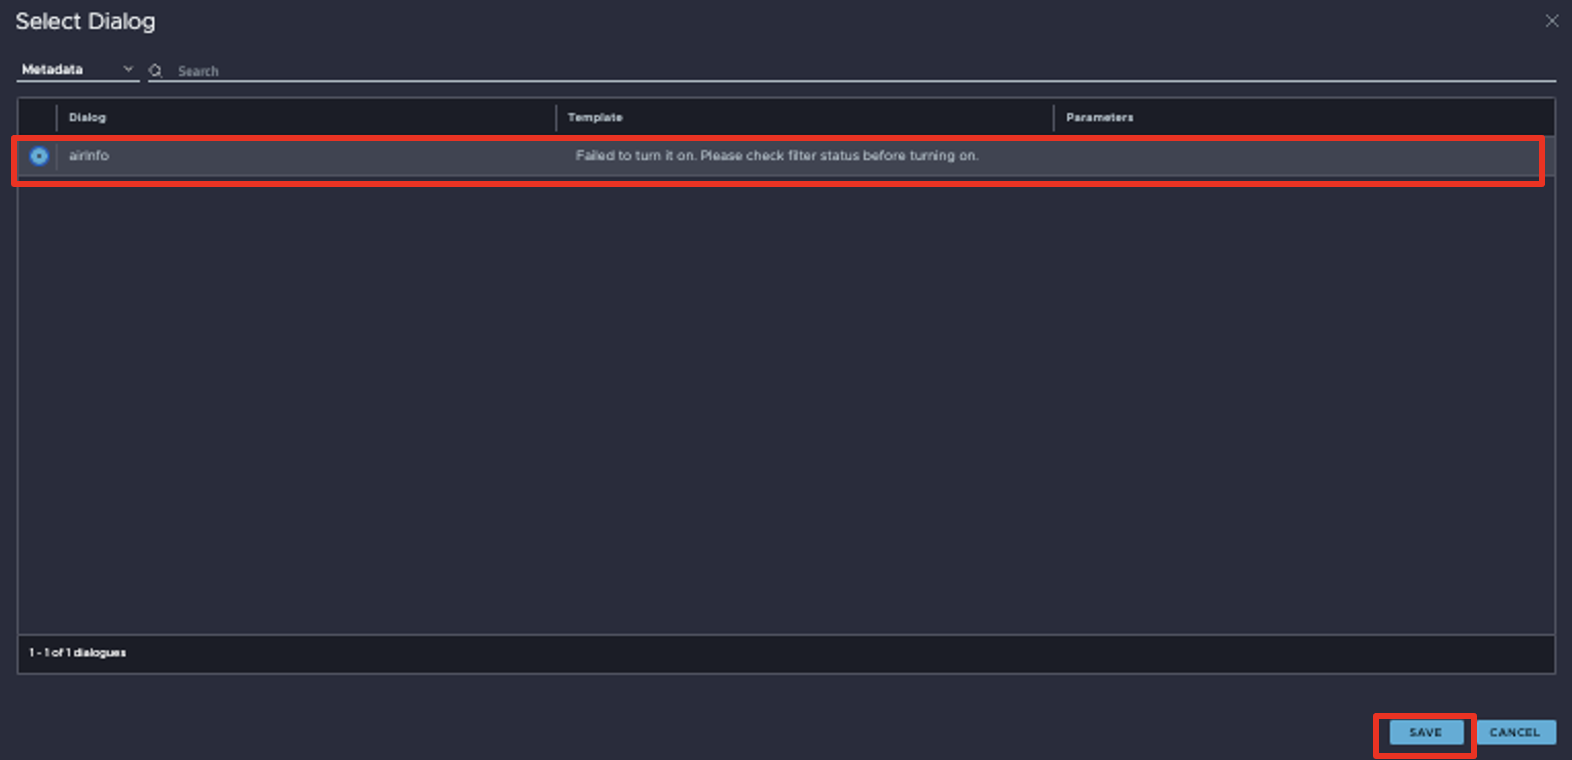
- The Select Dialog pop-up appears. At the top left corner, select Metadata in the menu.
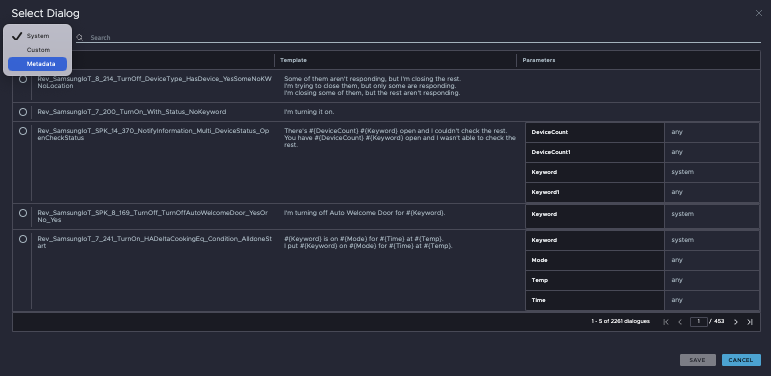
- Select the airInfo dialog and click SAVE.
Here's the finished action path:
Choose Default Dialog
You must choose a default dialog if you have not entered custom dialog for all locales. To choose the default dialog:
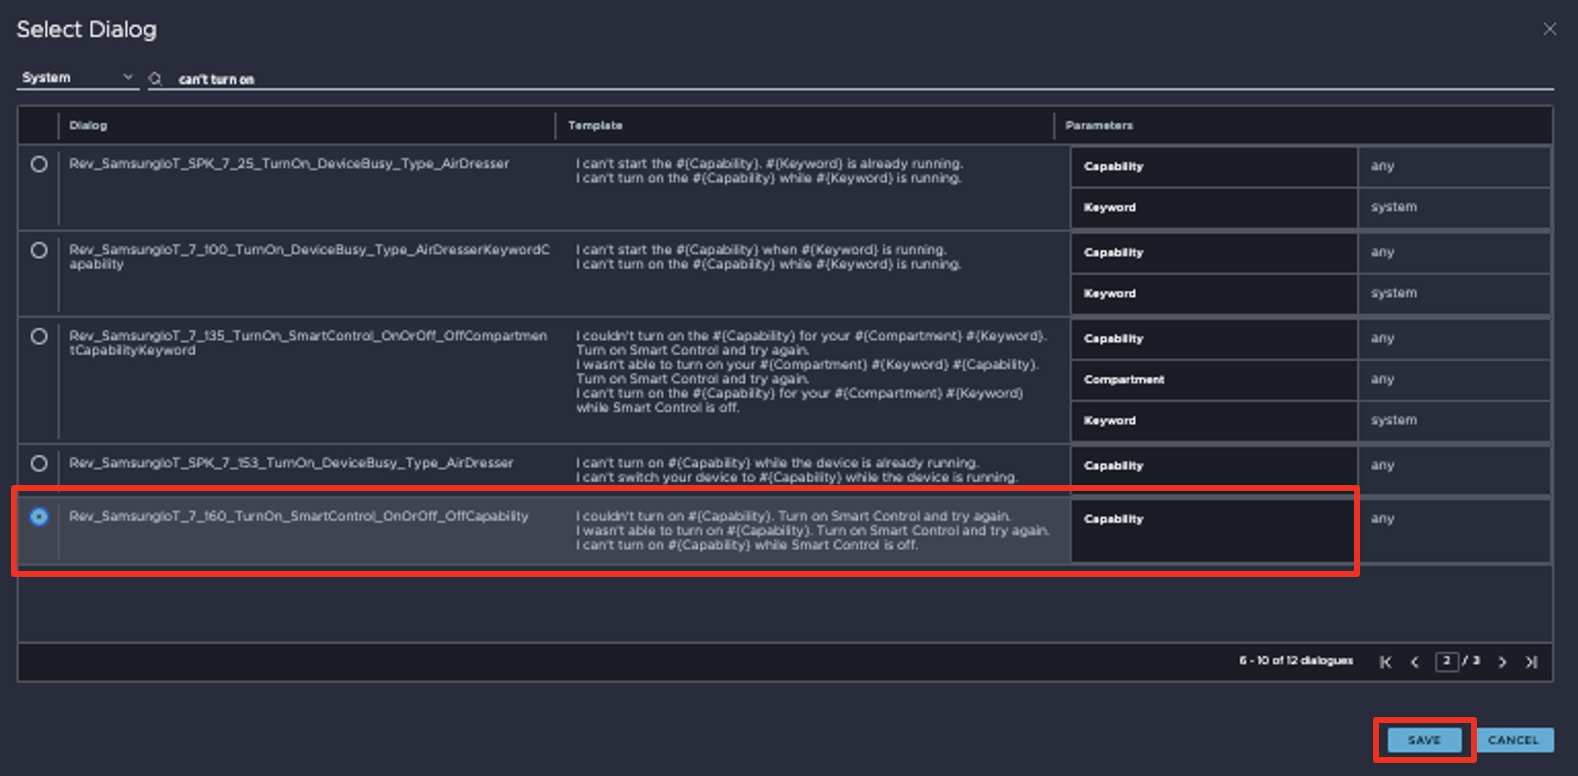
In the Dialog tab, click SELECT.
The Select Dialog pop-up appears. Choose one of the listed default dialogs and click SAVE.
The Dialog description lists the selected default dialog. It also appears in various locales in the Templates section of the Dialog description box.

Test Your Action Flow
To test the action flow, click the Try It button at the top right of the editor window. The flow editor should look like this:
In this test run, the command fails. Bixby then lets the user know about the failure with the custom dialog.
Additional Resources
The Node Recommendation feature enables you to get recommendations for next possible nodes, and can make it easier to create a graph.
Video Tutorial: Custom Responses and Prompts
The following video tutorial gives another example of how to use custom responses and confirmations in BHS.