
The Device Simulator
Bixby Developer Studio includes a built-in device simulator that lets you test both natural language (NL) and Aligned NL queries on a variety of simulated Bixby-compatible devices. It lets you set the user's location and timezone, manage OAuth sessions, and apply learning models, as well as launch the Debug Console to analyze the execution graph of the last-run query.
You can test your current in-progress version of your capsule or you can load a revision of your capsule for testing in the Simulator.
Launch the Simulator with the View > Open Simulator menu command, or by clicking the Simulator button at the top of the sidebar in the Files view.

The Simulator Window
The Simulator has its own set of application tabs running down its left side, similar to the main editor window. Like the main window, these affect the view in the Simulator's sidebar. From the top, going down:
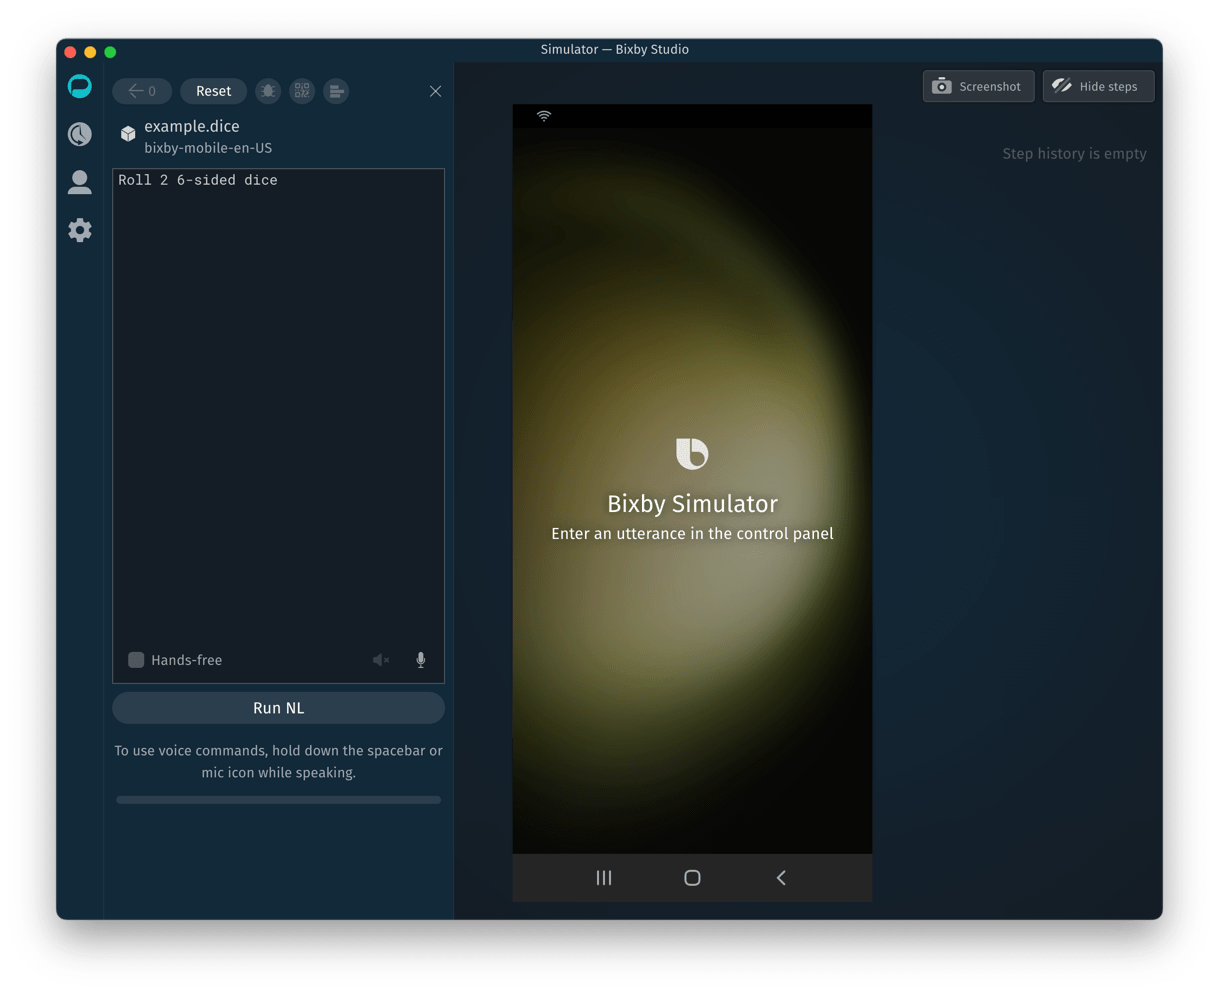
The Input view lets you set the capsule and target device being tested and enter queries. Depending on the device, you can also enable or disable Bixby's hands-free mode.
The User view lets you configure a variety of data passed to the capsule, including profile information, overriding GPS and clock information, learning and execution behavior, capsule permissions, and open OAuth sessions.
The Settings view lets you choose which Bixby device to test against. This list changes depending on what targets are available for your capsule.
Note that the sidebar in the Simulator can be collapsed, either by clicking the "X" icon in the sidebar's top right corner or by clicking the application tab icon for the currently-open view. When the sidebar is collapsed, click any of the application tab icons to open it again.
Simulator Usage
To test a query, use the Input view.
- Check to make sure the Simulator is set to run the capsule and target you plan to test, for example: "viv.dice". You can click on the capsule and target name to change them.
- Enter a query in the input window. The query can be one of the following:
- A Natural Language query (available when the NL model has been compiled)
- An Aligned NL query (always available)
- An intent (always available)
- Click Run to execute the query.
Some $vivcontext variables meant to pass user context information, including but not limited to accessToken, deviceModel, and bixbyUserId, are not sent when using the Simulator.
You can load a previous query and result screen by clicking the "˿" button. Click Reset to reset the Simulator and erase the query history stack.
If Bixby's NL model is out of date because you have edited models or code in your capsule that might affect the execution plans for your training, you can still enter an Aligned NL query or an intent. If you enter an NL query and the model needs to be compiled, the Run button will be disabled, and a Compile button will appear in the Simulator window next to the capsule name:

Once a query is run, the Debug button will be enabled:
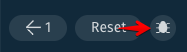
Click the Debug button to open the Debug Console with the current query preloaded.
Keyboard Shortcuts
The Device Simulator supports keyboard shortcuts for many of its commands and views. For a full list, refer to the Simulator Keyboard Shortcuts cheatsheet.
Speech
The Simulator supports both text-to-speech (TTS) and automatic speech recognition (ASR) for testing purposes. You can access these with the speech buttons in the lower right-hand corner of the input window:

To turn on text-to-speech, click the speaker icon, or type Ctrl+T (Windows/Linux) or Cmd+T (Mac). The icon is dimmed when TTS is disabled and bright when TTS is enabled. It is off by default. When TTS is on, Bixby's dialog will be spoken aloud.
To use automatic speech recognition, click and hold on the microphone icon or press and hold the spacebar while you are speaking into your computer's microphone. Release the button when you finish speaking. Your speech is transcribed in real-time into the input window, and the query is run when you release the mouse button or spacebar.
ASR requires access to your computer's microphone; your operating system might prompt you for this access. Also, you must have compiled an interpreter for the ASR feature to be available in the Simulator.
If any input control that accepts the spacebar has focus, such as the utterance input box or any of the buttons, you cannot trigger ASR with the spacebar. Either click in an area in the Simulator window with no controls, or use the microphone button.
Note that there are limitations to ASR and TTS.
Other Devices
Use the drop-down in the Settings view to select a device to simulate. The devices available are dependent on the targets your capsule declares in its capsule.bxb file.
In addition to selecting screen resolution, other elements of the Simulator can change based on the selected device. For instance, not all devices support keyboard input, although the simulator's input window will always let you both type and speak utterances. Some devices might have more limited input controls, such as TV remotes.
Here are some differences to be aware of between the Simulator and real devices:
- Not all mobile devices support portrait and landscape in the Simulator.
- The lightbox feature on the Simulator is available only for TV and watch devices.
- Hands-free mode in the Simulator does not turn the microphone on automatically; you must still hold down the space bar or the Simulator's microphone icon while speaking.
- Many options that appear in various setting screens on a real device appear in the "User" settings tab in the Simulator.
- The Simulator has some abilities that real devices do not (for instance, clearing Selection Learning).
- The Simulator provides a Wallpaper option in the Settings that mimics a very light, light, dark, and very dark wallpaper that a user might have on their phone. These are meant to be a reference for you when testing images and icons in your capsule.
Hands-Free Mode Simulation
The Simulator can be put in hands-free mode by checking the box labeled Hands-free in the input window. This works for all devices that support hands-free mode.
TV Remote Simulation
When you are simulating a TV target, you can use the keyboard shortcuts listed in the following table to simulate a TV remote:
| Remote Button | Windows | Mac |
|---|---|---|
| Up | Ctrl + Alt + Up | Cmd + Opt + Up |
| Down | Ctrl + Alt + Down | Cmd + Opt + Down |
| Left | Ctrl + Alt + Left | Cmd + Opt + Left |
| Right | Ctrl + Alt + Right | Cmd + Opt + Right |
| Select | Ctrl + Alt + Return | Cmd + Opt + Return |
| Back | Ctrl + Alt + Backspace | Cmd + Opt + Delete |
You can also use the mouse and click on buttons.
Test Audio
This section discusses how to test your capsule if you use the bixby.audioPlayer library or if you use the audio-control component.
With the AudioPlayer Library
When testing a capsule that includes audio playback via the AudioPlayer library, the Simulator will show audio controls along with informational fields from the relevant AudioInfo and AudioItem concepts.

The buttons in the player are fully functional. From left to right, these buttons do the following:
- toggle random shuffle mode
- move to previous track
- toggle play/pause
- move to next track
- cycle through repeat modes: no repeat, repeat a single
AudioItem, repeat the whole playlist
With the Audio Control Component
If you are testing a capsule that uses the audio-control component in a View, the Simulator will automatically include the controls for playing the audio and display any information specified in that component. These controls are fully usable in the Simulator, just as if a user was controlling the audio on a mobile device. This includes the controls for the following:
- Playing/Pausing the audio
- Scrolling to a specific time in the track with the seek bar, if enabled
- Skipping forward/backward by a specified amount of time, if enabled
- Skipping tracks forward and back, if enabled
Additionally, below the simulated screen is a bar that shows the same media controls that a user would see if they were on their lock screen or in the notifications view while swiping down fom their screen, if they were playing audio from a capsule with the audio-control component. This matches the media control keys of the client.
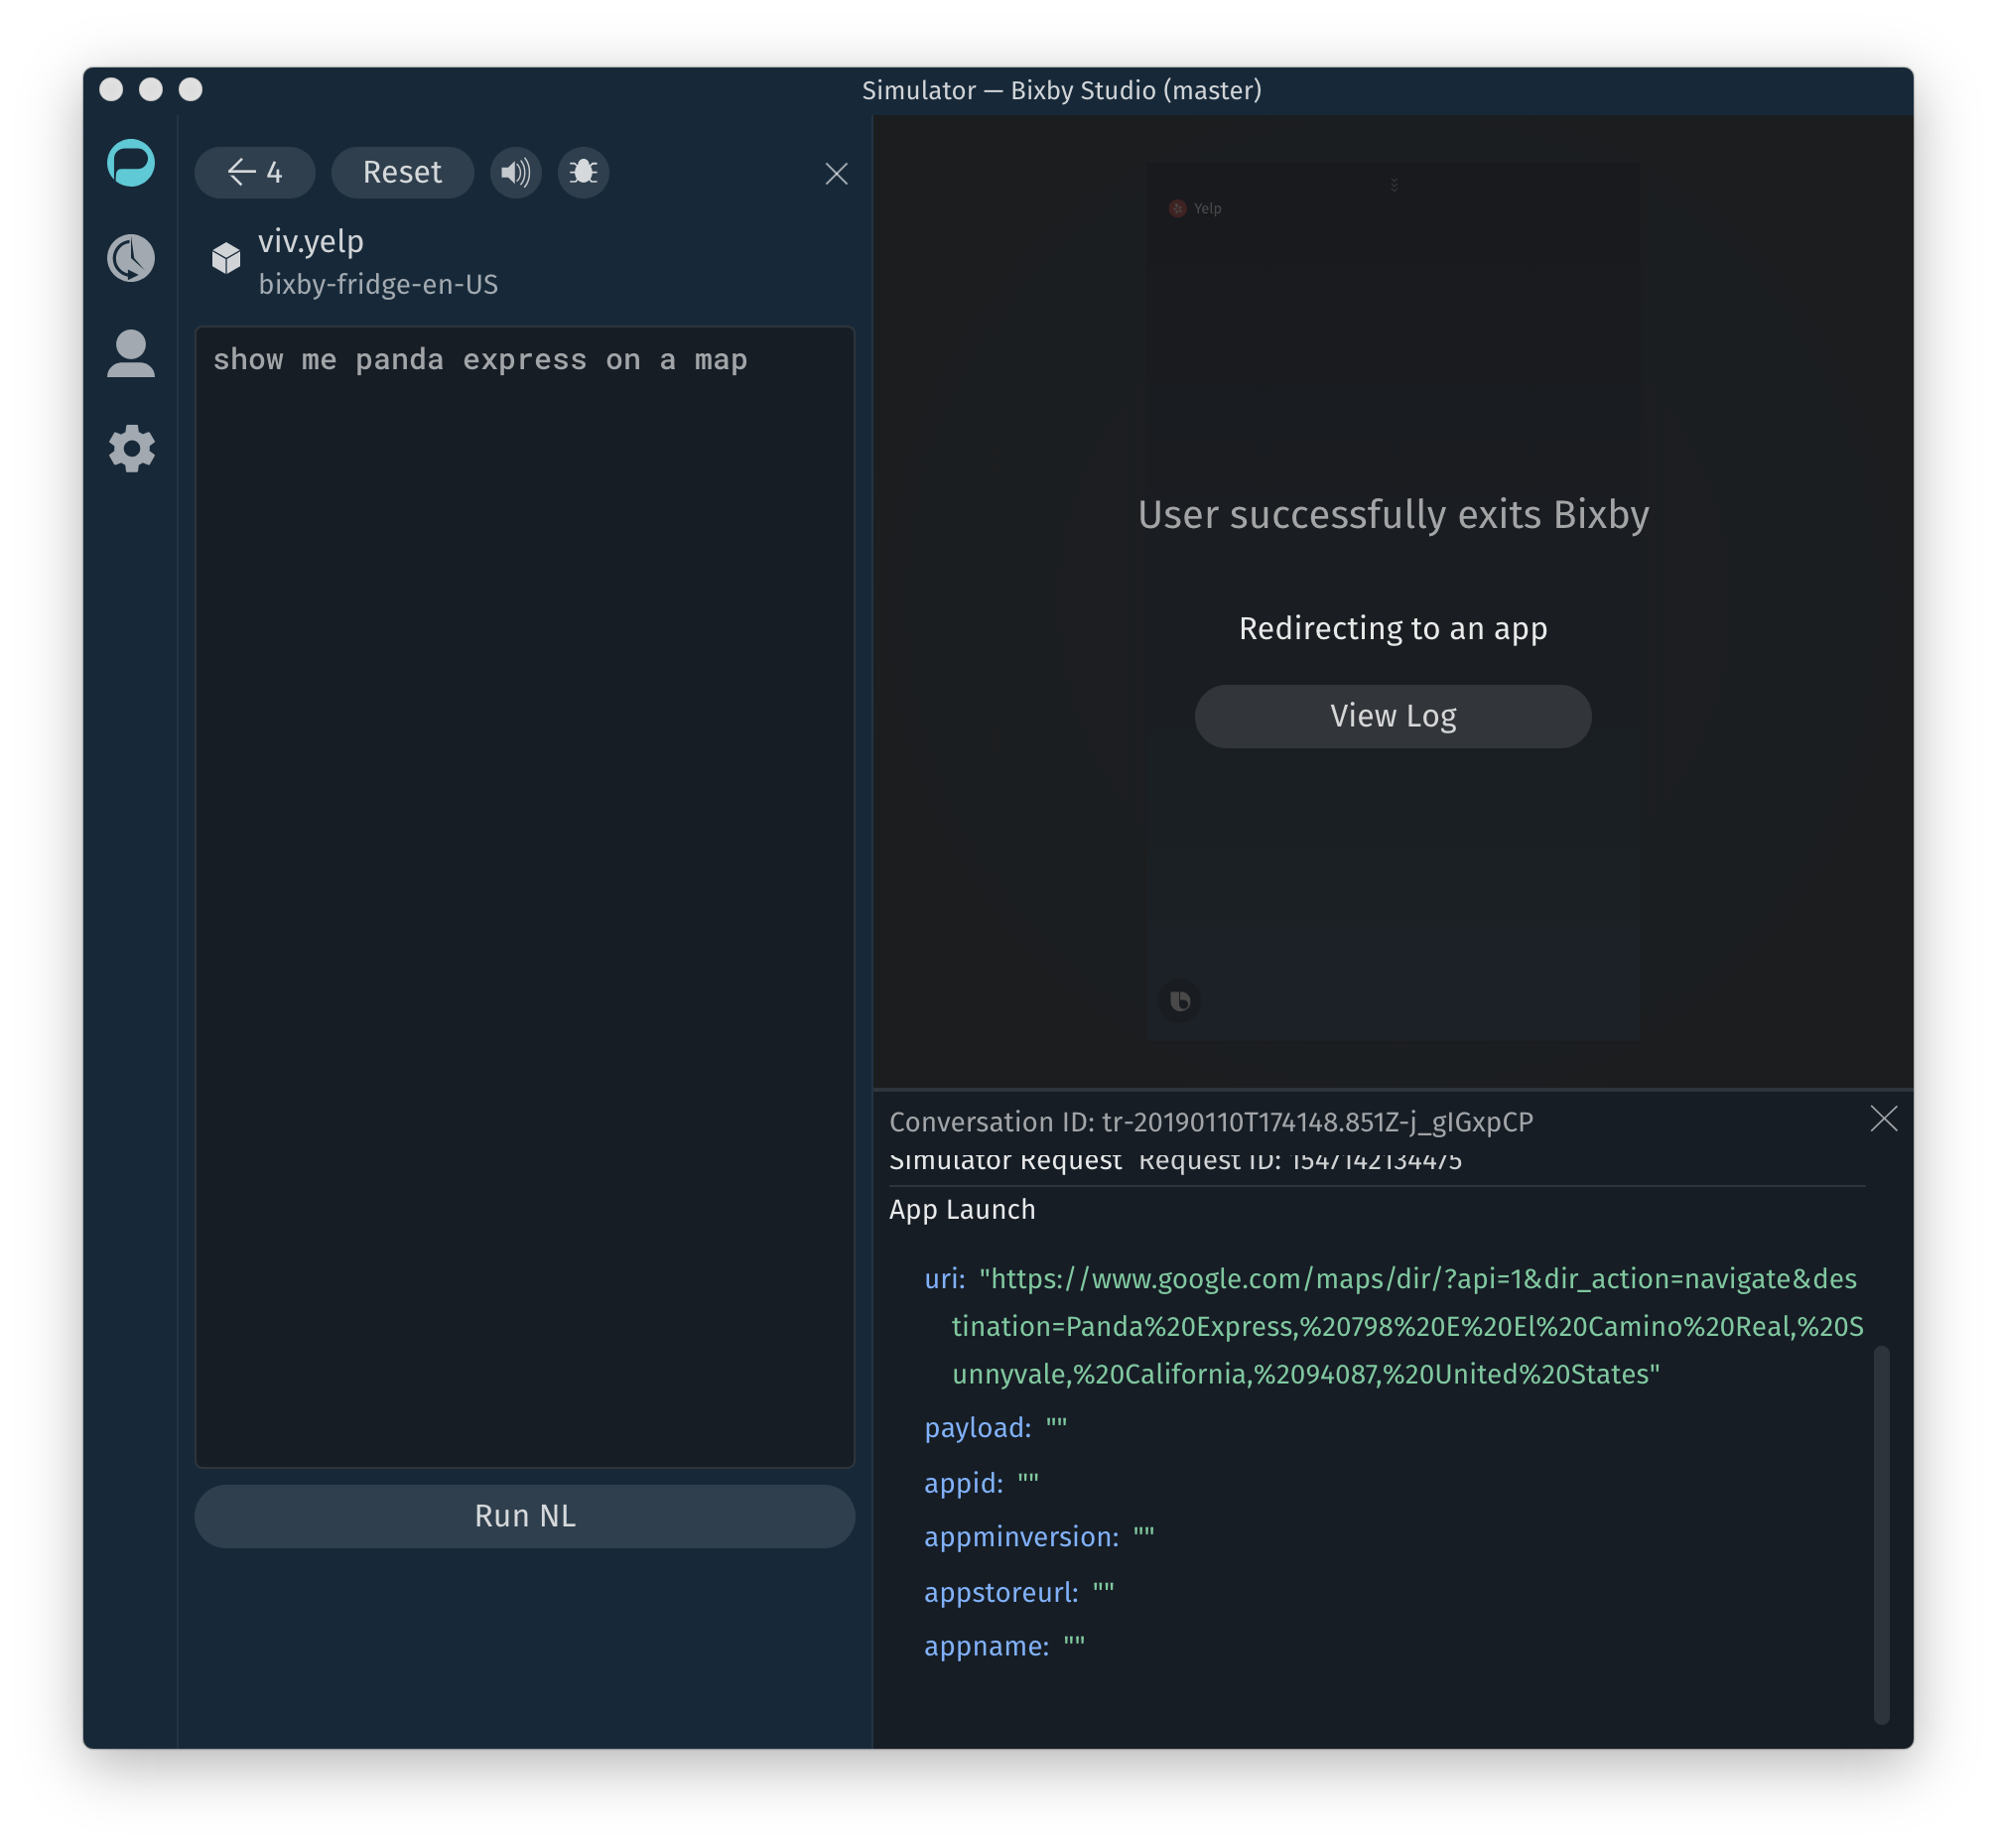
Simulate app-launch
The app-launch key lets result views open external applications if they are supported on the client device. As these applications are not available in the Simulator, when app-launch is executed in your capsule, the following occurs:
- The Simulator displays a message indicating that the user has exited Bixby at that point. If the application name is available (through the
app-namekey), it will also be displayed here. - Data relating to the app launch (such as the application ID and name or payload information sent from Bixby) is recorded to the Simulator log; click the View Log button to display it on this screen.
Step History
As you enter NL and Aligned NL queries and respond to input views, the steps you take while interacting with the capsule will be recorded in the Step History, along the right-hand side of the Simulator window.
- Click the Hide steps button to hide the step list, and Show steps to reveal it.
- Click Export story to use the current step list to build a Story for testing your capsule. See Stories and Assertions in Testing Capsules for more information.
User View
The User view lets you change data returned to your capsule about the user, by simulating different locations and time zones. This view also lets you control learning and execution settings.
Features
The Features section describes settings available within the Simulator, and lets you selectively enable and disable them.
Enable Enhanced List Navigation Support
When this option is enabled, the Simulator will enable Enhanced List Navigation, regardless of the runtime flag setting in the capsule.
GPS/Clock Override
Use this section to change the location and date/time reported to the capsule in the Simulator.
Under Location, enter a specific latitude and longitude or enter a city in the Location field. Recently used cities will be remembered in the list. You can also specify "My Current Location" to have the Simulator geolocate you, and specify "No GPS Available" to test your capsule's performance on a device where GPS does not exist or is turned off.
Under Time, specify the time zone the Simulator reports to the capsule, as well as the time and date. If you have specified a custom time and date, click Clear to return to reporting the current time.
If you are using JavaScript Runtime Version 2, your capsule will need to check the $vivContext.testToday variable to receive the date/time set in the Simulator, given in milliseconds since January 1, 1970. This variable is undefined when the capsule is not running in the Simulator or the clock is not being overridden.
// set myDate to the real current time or the override in the Simulator
myDate = new Date($vivContext.testToday ?? Date.now())
Learning and Execution
This section has the Deterministic Mode checkbox, which affects execution, and allows you to see bootstrapped preferences.
The Deterministic Mode checkbox controls several aspects of how the capsule behaves at execution.
- Selection Learning: If enabled, selection learning is turned off, but capsules can still use selection rules. Disable this option to allow capsules to use learned selection preferences stored for the user. Use the Reset Learned Behavior button to clear selection learning data saved in the Simulator.
- Randomized Dialog: If enabled, dialog in capsules will behave as if
choose (First)is specified and ignorechoose (Random). If disabled, Dialog templates that usechoose (Random)behave normally. For more information, see thechoosereference. - Permission Prompts: If enabled, permissions are always prompted for in every conversation, even if permissions were previously granted.
- Date with Local Endpoints: If enabled and your local endpoint uses
DateTime, theDateandTimeare automatically initialized to the conversation start time. - Stories: If enabled, allows you to export stories. Deterministic Mode must be enabled for every step in a story, or you will have to start the story over.
You can also view bootstrapped preferences here. These are a subset of learned preferences whose values are specified in the capsule to accelerate or bypass the learning process for those values.
OAuth
Current OAuth sections are displayed here, if any exist. You can clear existing sections from this tab.
Permissions
If the simulated capsule has requested permissions from the user, such as access to location information or library-specific permissions, those permissions will appear here, and will be checked if access has been granted by the user during simulation. You can clear (and set) requested permissions from this tab. Just like on real devices, permission settings are remembered across invocations in the simulator.
Like an actual device, the Simulator will remember the user's response to the initial allow or deny prompt for a given permission, and will not request access again if it was initially denied. To reset the prompting behavior so the capsule again prompts you to allow or deny access, toggle the checkbox for that permission on this screen: check the box and uncheck it again.
If you update your capsule's code to add or remove a requested permission, clicking the refresh icon in the Simulator will update the panel to reflect the code's current state.
Settings View
Settings lets you specify the device being simulated and switch between UI themes.
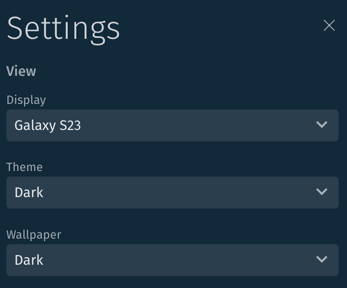
- Display: the various devices you can view in the Simulator. The devices list corresponds to the currently compiled target in the Simulator.
- Theme: the OneUI theme you want to display:
DarkorLight. - Wallpaper: various wallpaper options in light or dark gradients.
When you change devices, the primary effect in the Simulator is changing the display resolution and aspect ratio. If you choose a device that does not have a display, hands-free mode will automatically be enabled. The Simulator supports mobile, watch, TV, and fridge display targets.
When the Dark theme is selected, images specified with dark-theme will be used; when the Light theme is selected, images specified with light-theme will be used. When an image for the currently selected theme is not specified, images will use the image specified in the parent url key. Not all devices support both dark and light themes.
Troubleshooting
If you're seeing issues in the Simulator, such as compiling issues or getting unexpected results, check that your capsule is properly synced in the workspace. Then try switching or re-selecting the target and recompiling the interpreter.
If you are still experiencing issues, you can file a report for the Support Team.